Creating Realistic Corner Shadows in Photoshop: A Step-by-Step Tutorial
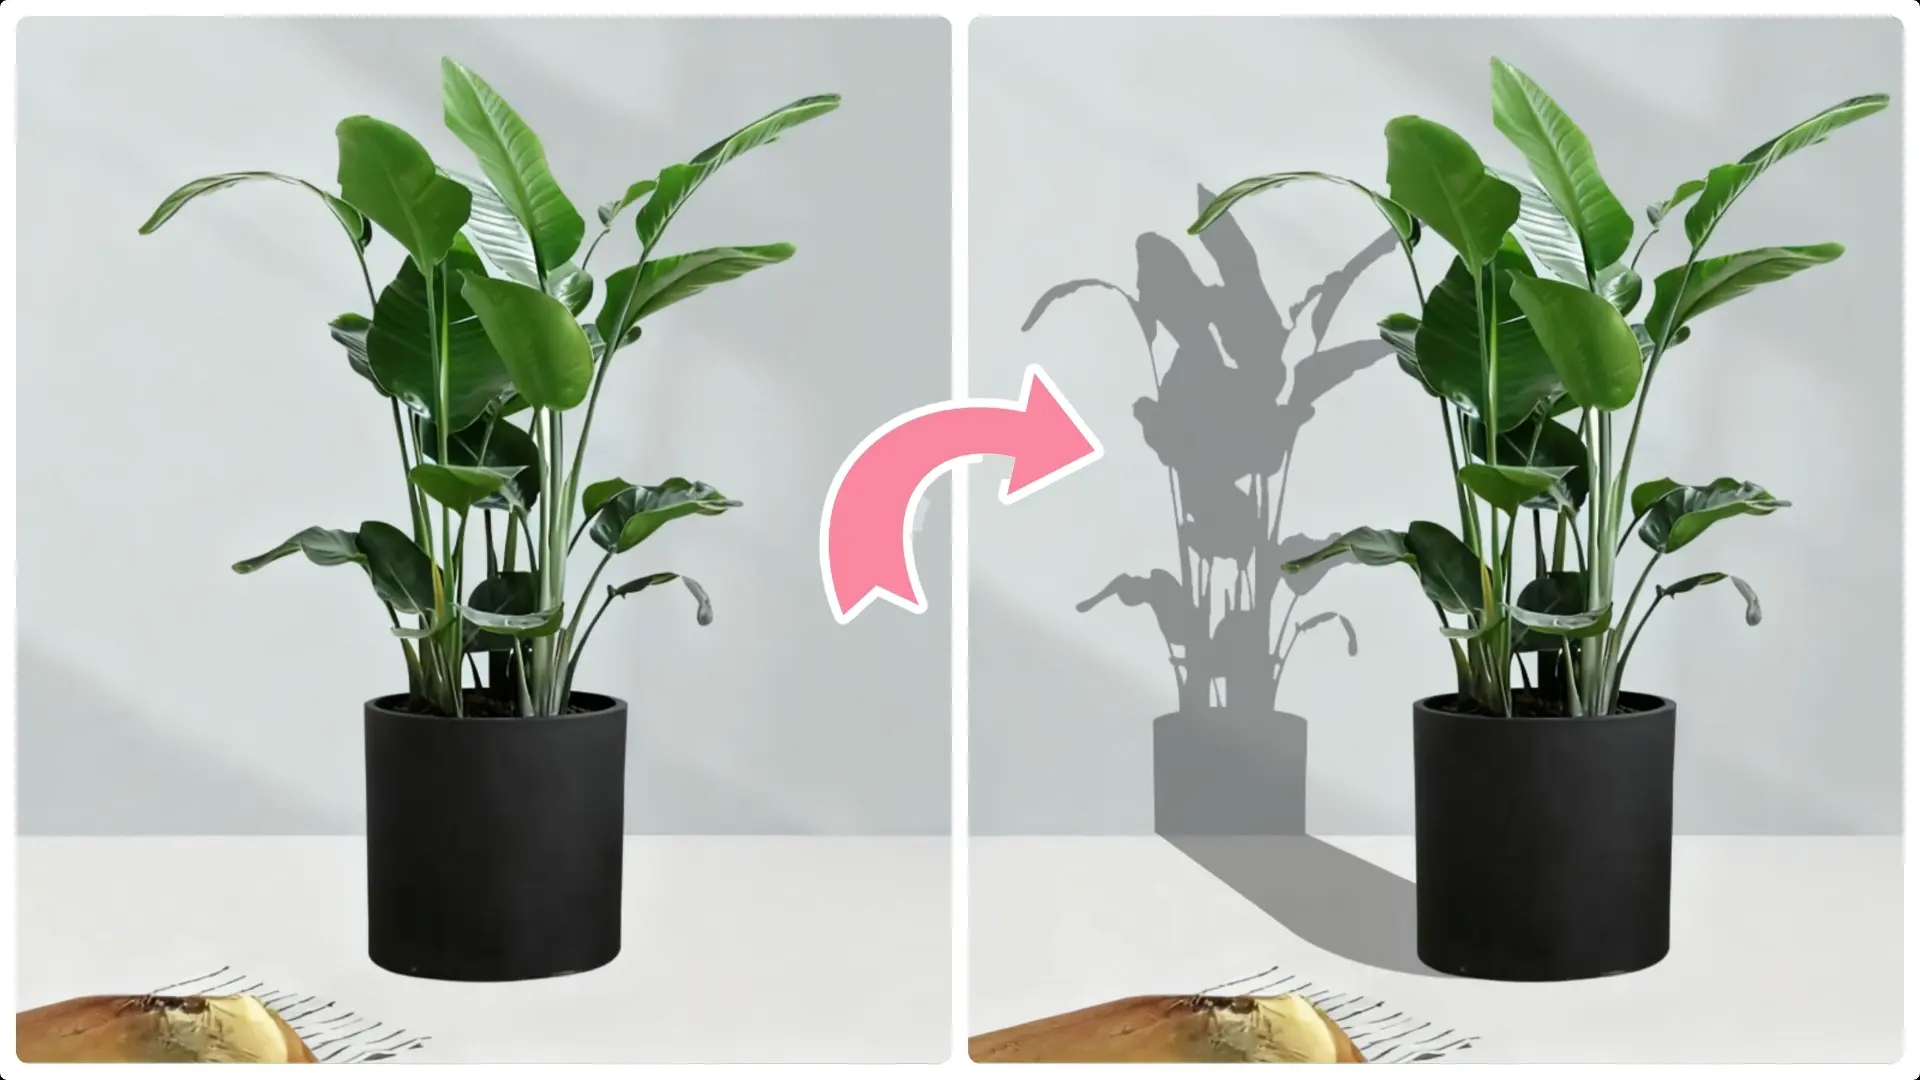
Adding a corner shadow to an object can create depth and enhance realism in your design. Follow these detailed steps:
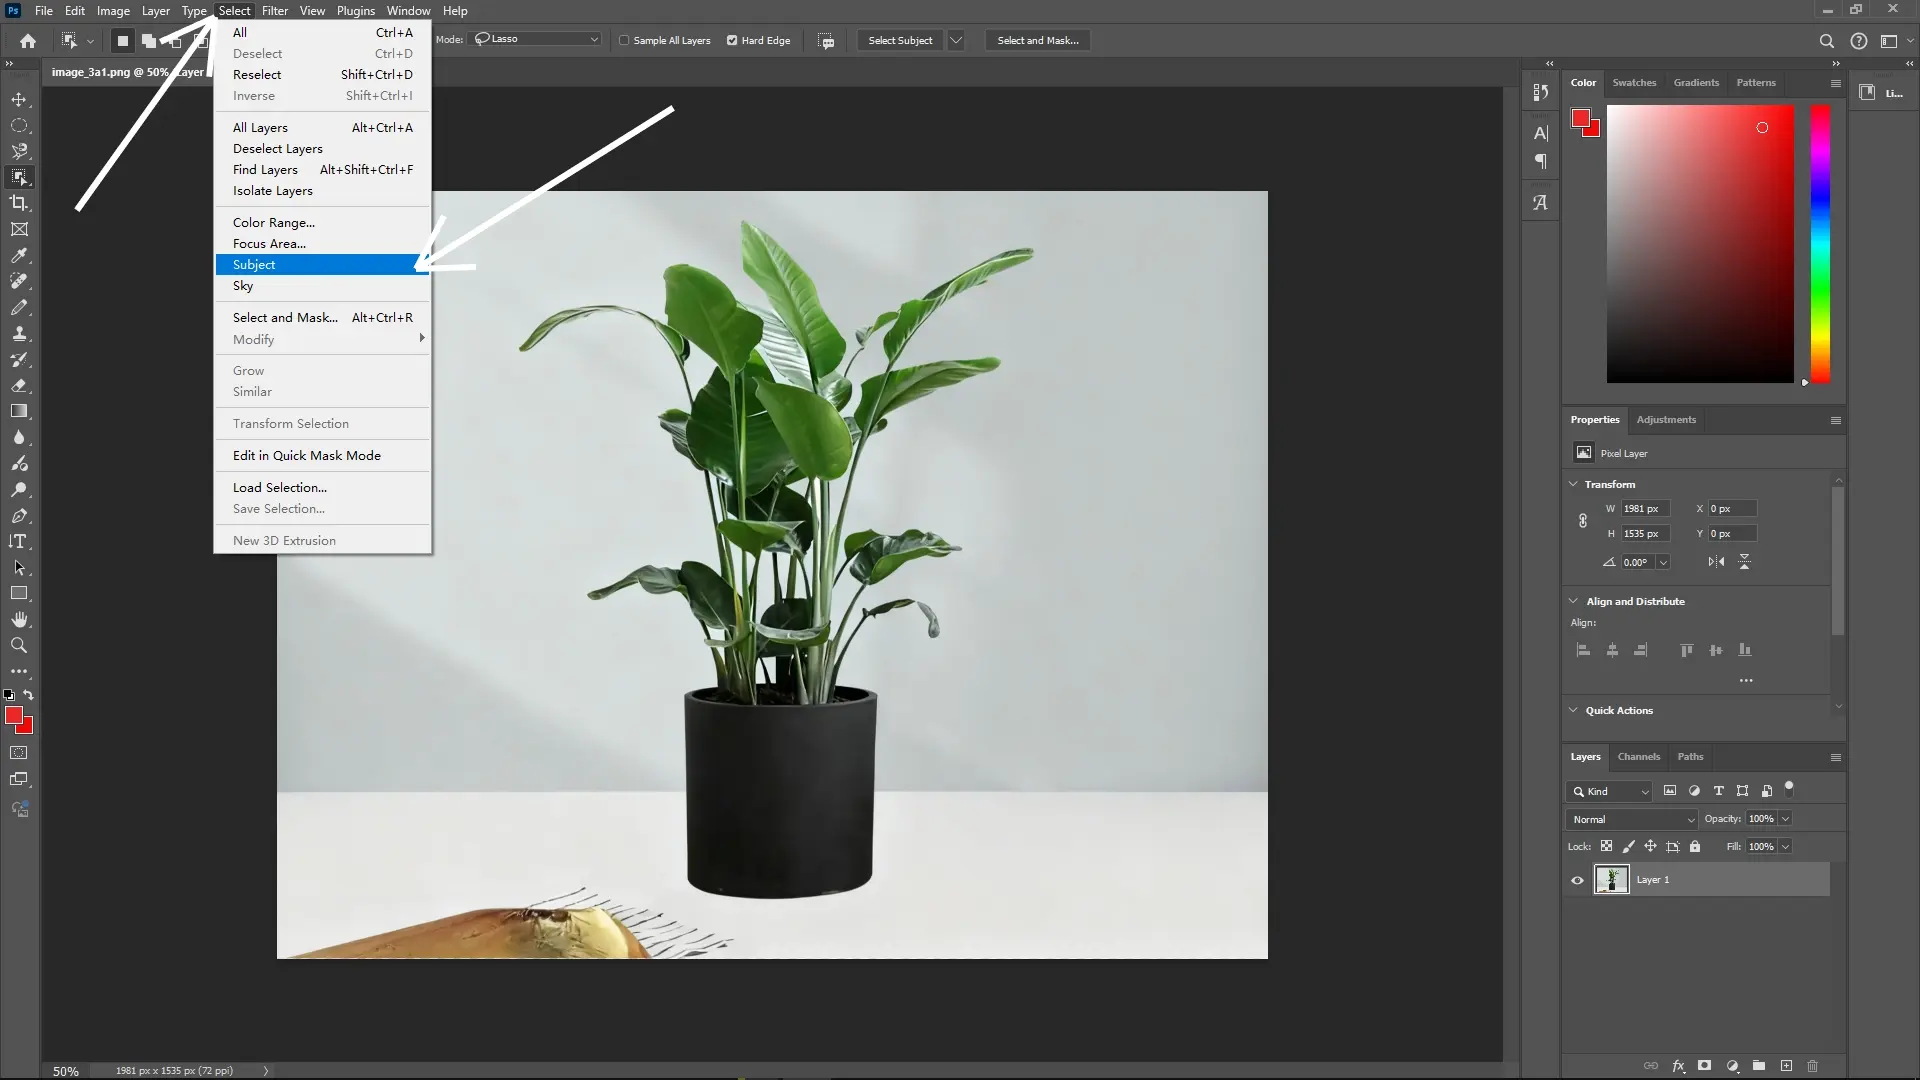
Step 1: Select the Subject
Use the Subject Selection Tool:Navigate to Select > Subject to let Photoshop automatically detect and select the main object in your image.
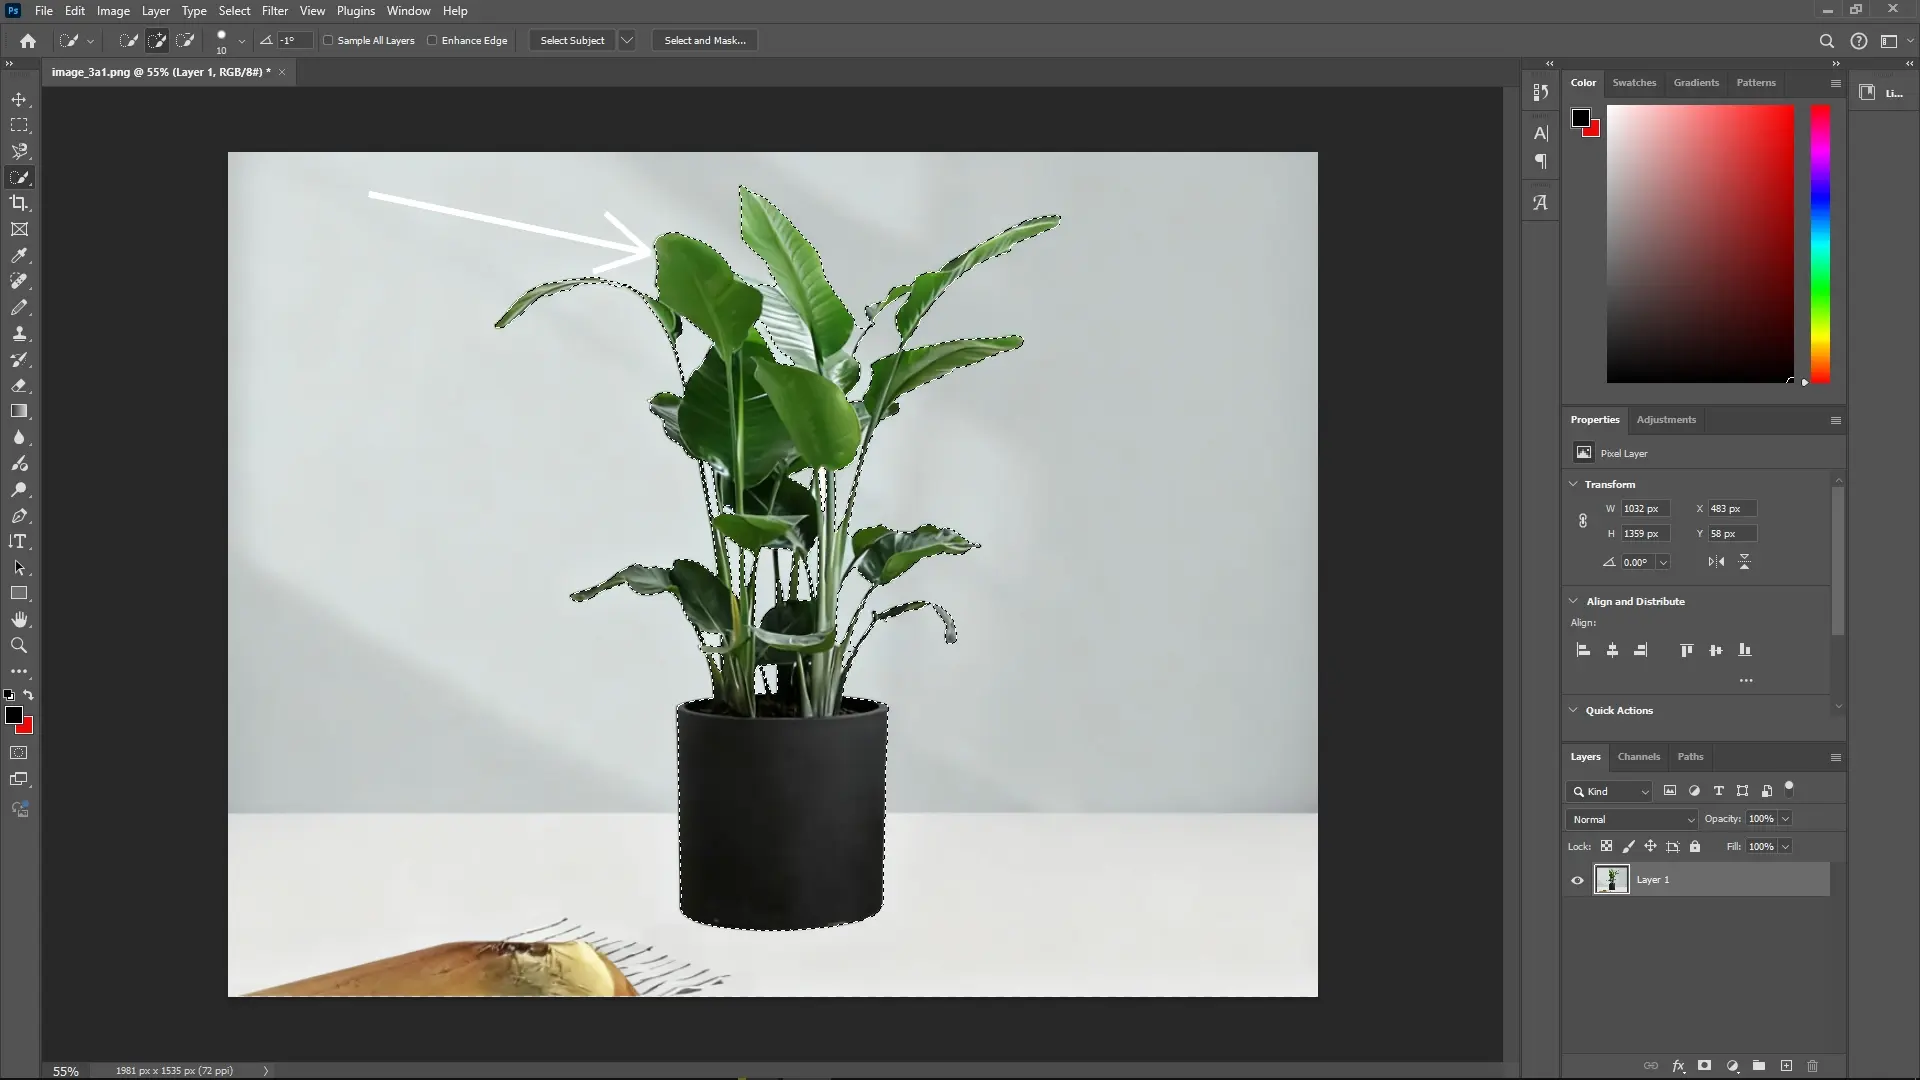
 Refine the Selection:
If necessary, switch to the Object Selection Tool. Hold down the Alt key (Option on Mac) and click with the left mouse button to remove any unwanted areas from the selection.
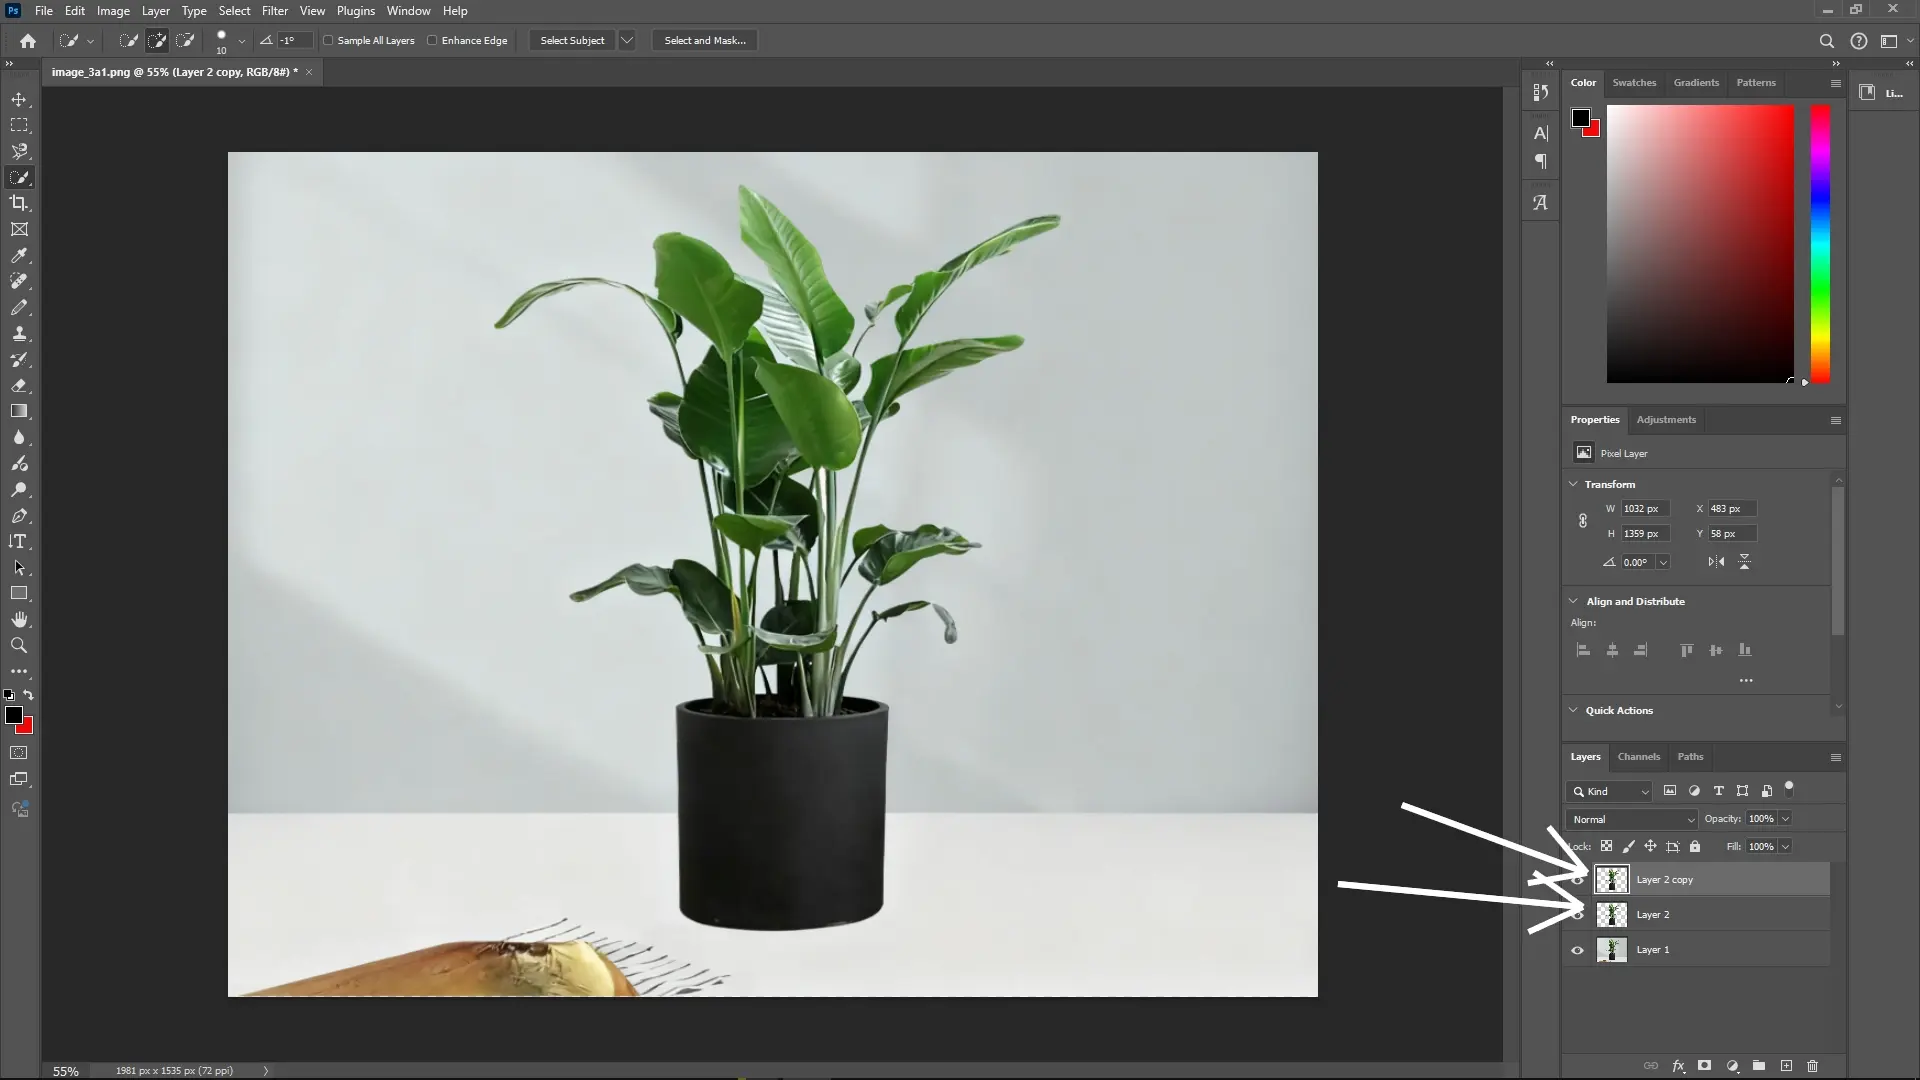
Step 2: Duplicate the Layer
Copy the Selected Layer:With the selection active, press Ctrl + J (Command + J on Mac) twice to duplicate the selection onto two new layers above the original.
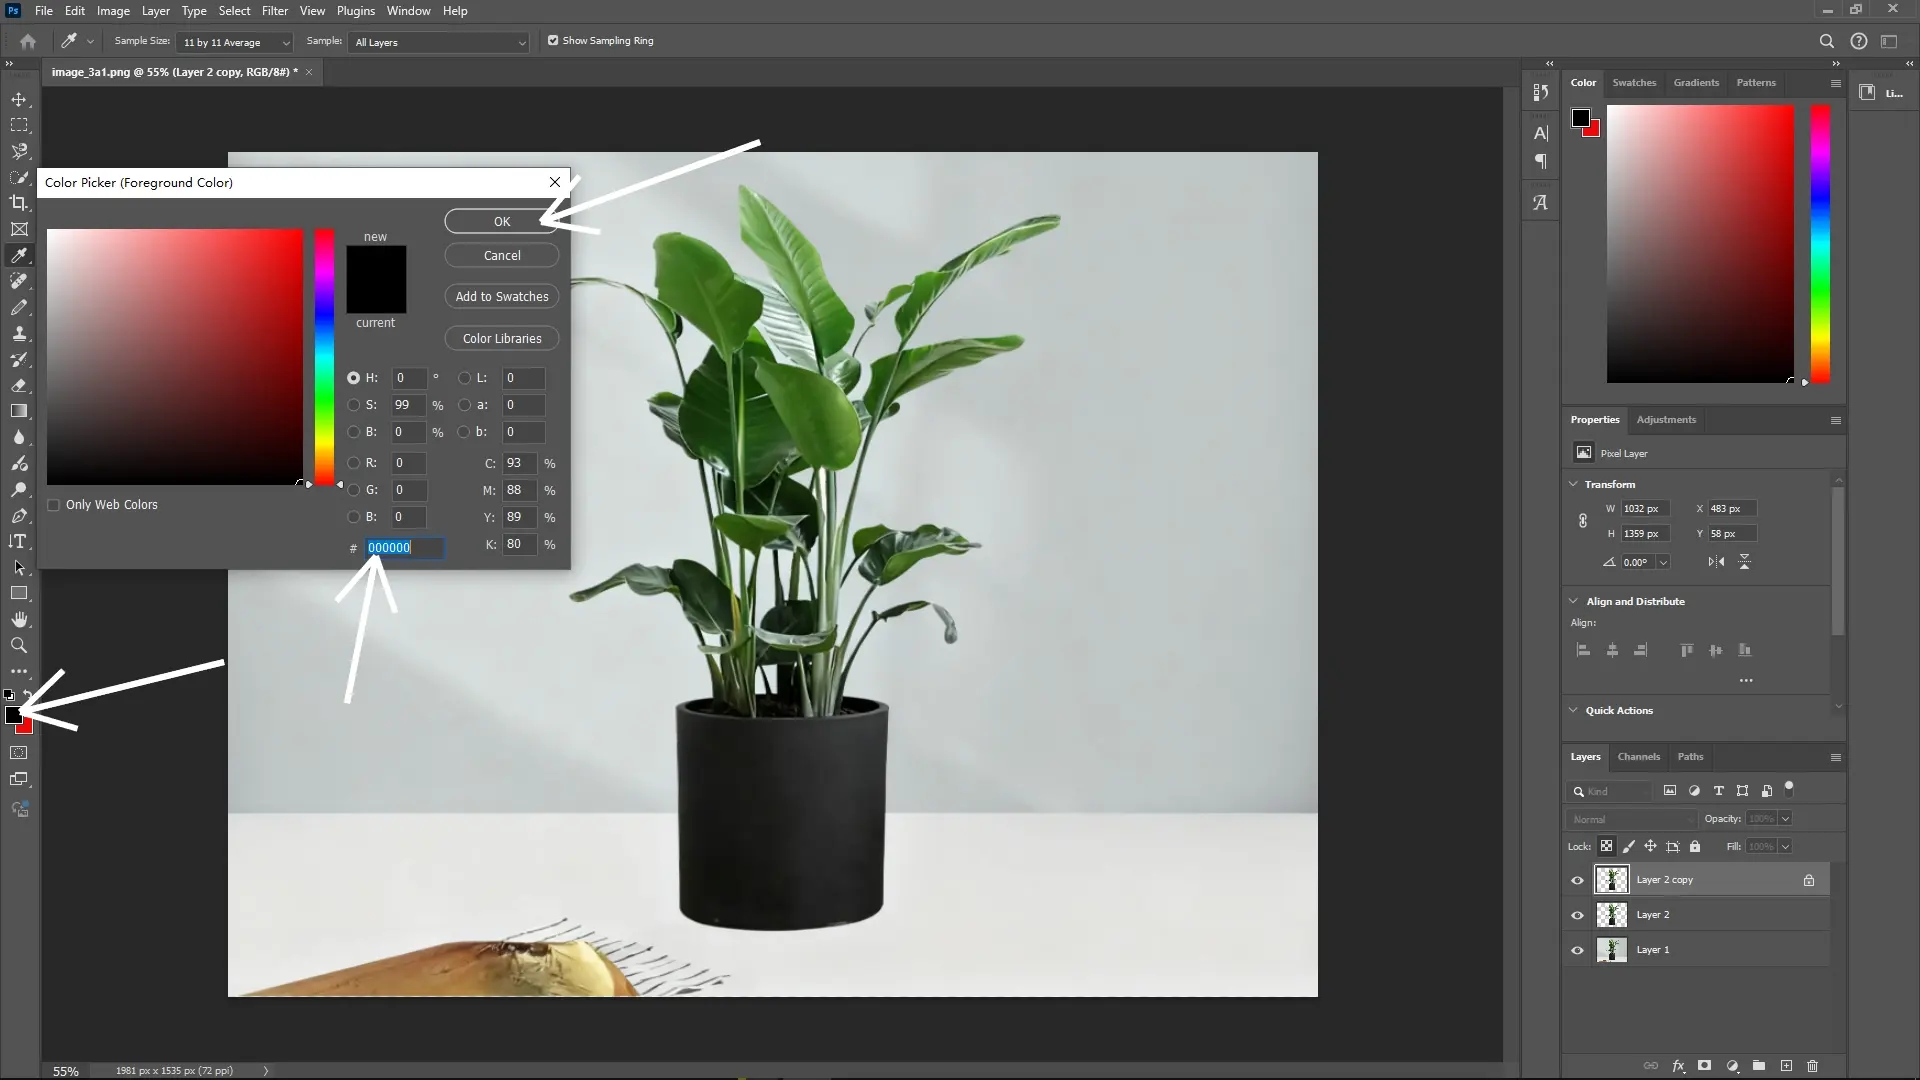
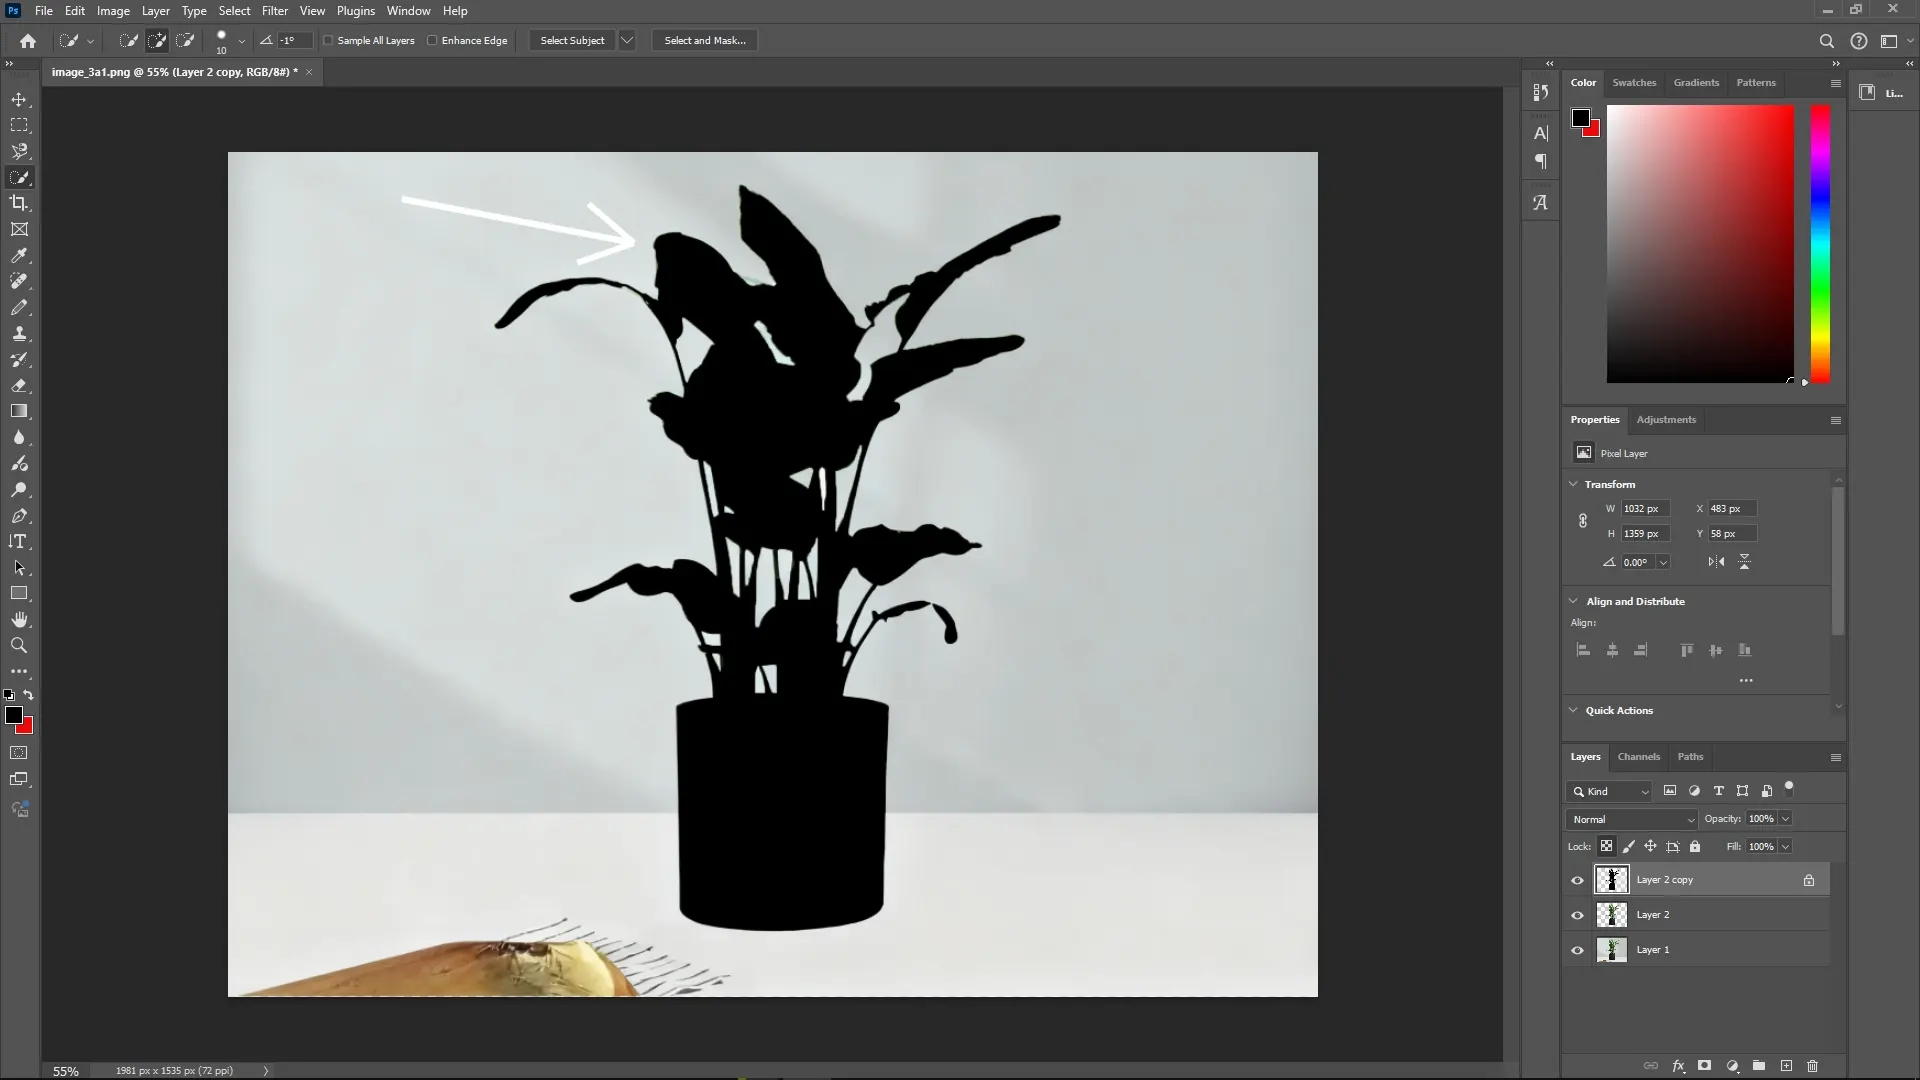
Step 3: Fill the Bottom Duplicate with Black
Select the Layer 2 Copy:Choose the Layer 2 Copy in the Layers panel.
Fill with Black:Set your foreground color to black. Press Alt + Delete (Option + Delete on Mac) to fill this layer with black.
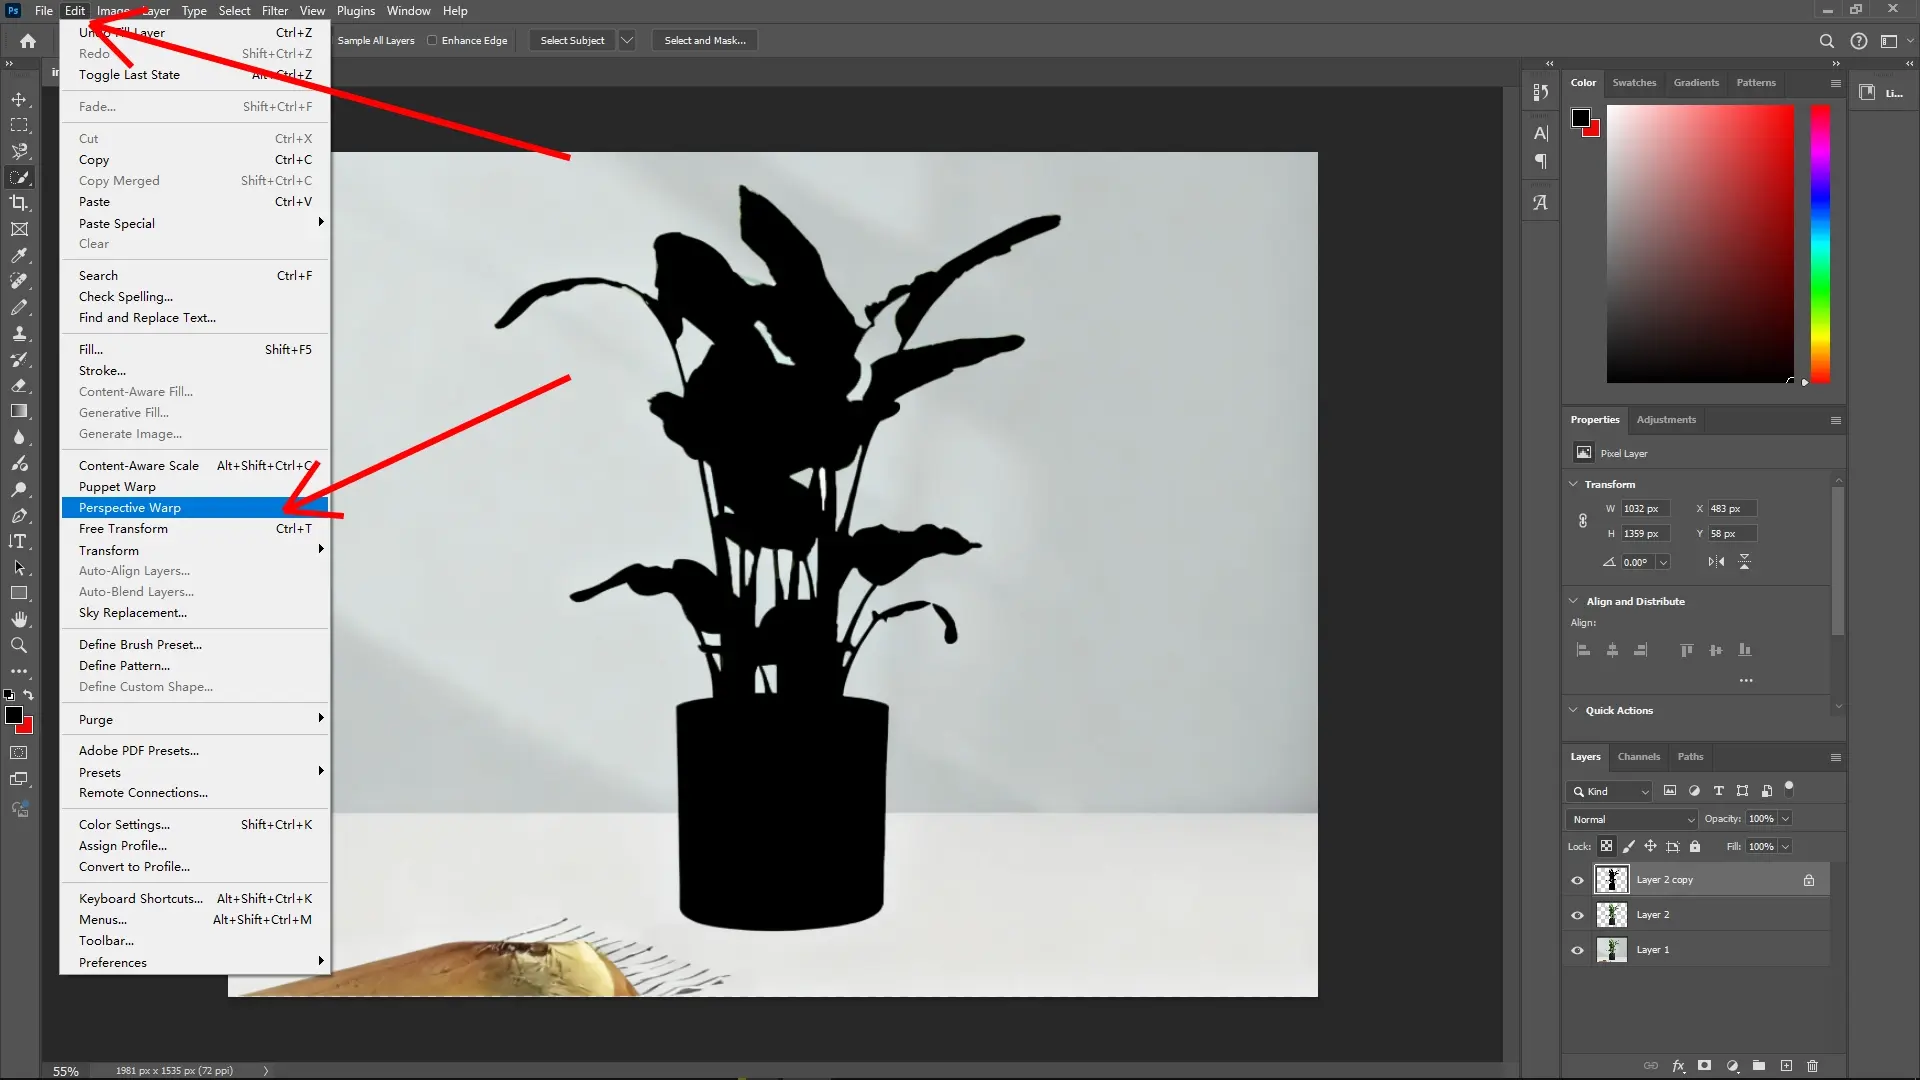
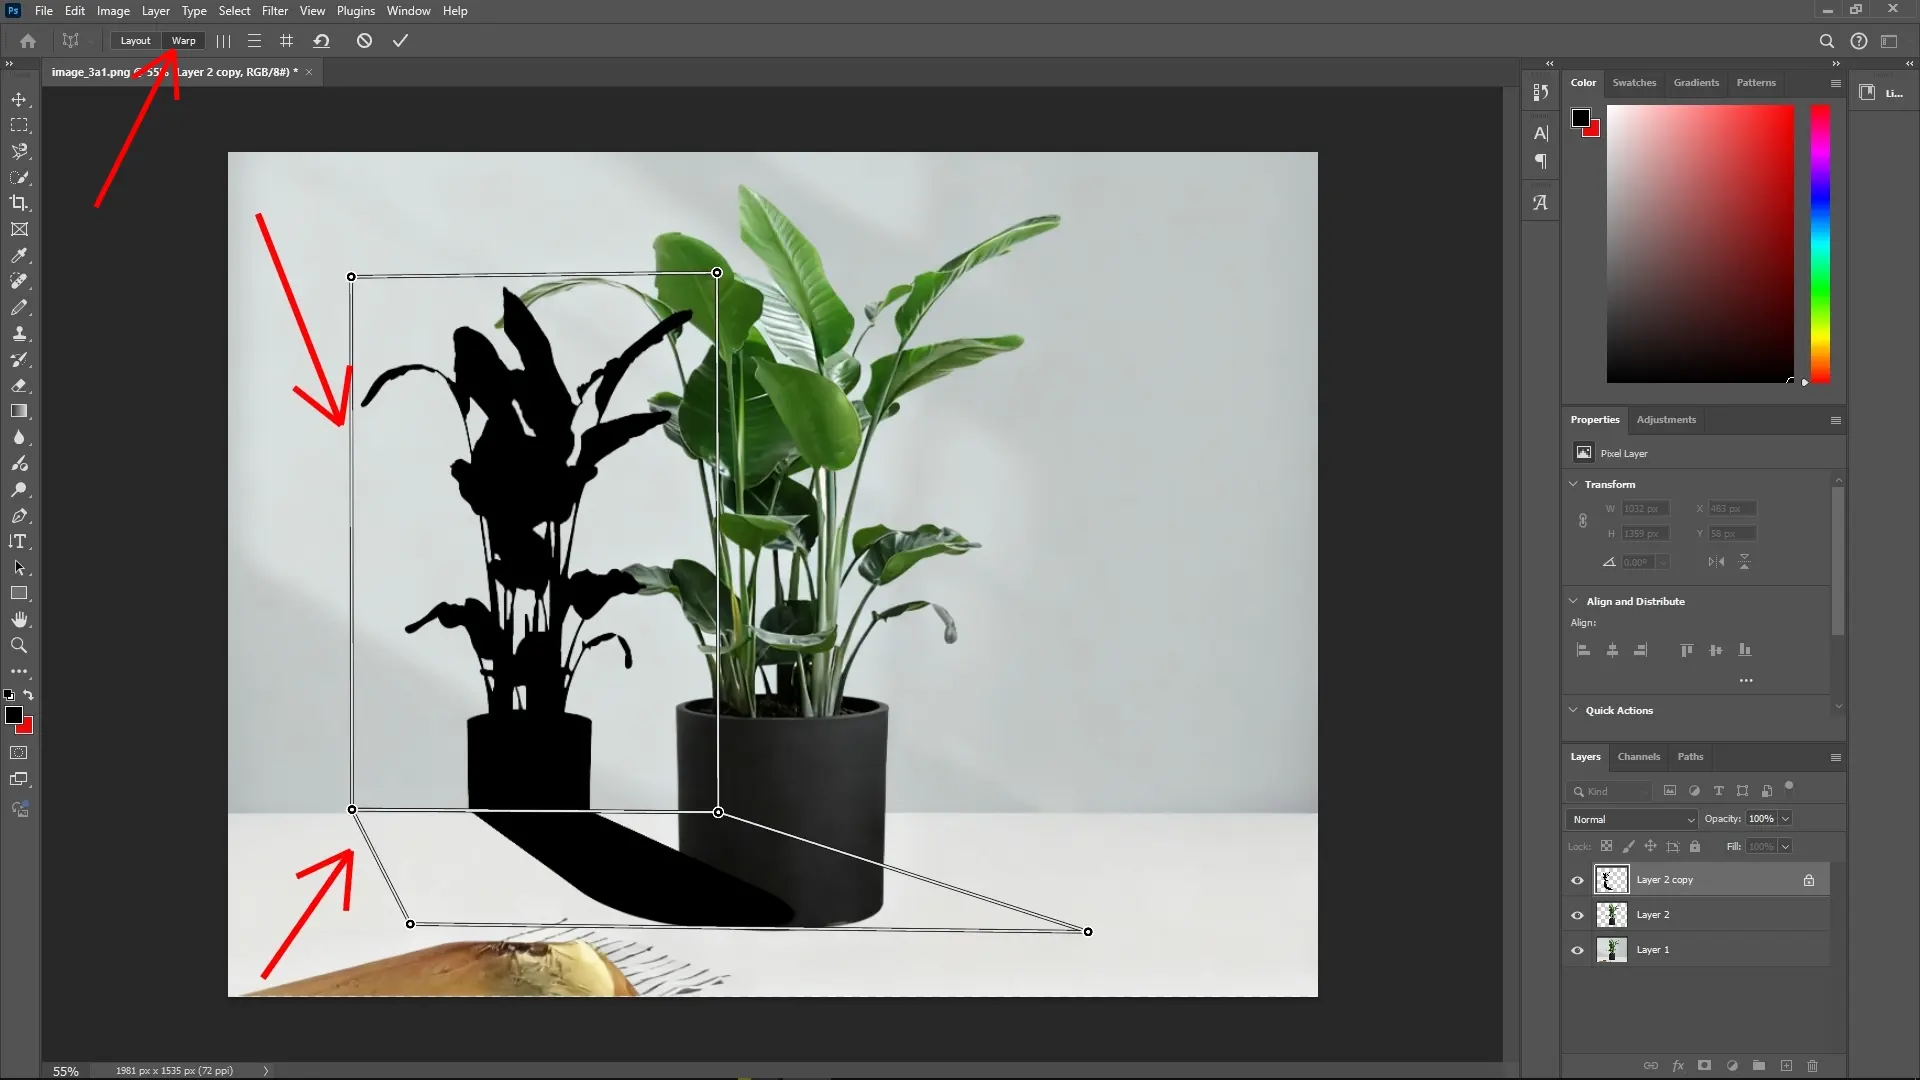
Step 4: Apply Perspective Warp
Access Perspective Warp:Go to Edit > Perspective Warp.
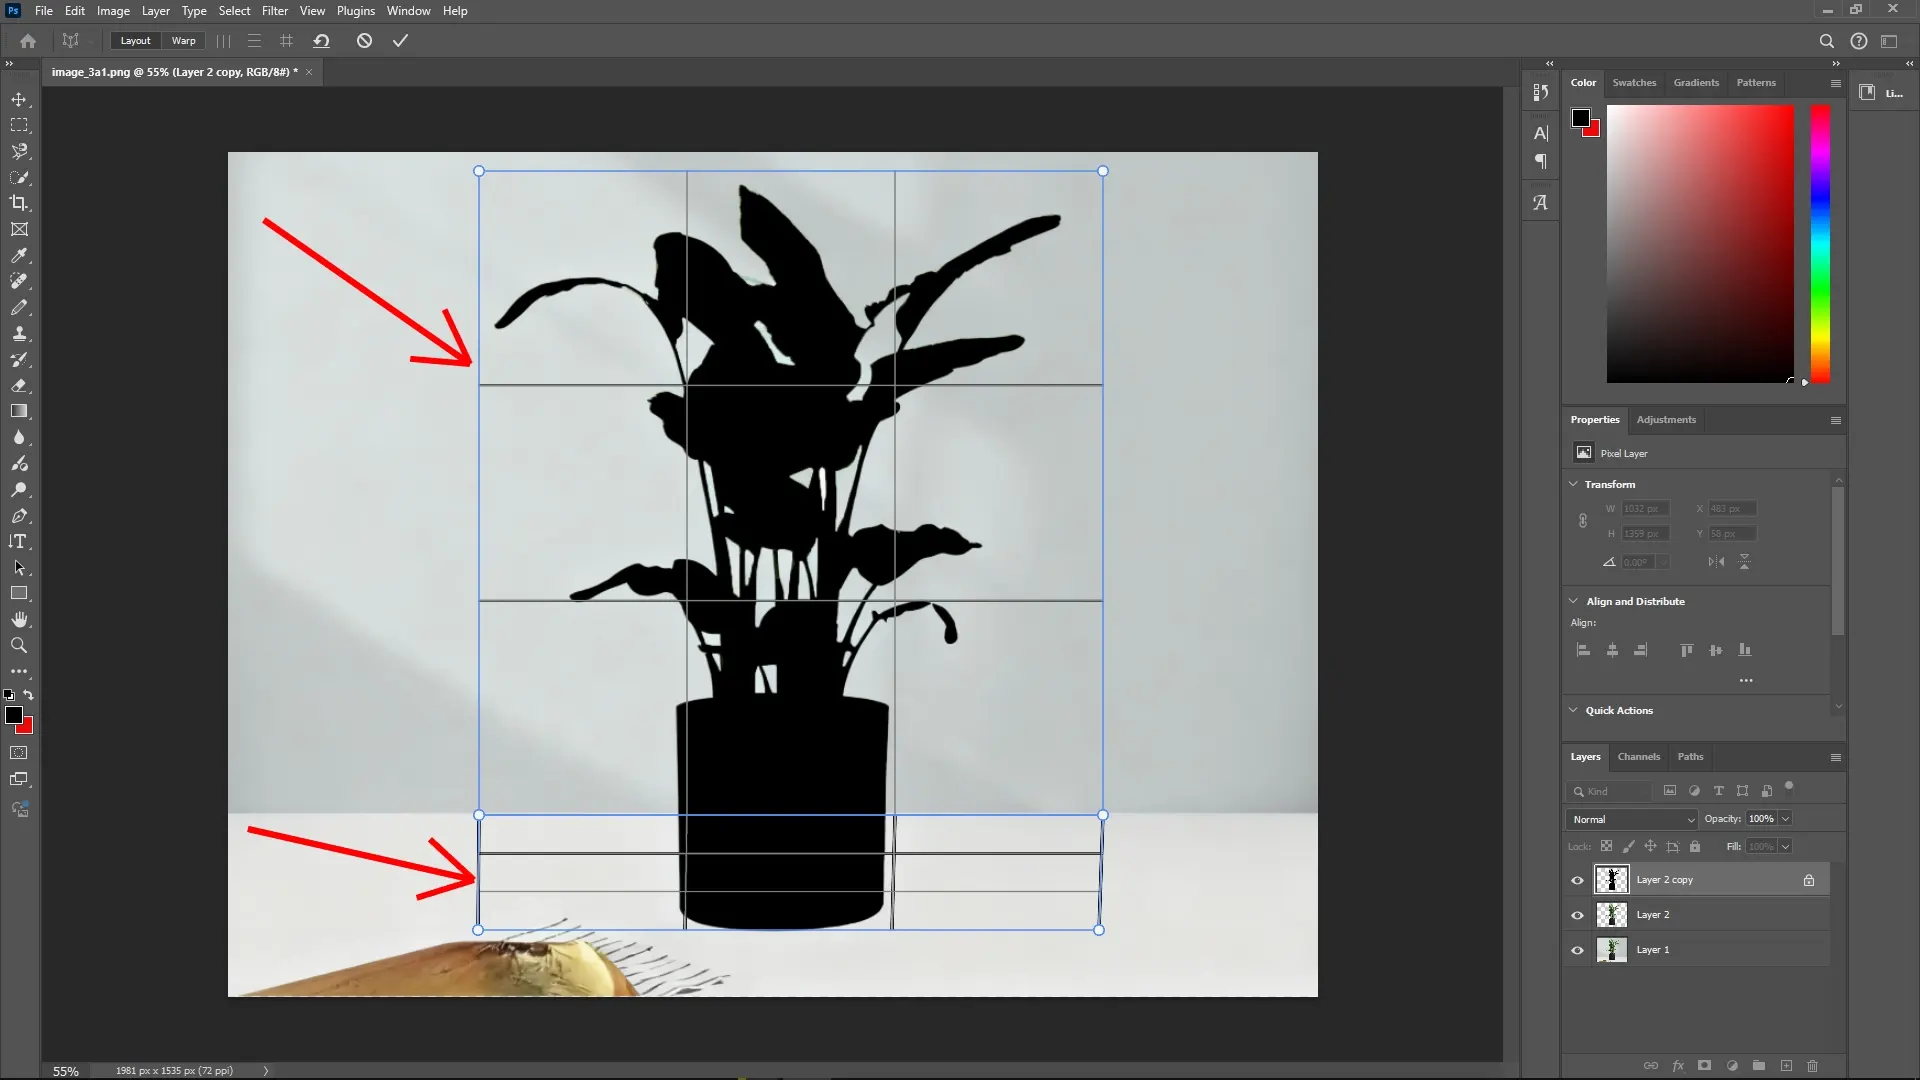
 Draw Two Meshes:
Click and drag to create the first mesh covering the area of your shadow. Then create a second mesh adjacent to the first, aligning them to form a connected grid.
 Adjust the Perspective:
Switch to Warp mode by clicking the button in the options bar.
Now drag the corner points of the meshes to adjust the shadow’s perspective, making it conform naturally to the scene’s light source and surface angle.
 Confirm the Transform:
When satisfied with the adjustment, press Enter (Return on Mac) to apply the Perspective Warp.

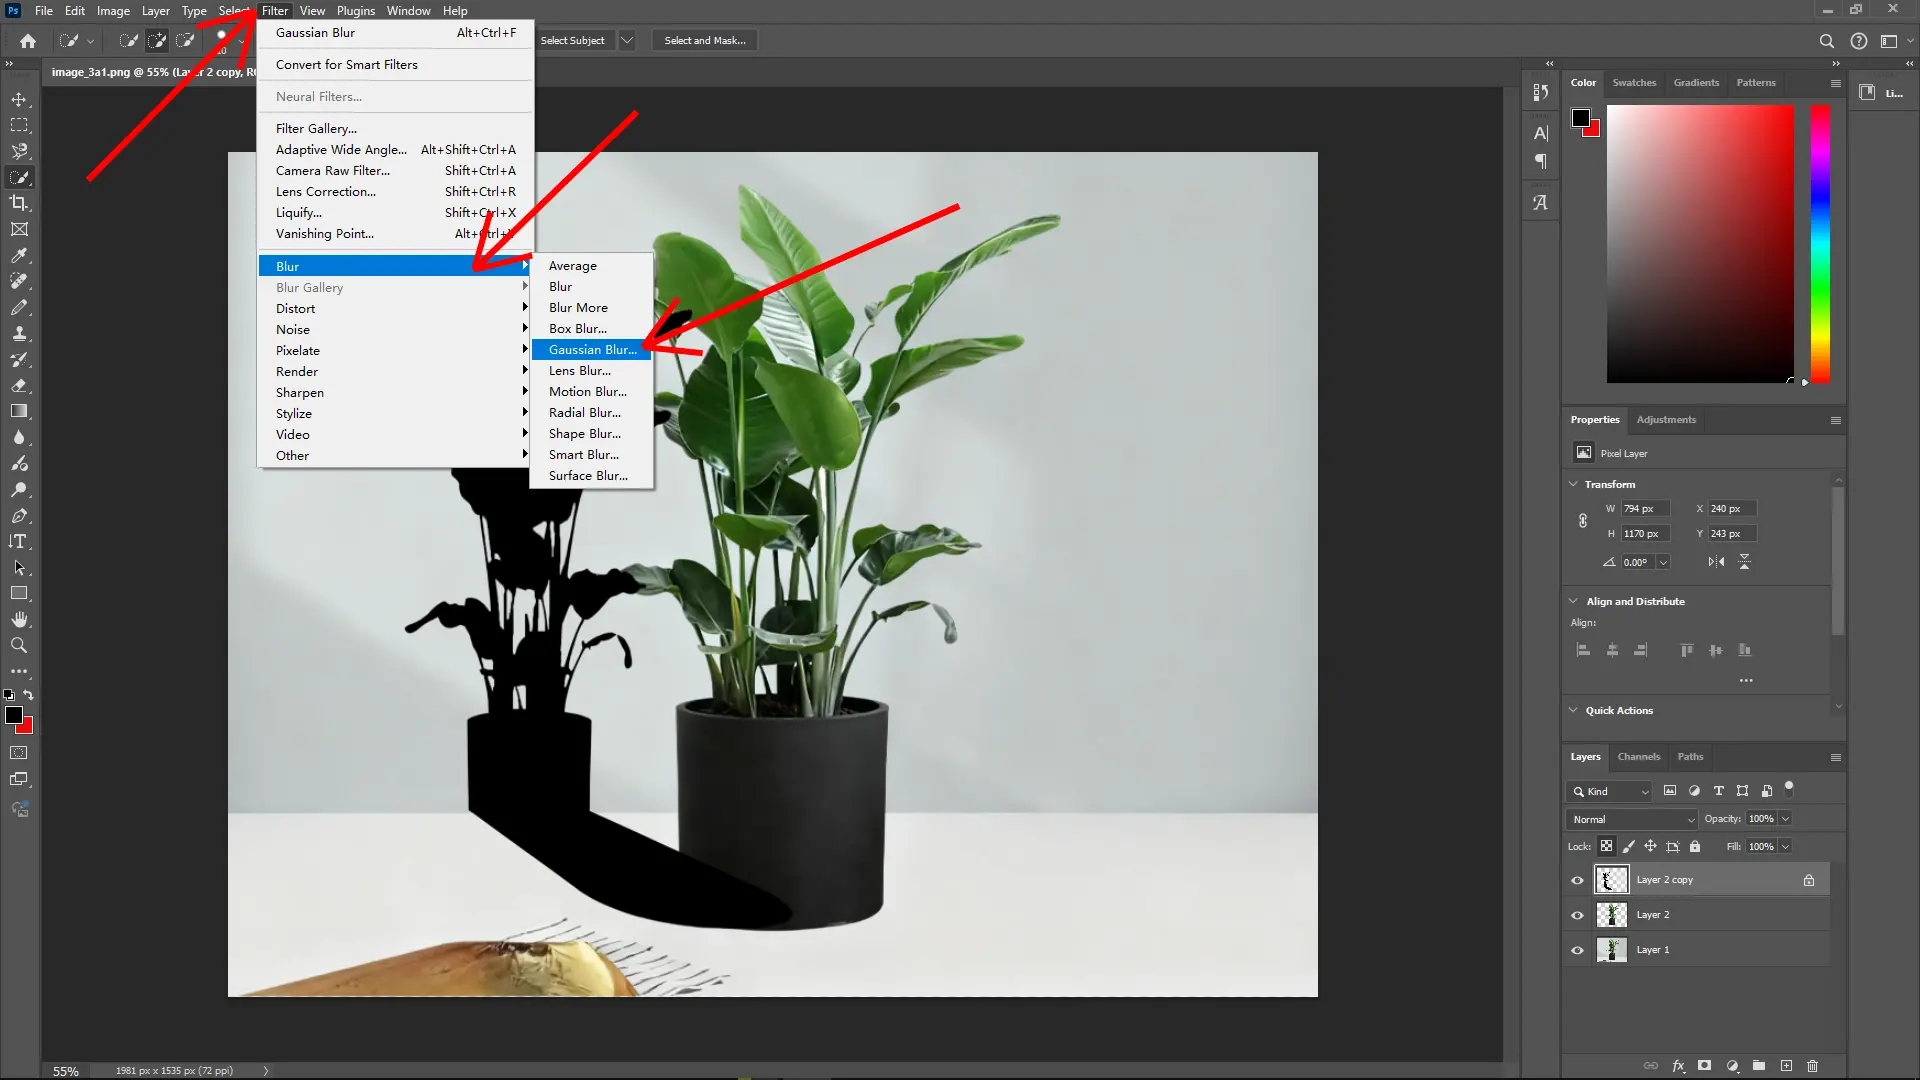
Step 5: Apply Gaussian Blur
Blur the Shadow Layer:With the black-filled layer selected, go to Filter > Blur > Gaussian Blur.
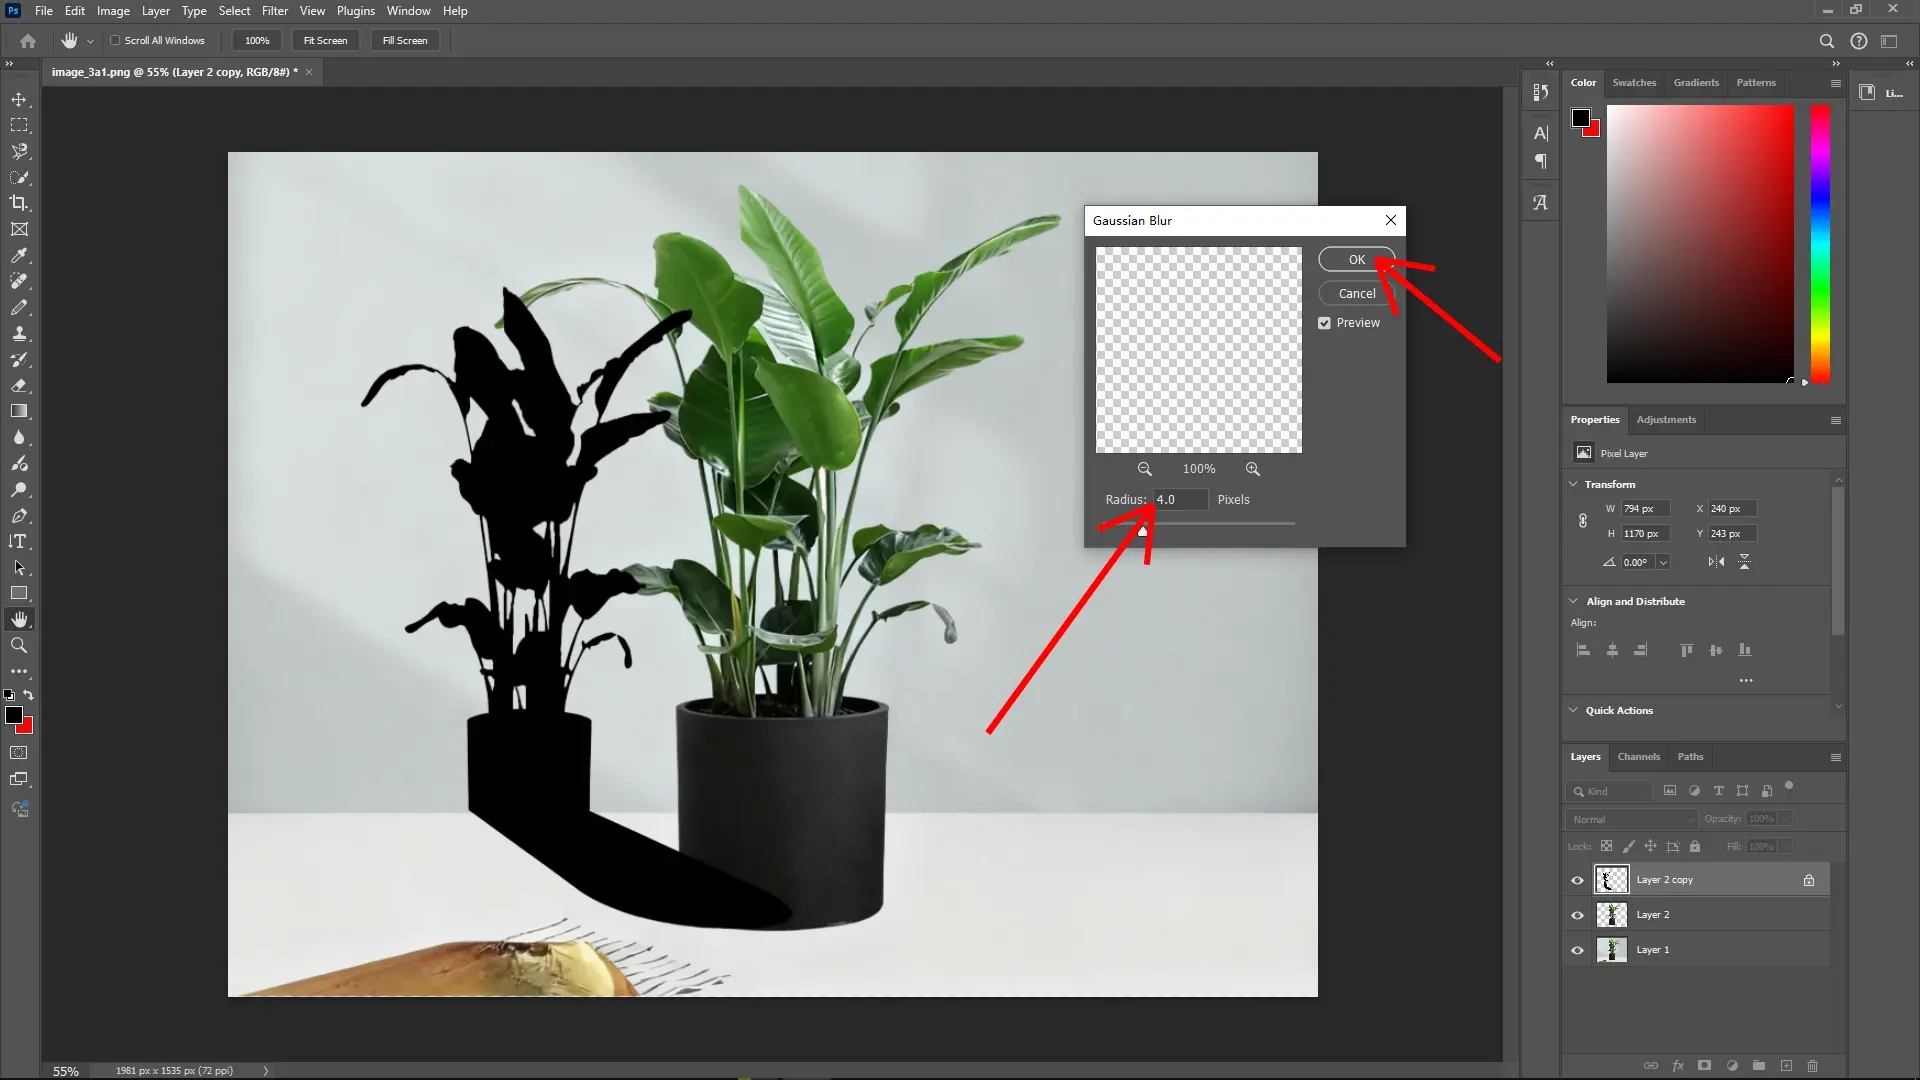
 Set Blur Radius:
Adjust the blur radius slider to soften the shadow edges until it appears natural. The optimal setting depends on your image resolution.
Set Blur Radius:
Adjust the blur radius slider to soften the shadow edges until it appears natural. The optimal setting depends on your image resolution.
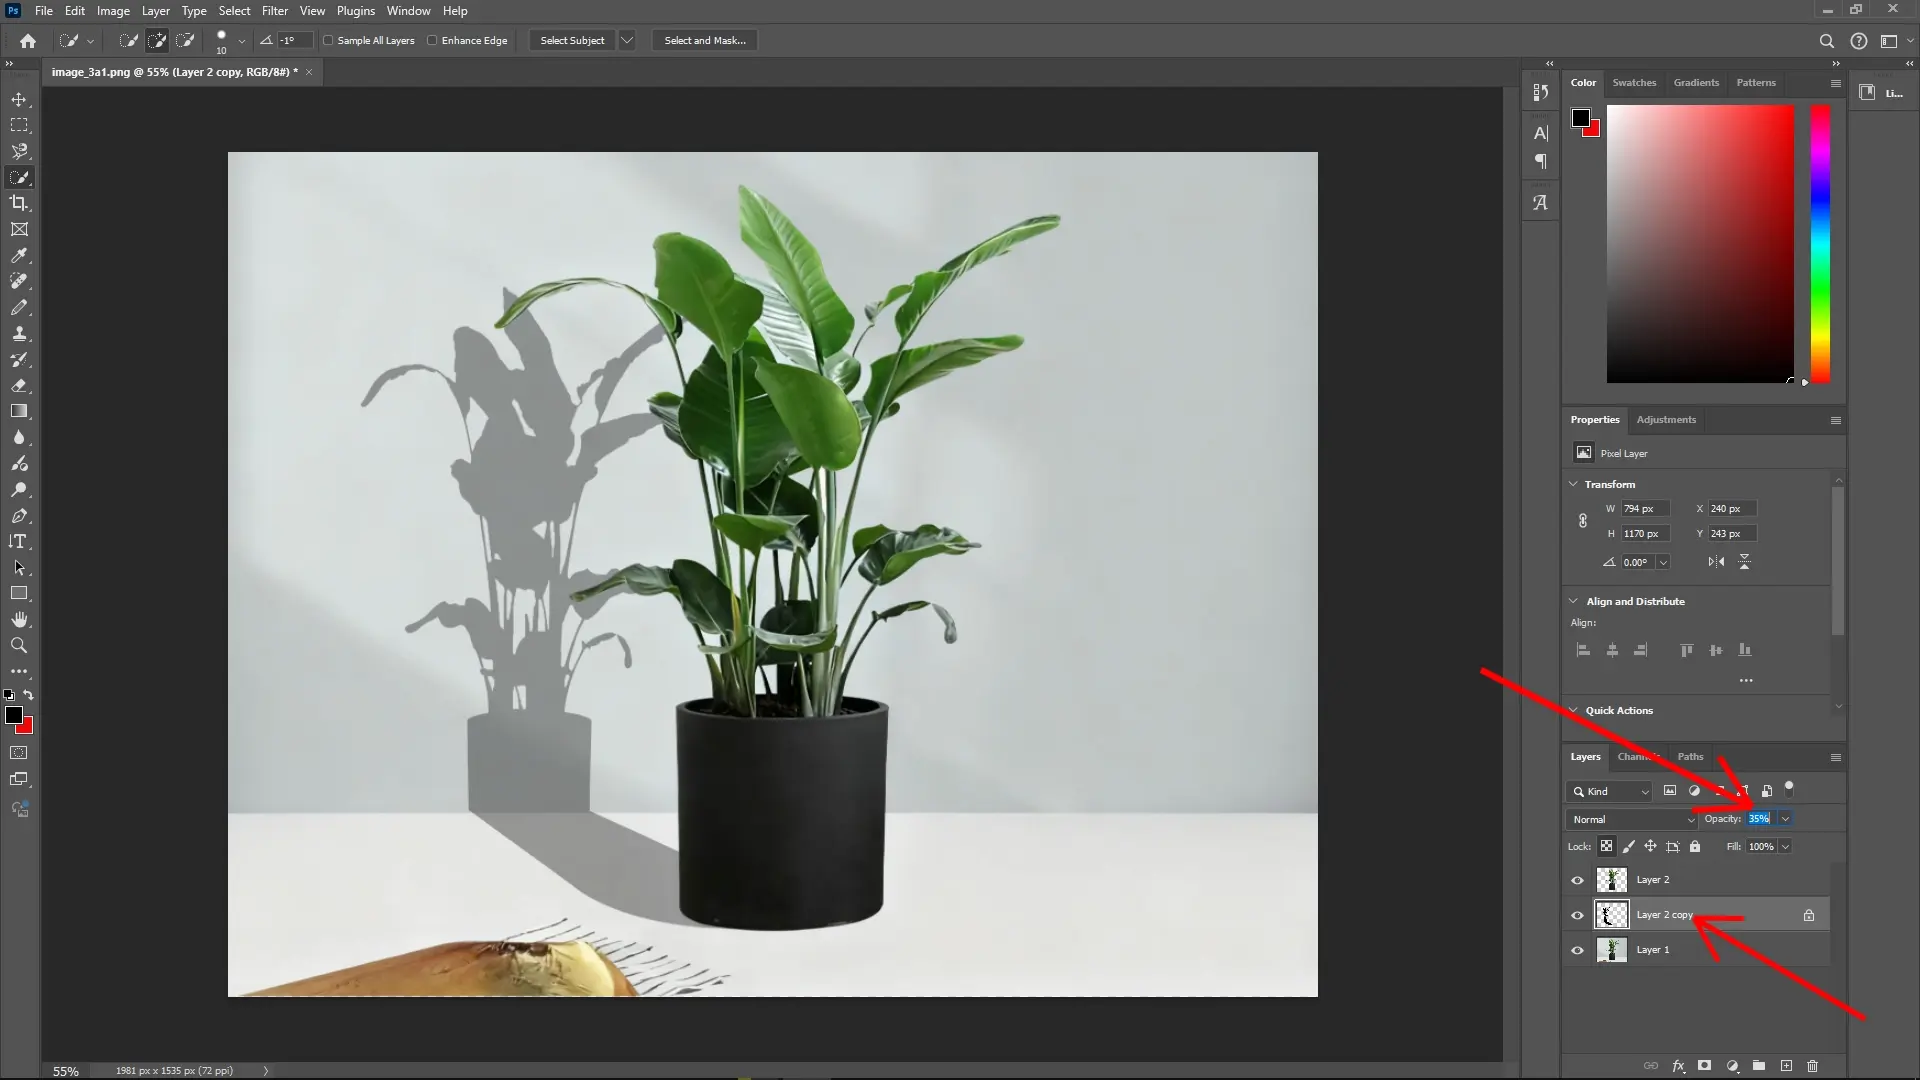
Step 6: Adjust Layer Opacity
Reduce Opacity:In the Layers panel, lower the opacity of the shadow layer to blend it seamlessly with the background. Typical values range from 30% to 70%, depending on the desired shadow strength.
Final Tips
Feathering the Selection:Before creating duplicates, feather the selection slightly by selecting Select > Modify > Feather for a softer shadow edge.
Shadow Color Variations:Depending on your light source and environment, consider using a dark grey or color-tinted shadow for additional realism.
By following these steps, you’ll create a convincing and dynamic corner shadow that enhances the dimensionality of your object. This technique is suitable for both professional designs and digital artwork.
Write Reply