How to Apply a Texture/Image onto a Model's Clothing in Photoshop
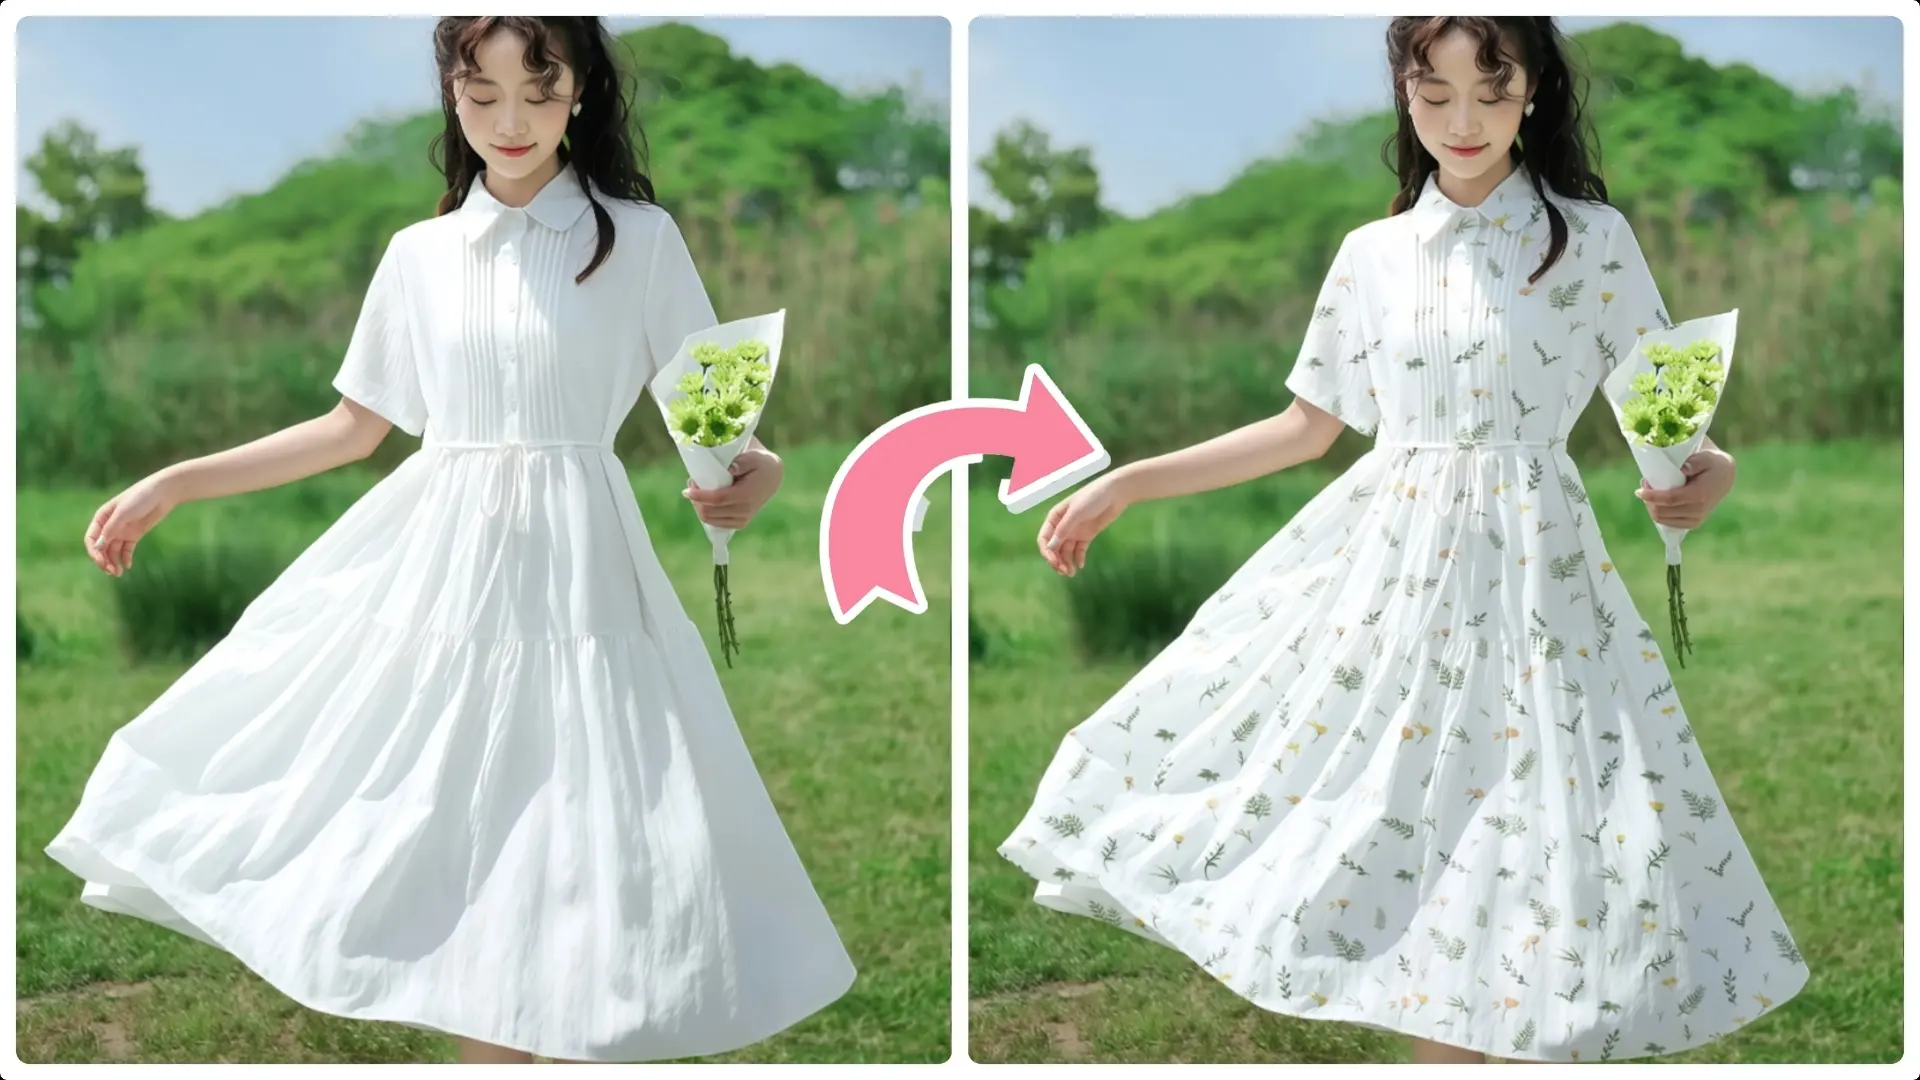
Applying textures or images onto clothing in Photoshop is a powerful technique. In this step-by-step tutorial, we’ll guide you through the complete process of integrating textures seamlessly onto clothing, helping you achieve professional and natural-looking results every time.
Step 1: Create a Selection
Tool: Select the Object Selection Tool, found in the toolbar.
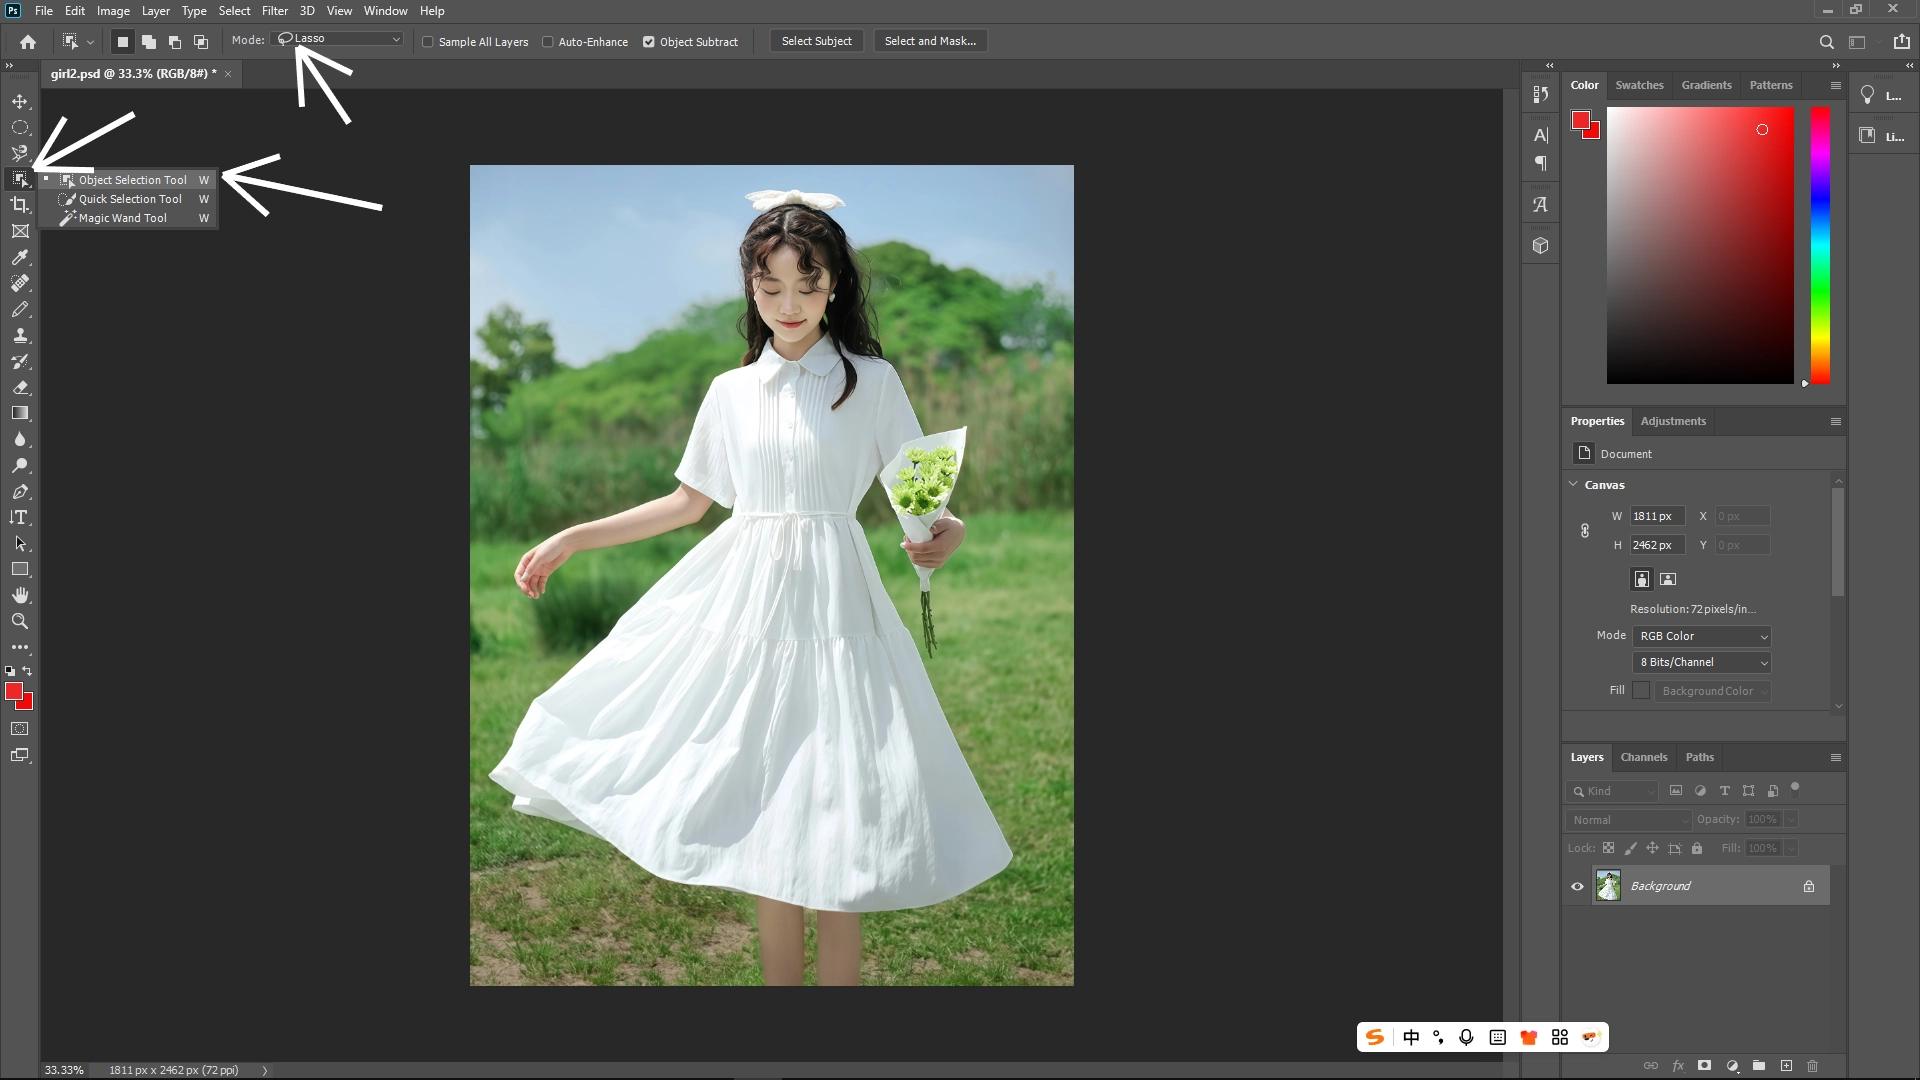
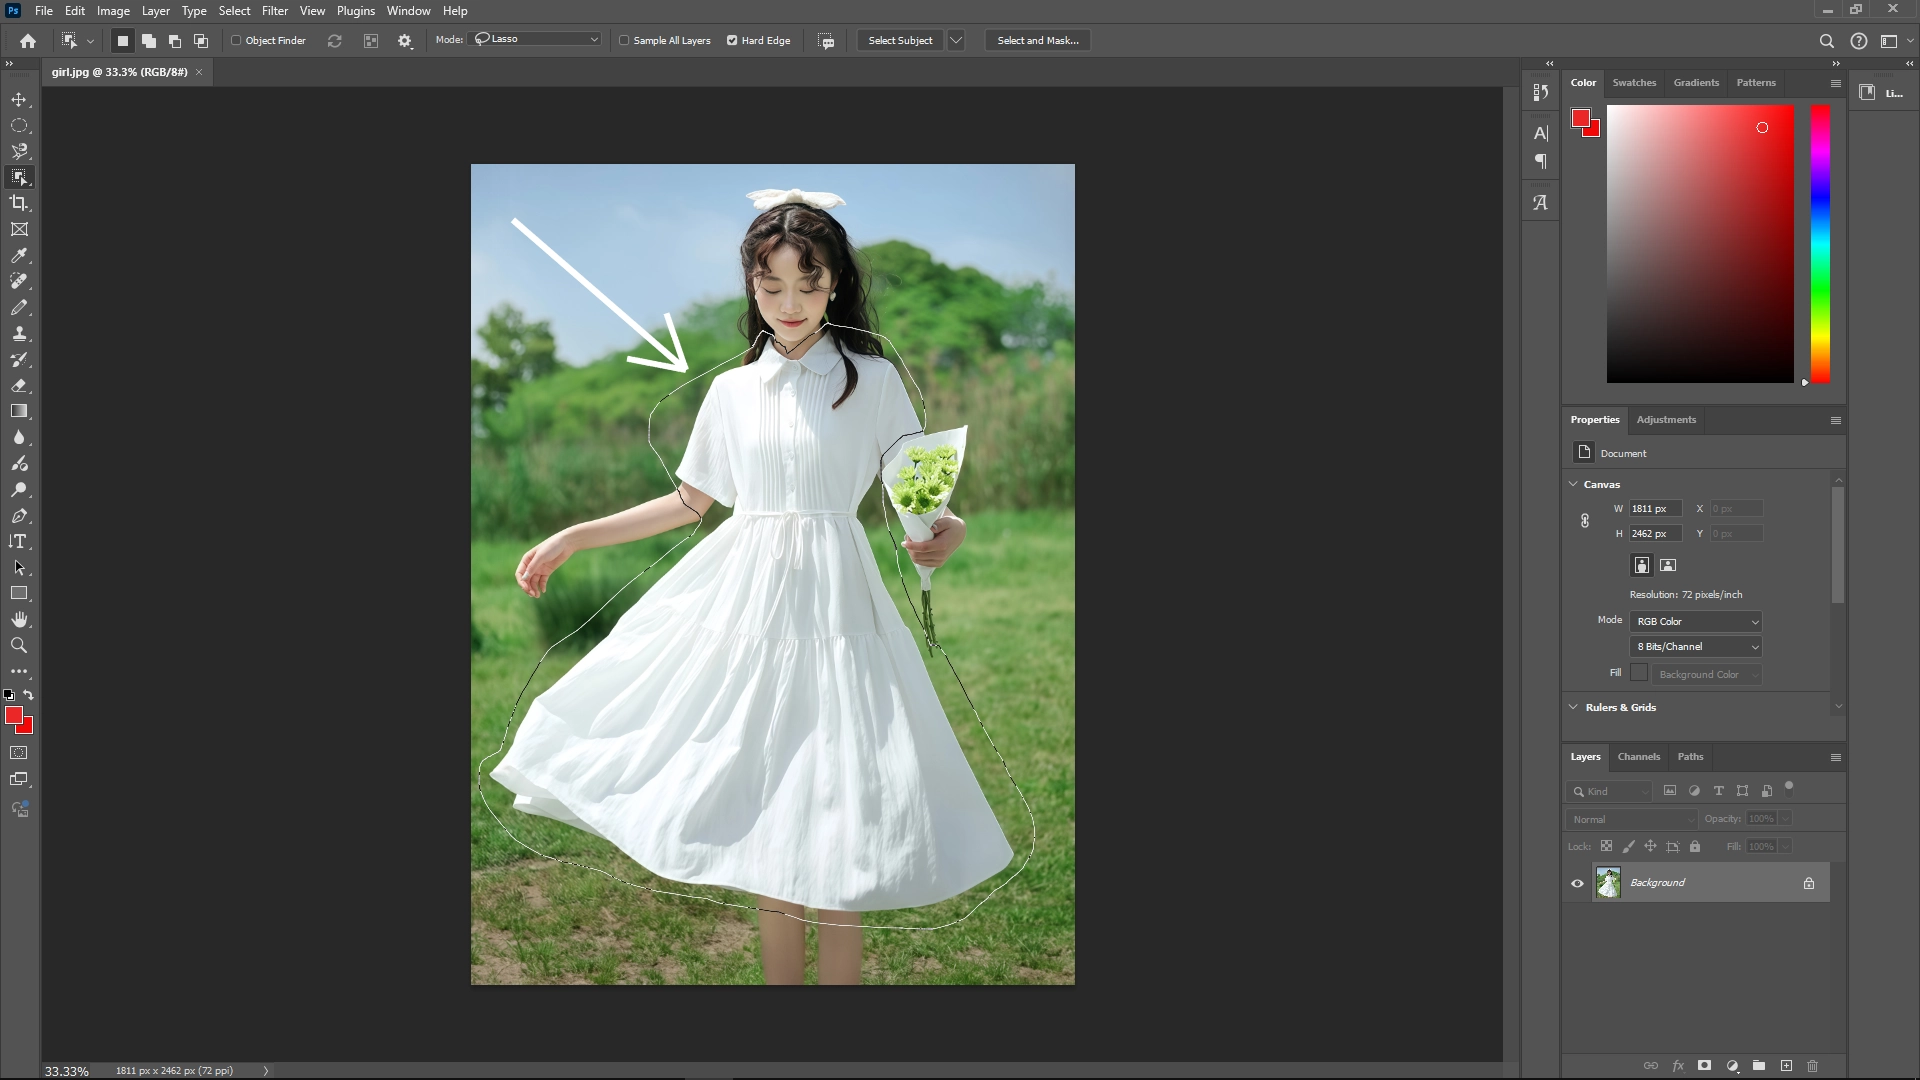
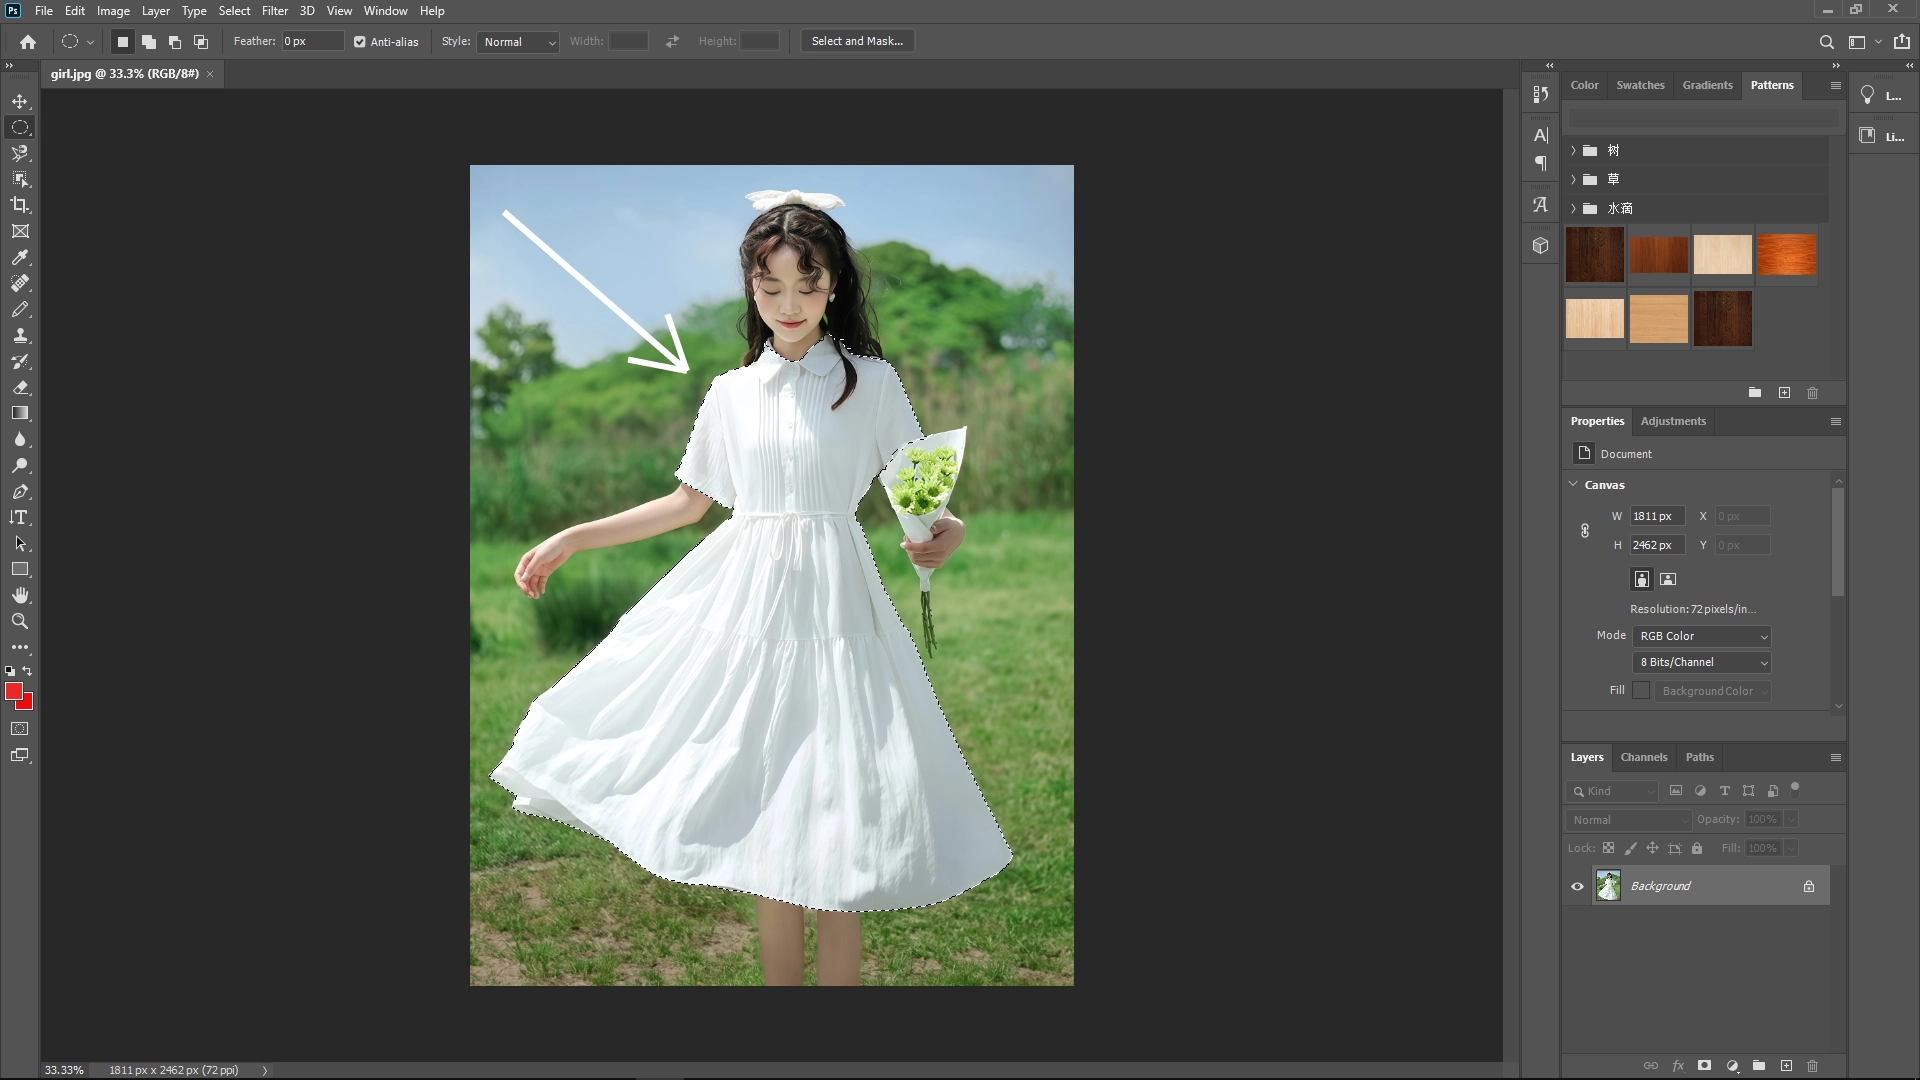
Action: Click and drag to draw a selection around the clothing area. Precision is key, so zoom in if necessary.
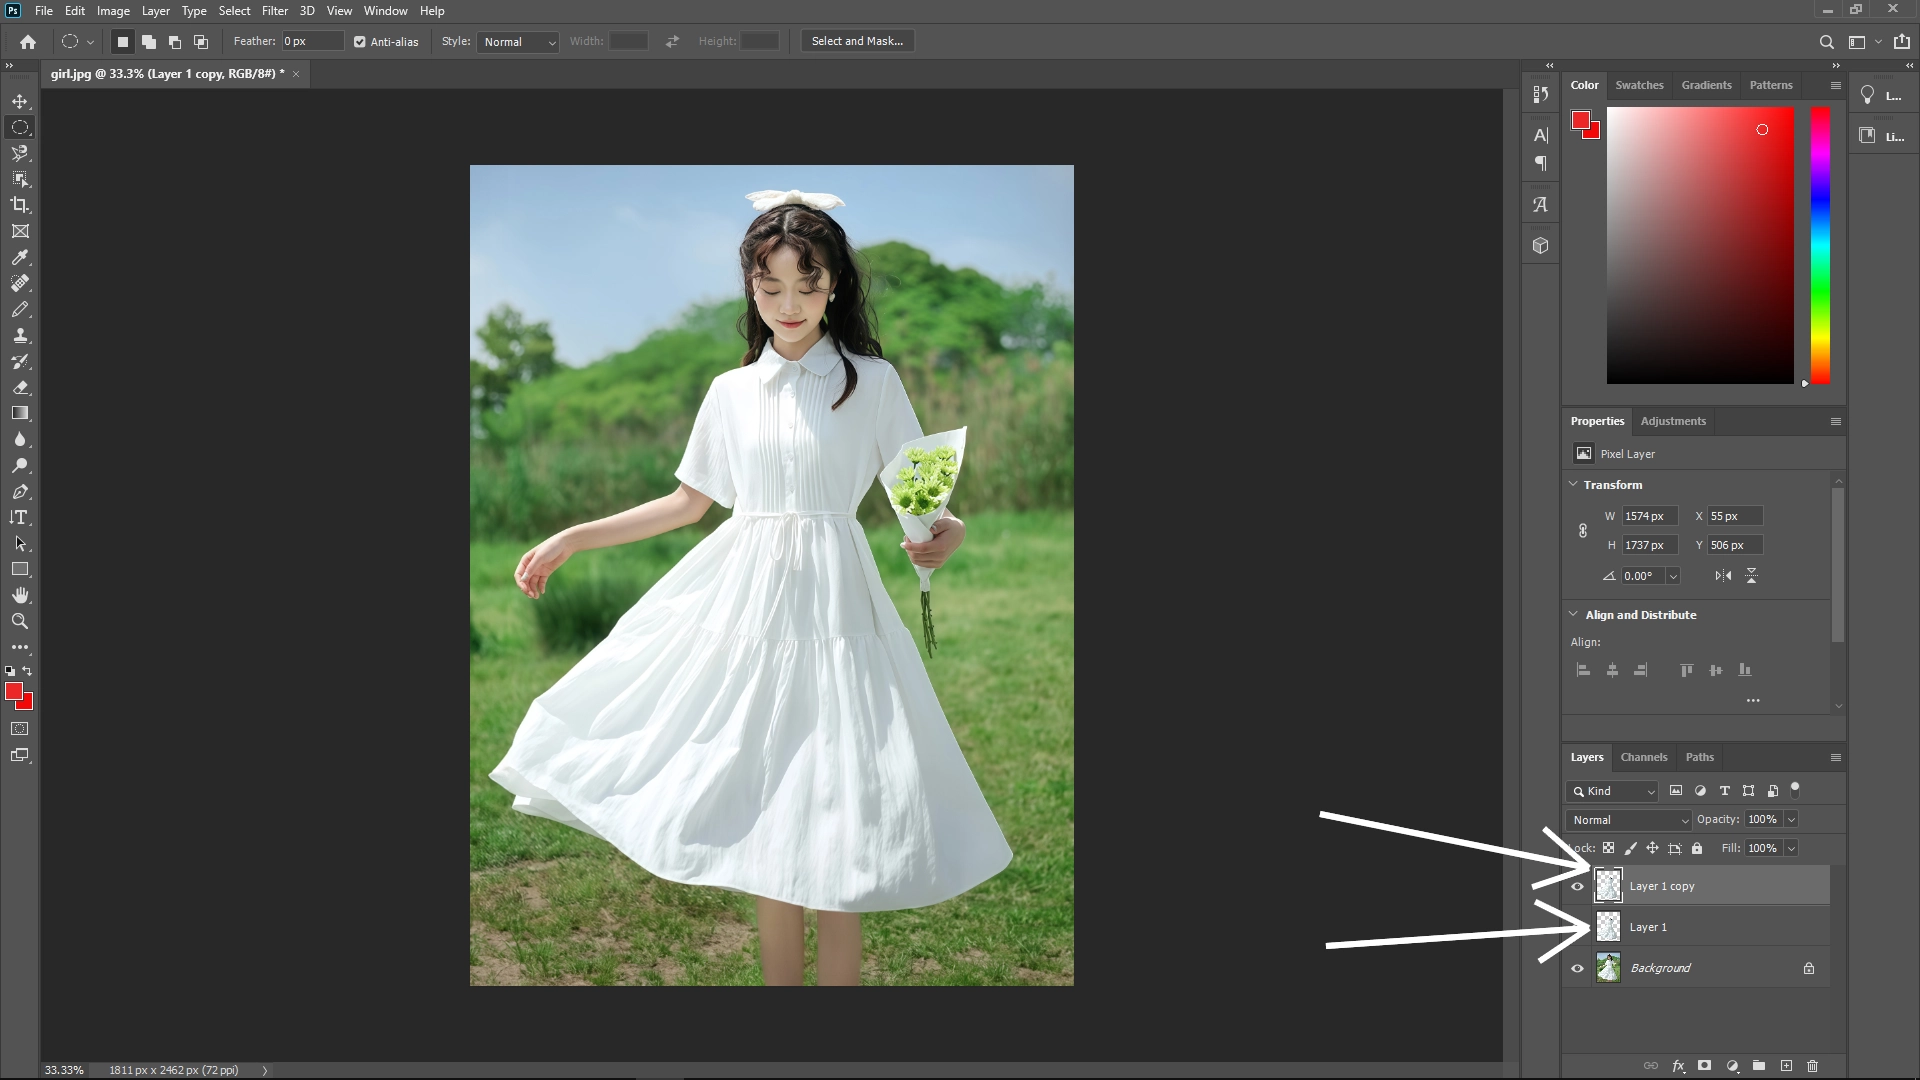
Step 2: Duplicate the Selection
Shortcut: Press Ctrl + J (Cmd + J on Mac) to create two new layers from the selected clothing area, ensuring you have a working layer to manipulate without affecting the original image.
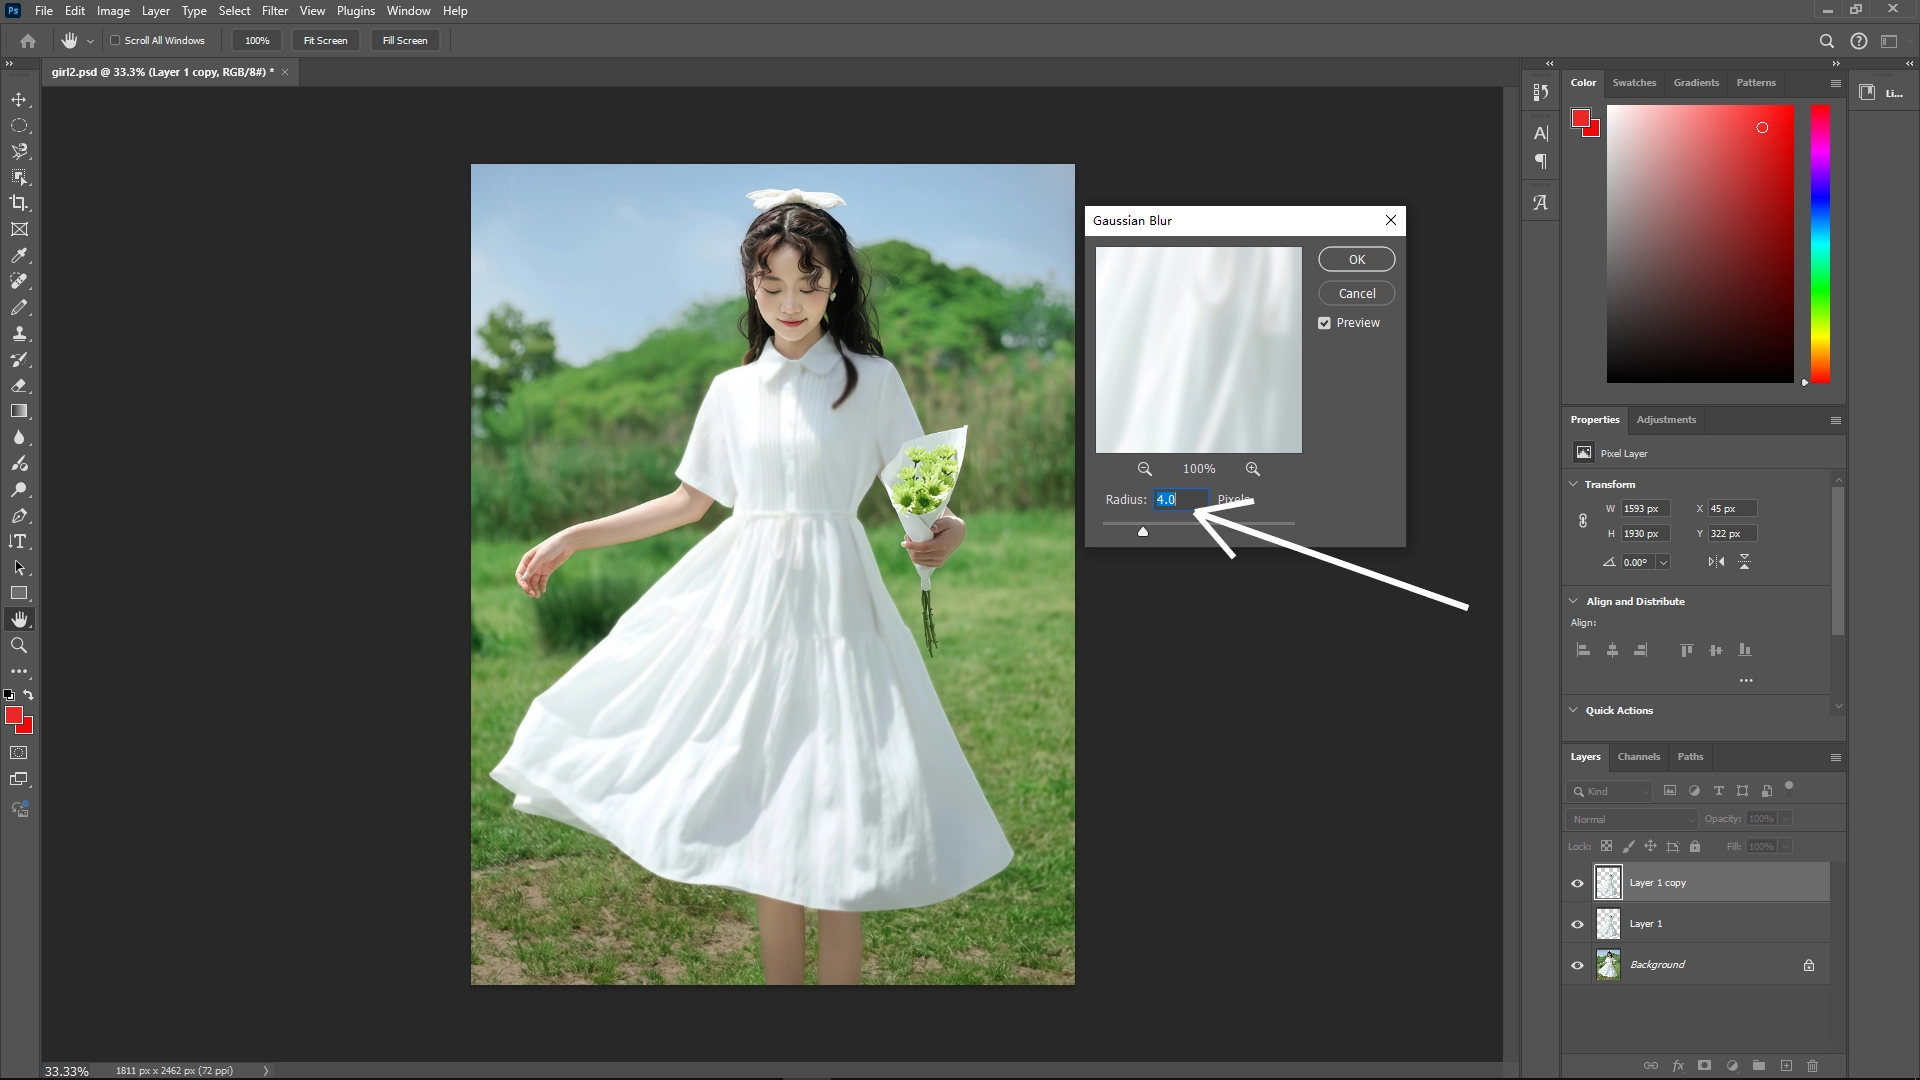
Step 3: Apply Gaussian Blur
Process:
Select the duplicated layer 1 copy.
Navigate to Filter > Blur > Gaussian Blur.
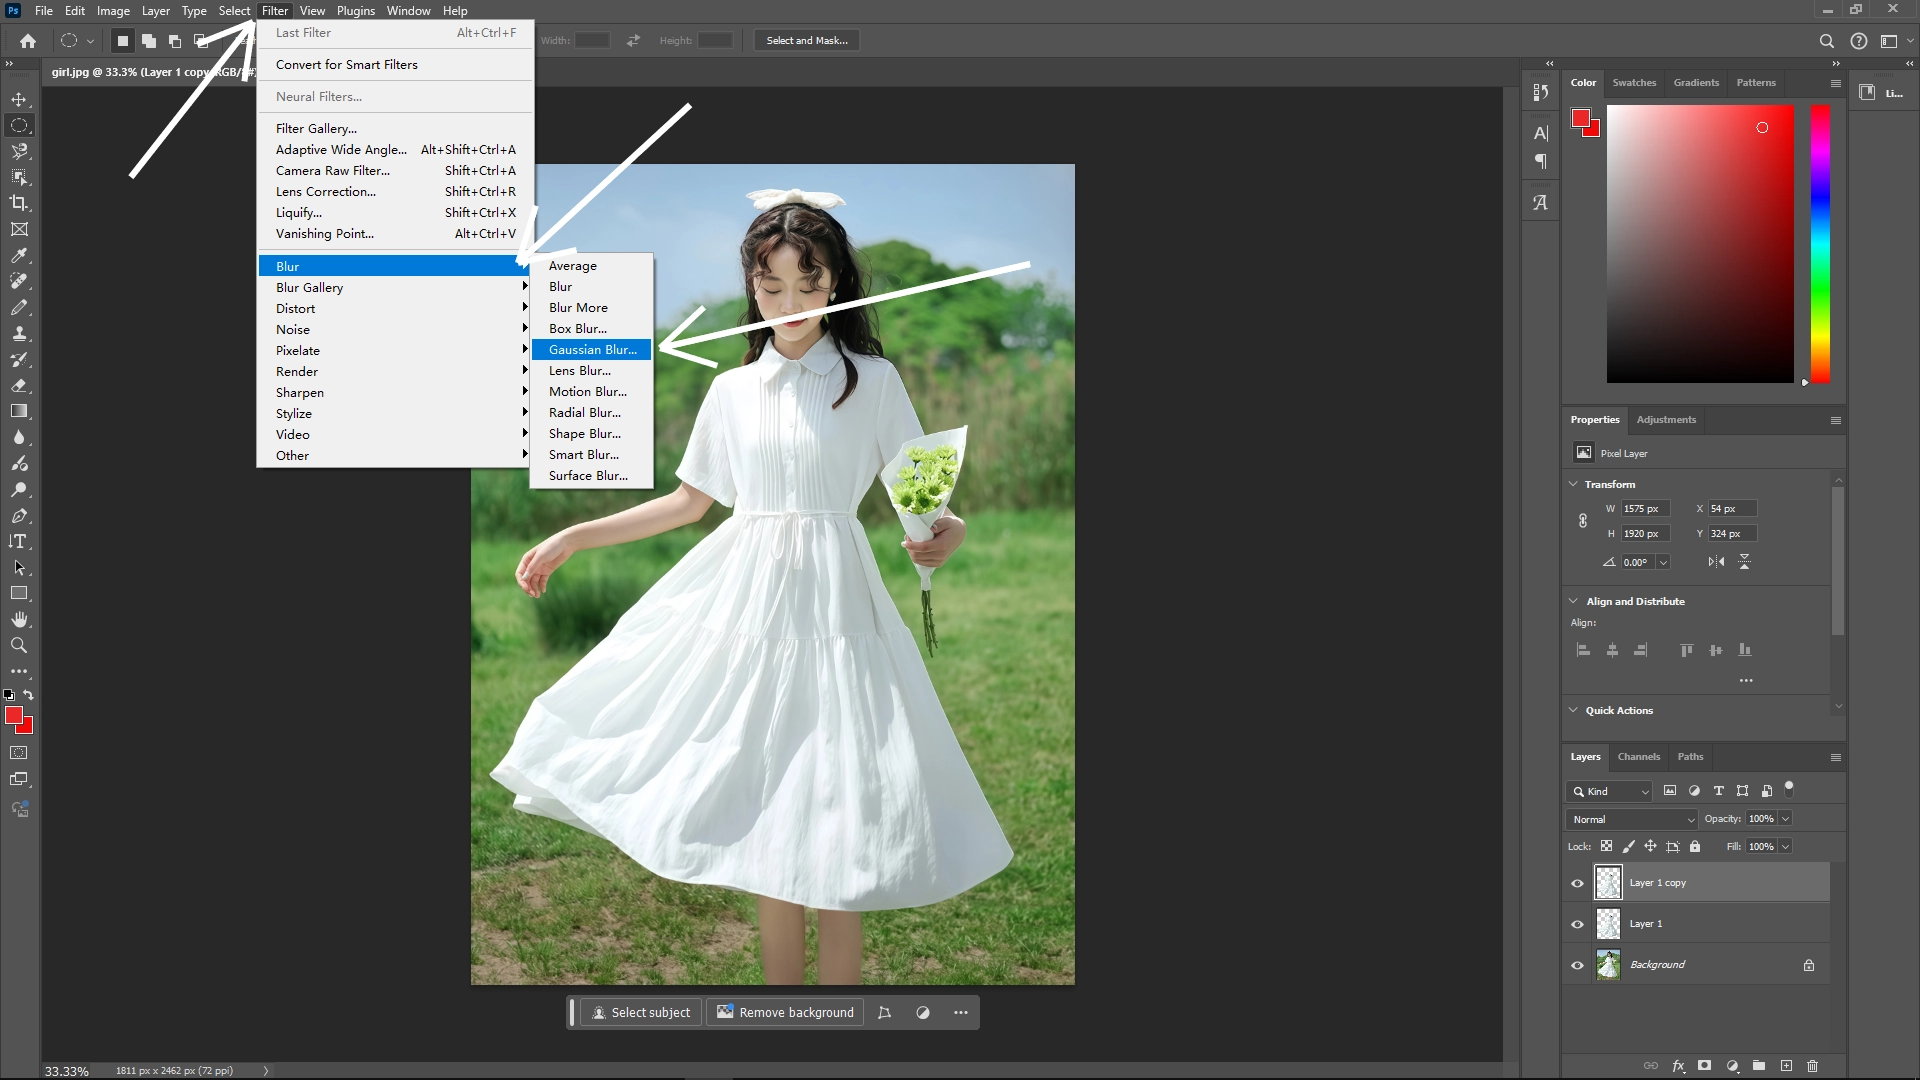
Apply a subtle blur (around 1-3 pixels) to soften the layer edges. This helps smooth out any hard edges and aids in creating a displacement map later.
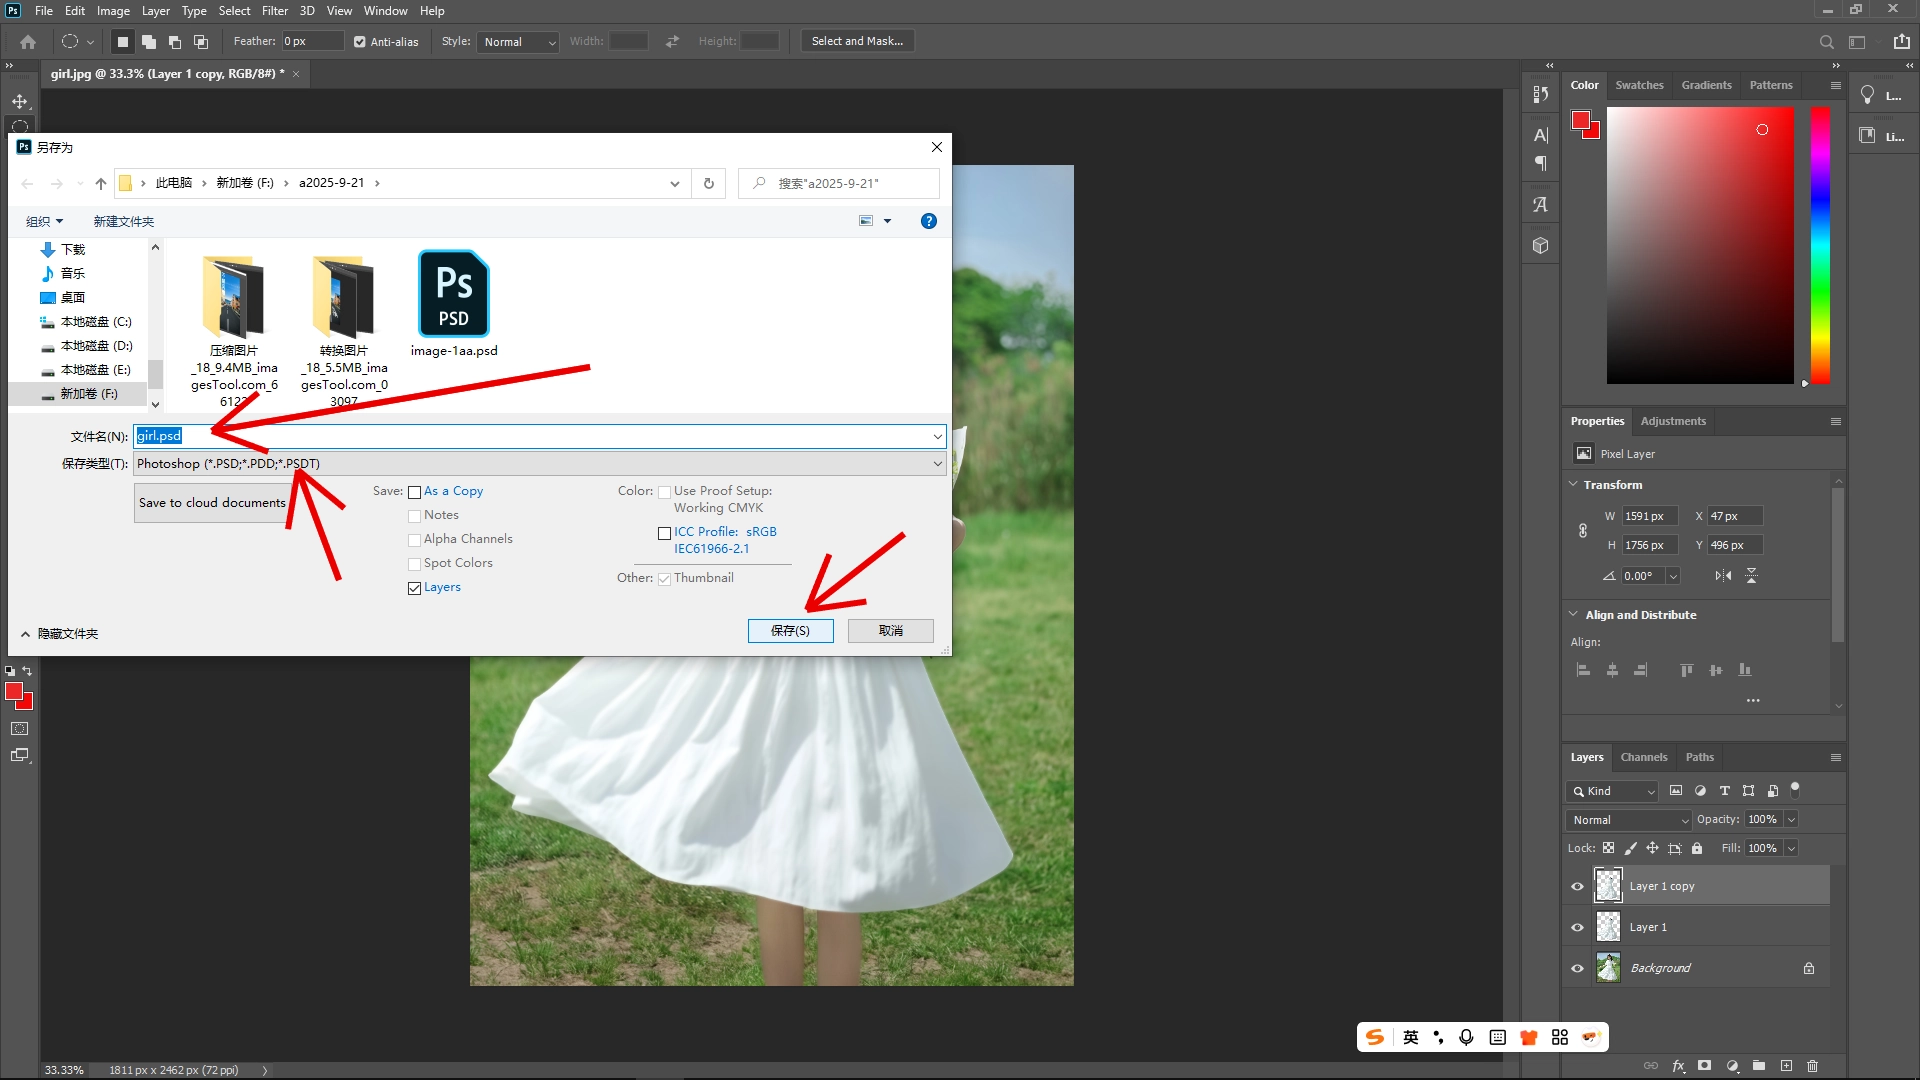
Step 4: Save the Blurred Layer as PSD
Action:
Save just the blurred layer as a separate PSD file by selecting File > Save As.
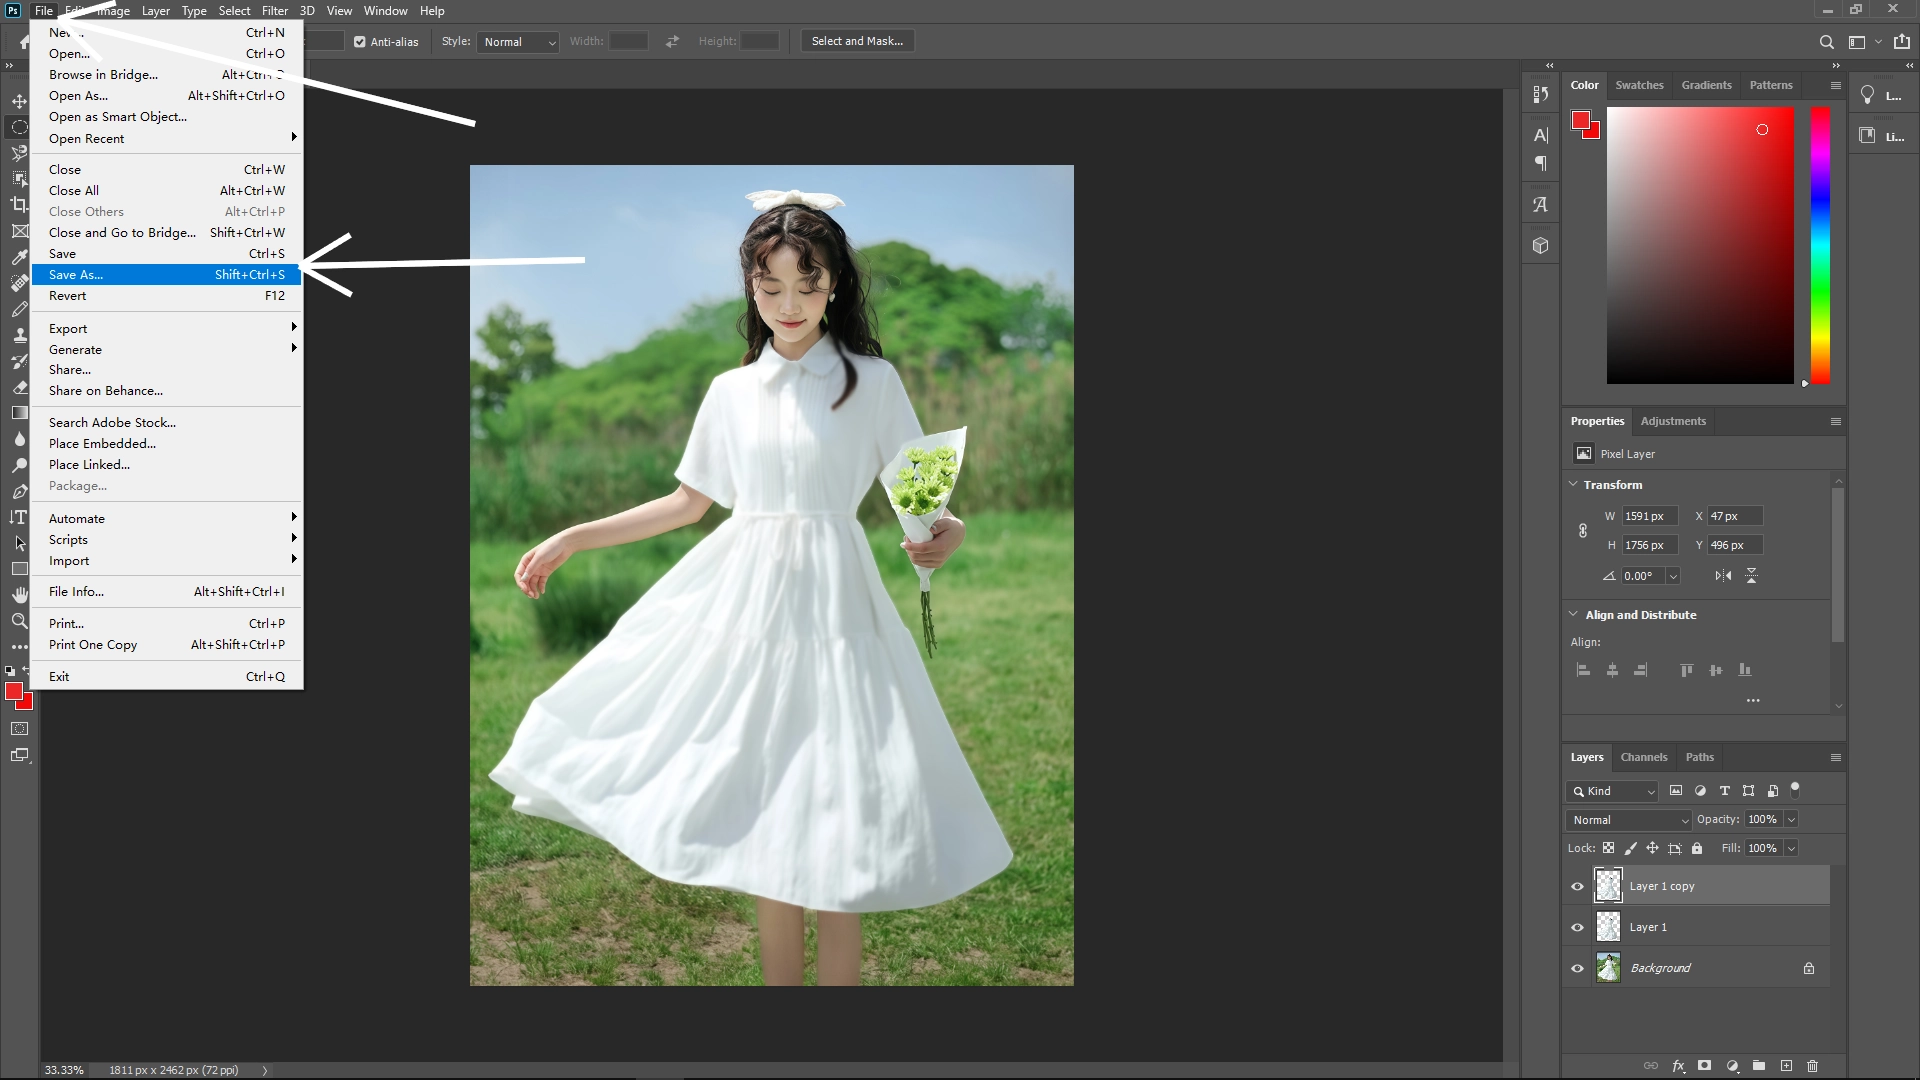
Name it appropriately (e.g., "girl.psd") and ensure it's saved in a convenient location.
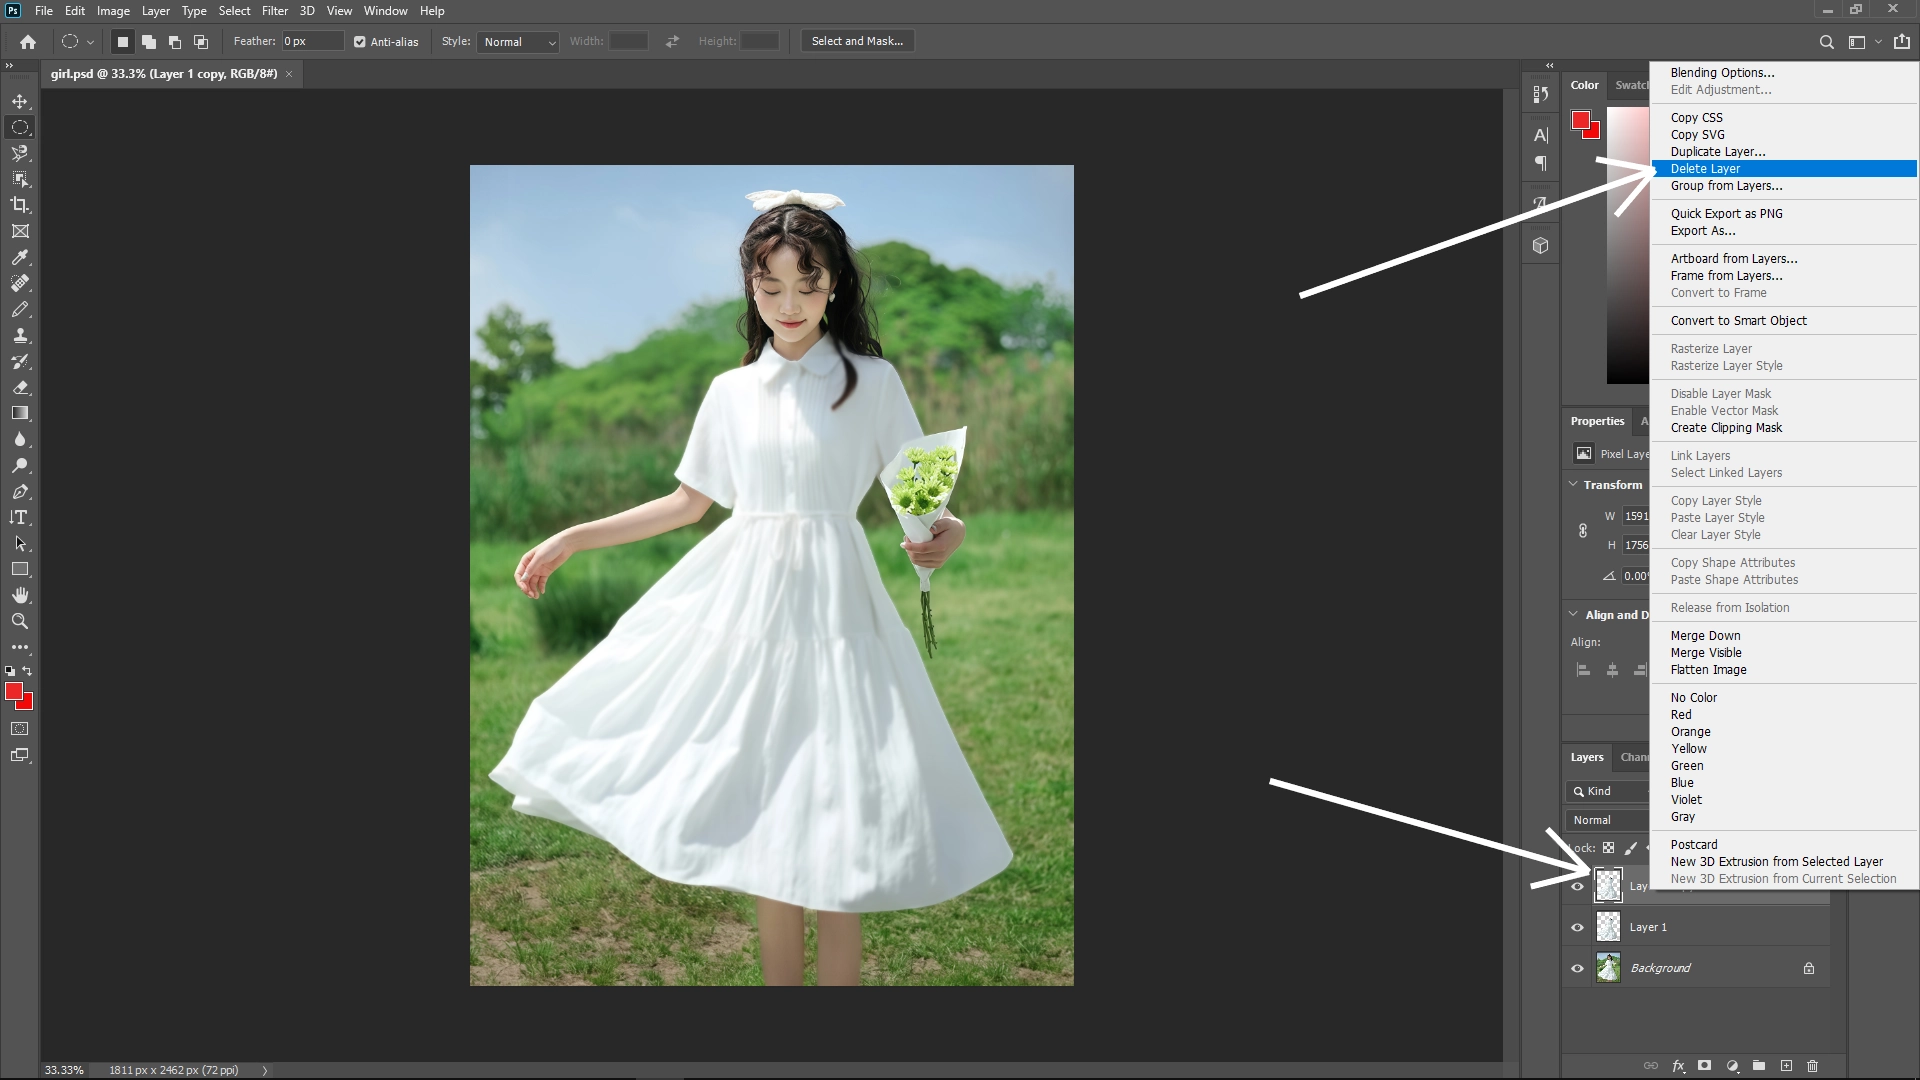
Step 5: Delete the Blurred Layer
Reason: After saving the blurred layer, you can delete it since its primary purpose was to create a displacement map.
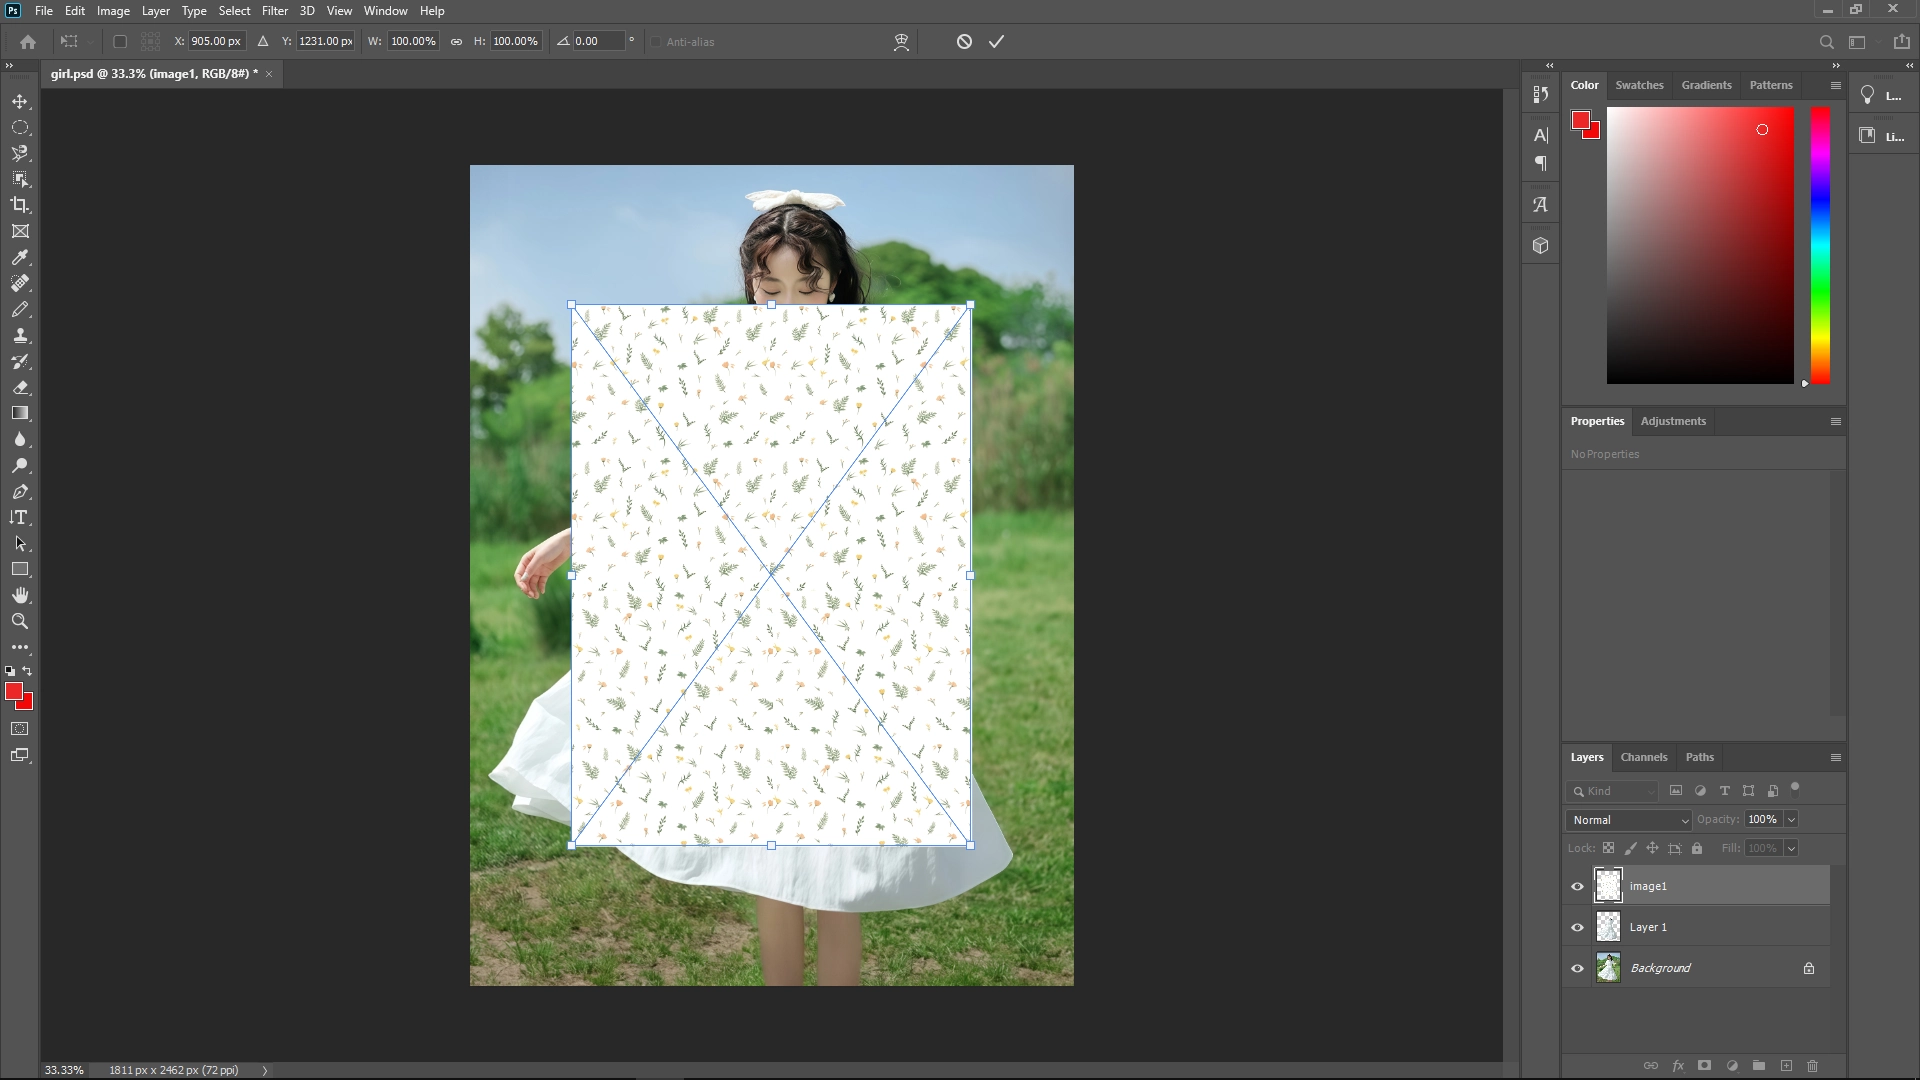
Step 6: Import Your Texture/Image
Process:
Drag and drop your external image or texture file onto your working document. Photoshop will automatically create a new layer for this image.
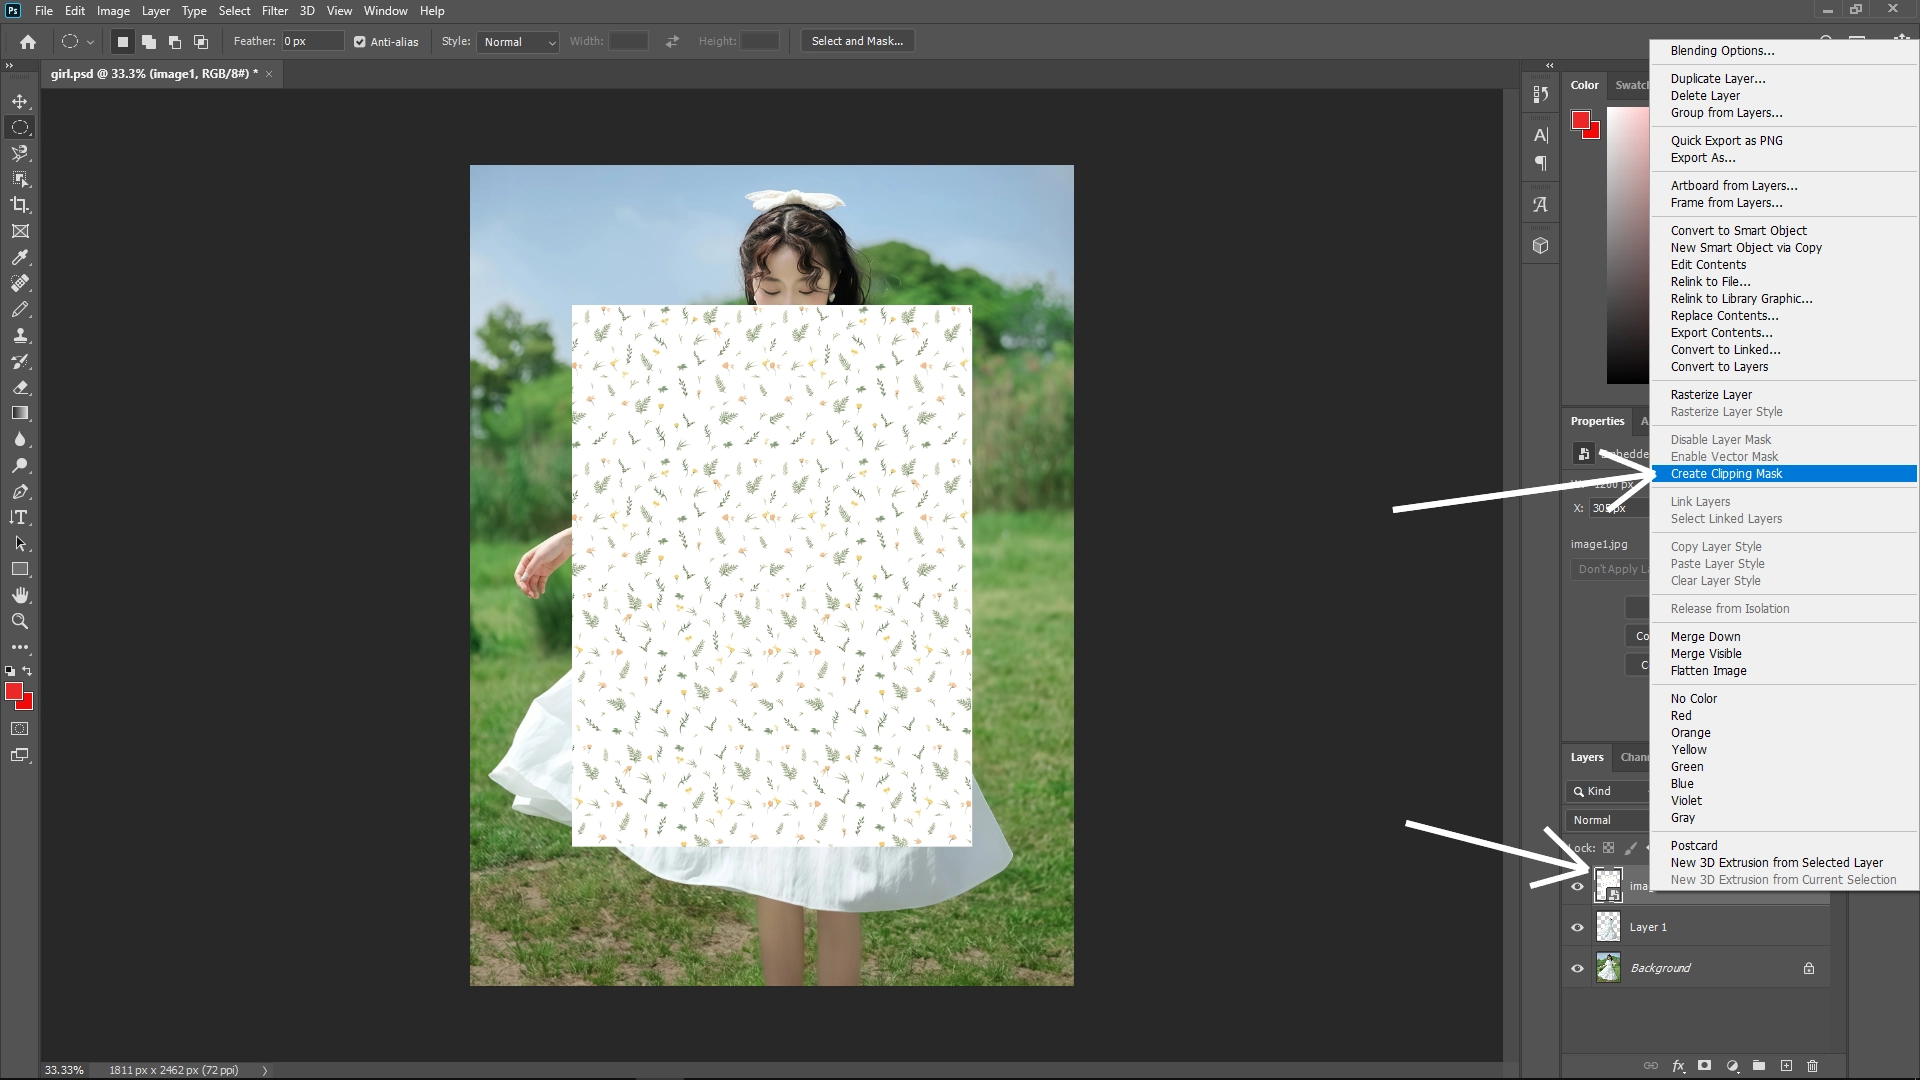
Step 7: Create a Clipping Mask
Action:
Right-click on the texture layer and select Create Clipping Mask. This confines the texture to the boundaries of the layer directly beneath it (the clothing area).
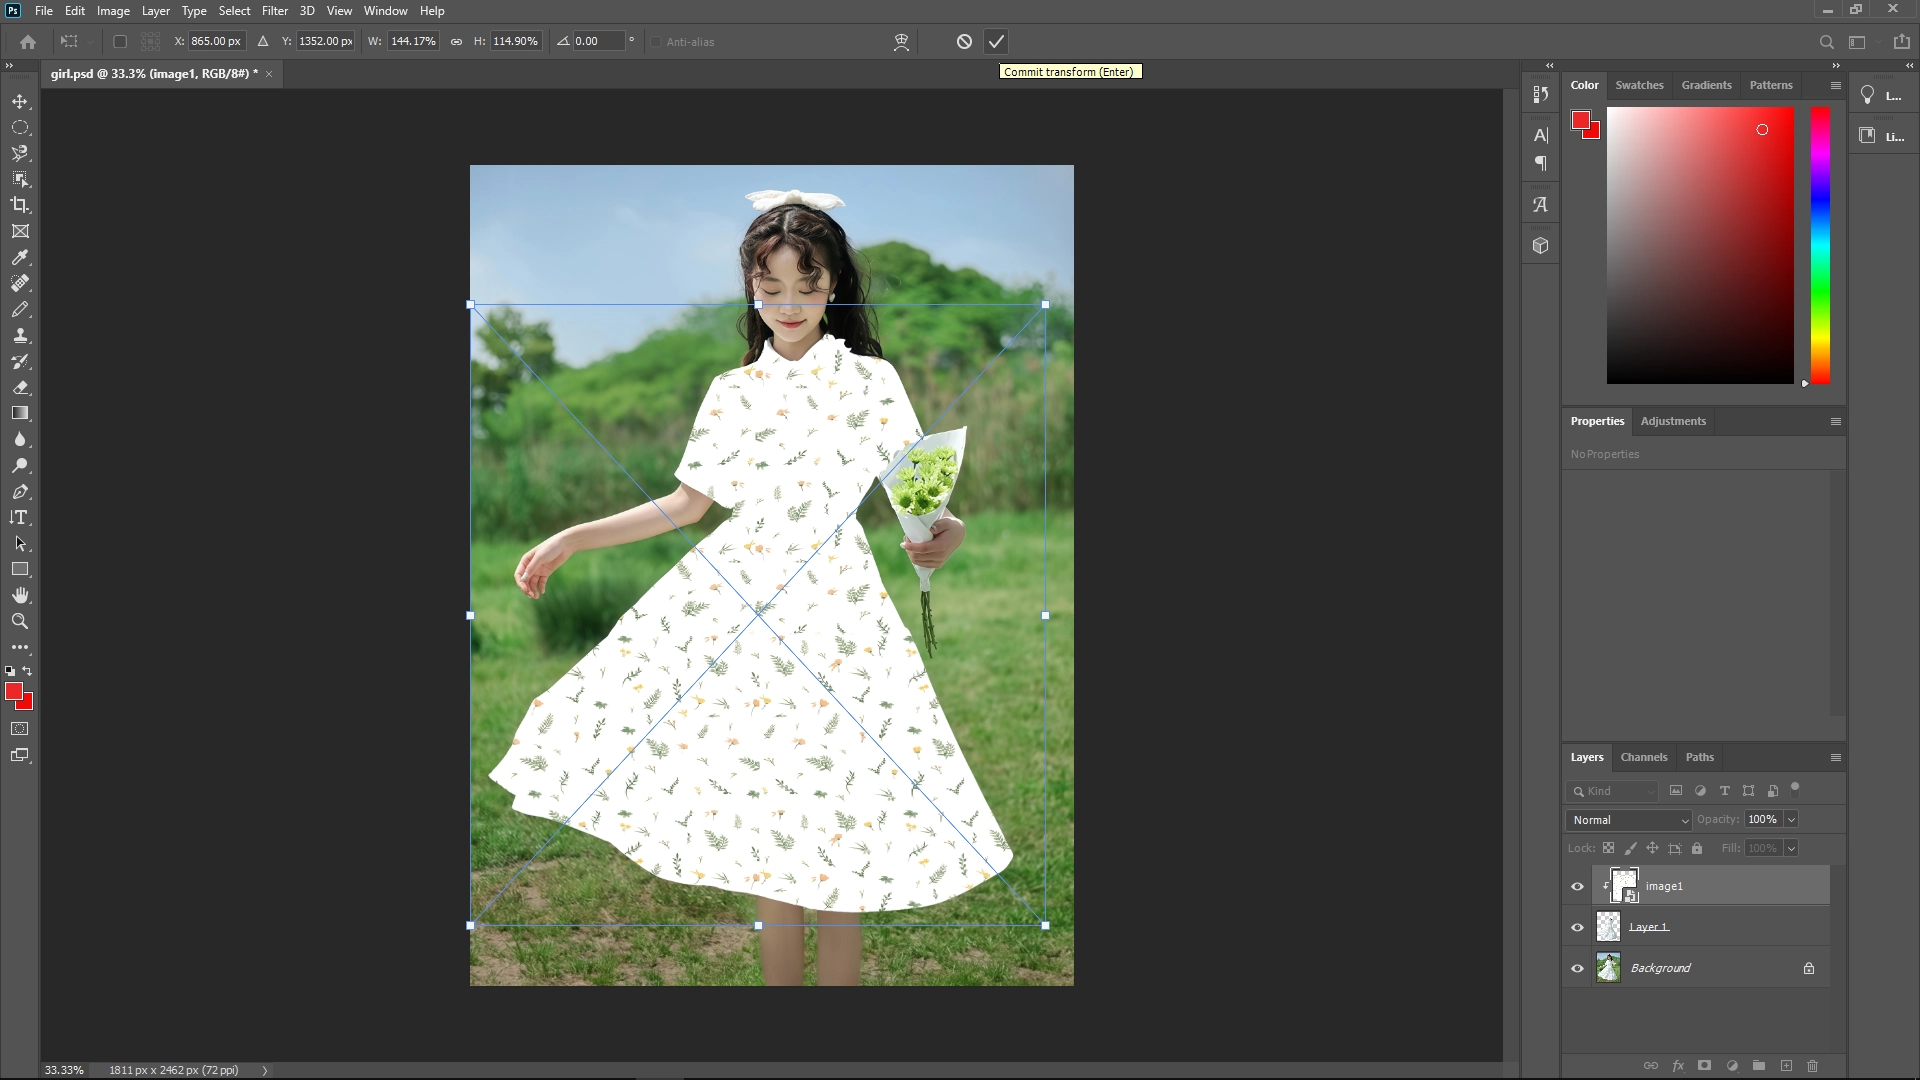
Step 8: Adjust Texture Size and Position
Tool: Use the Transform Tool (Ctrl + T or Cmd + T on Mac).
Action: Resize and reposition the texture to fit your selection appropriately. Consider pressing and holding Shift to maintain aspect ratio.
Step 9: Apply Displacement Filter
Process:
Go to Filter > Distort > Displace.
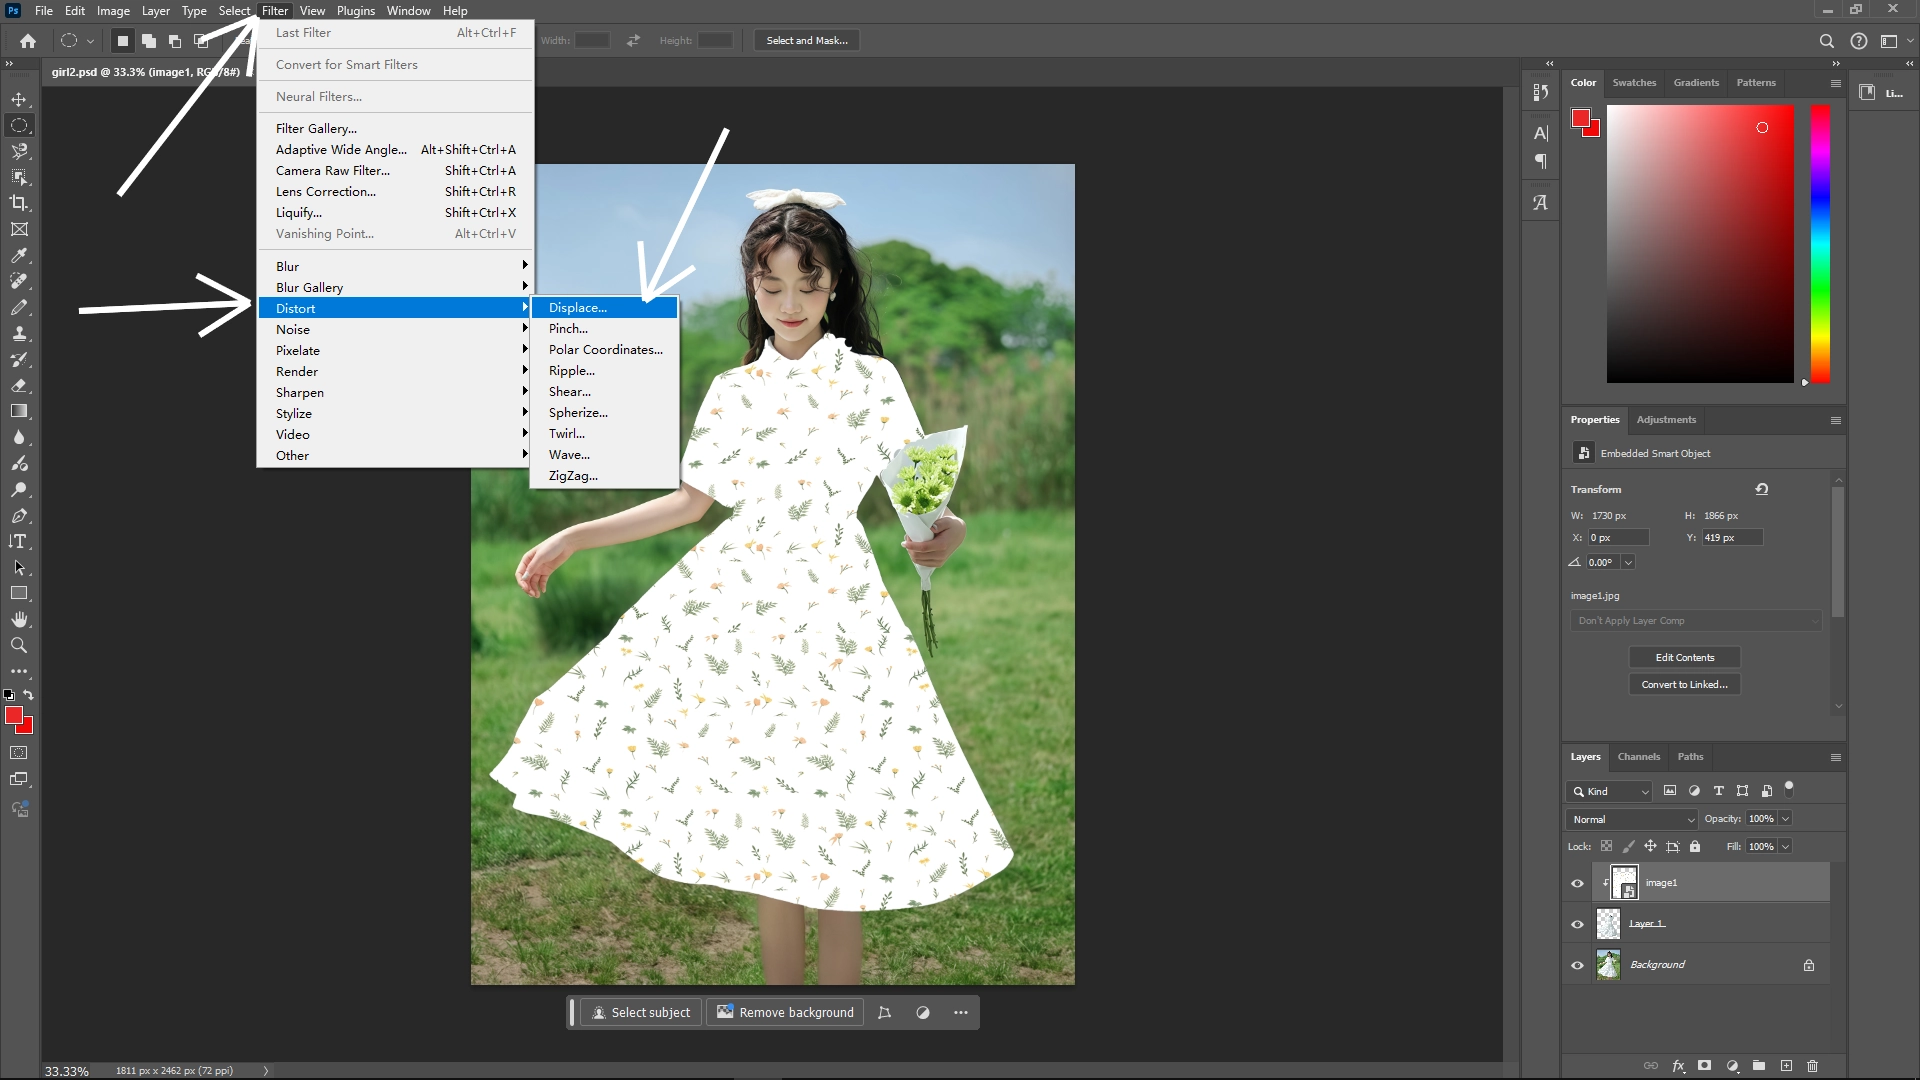
Input horizontal and vertical scale values, generally between 5-20 depending on the necessity; this determines the intensity of distortion.
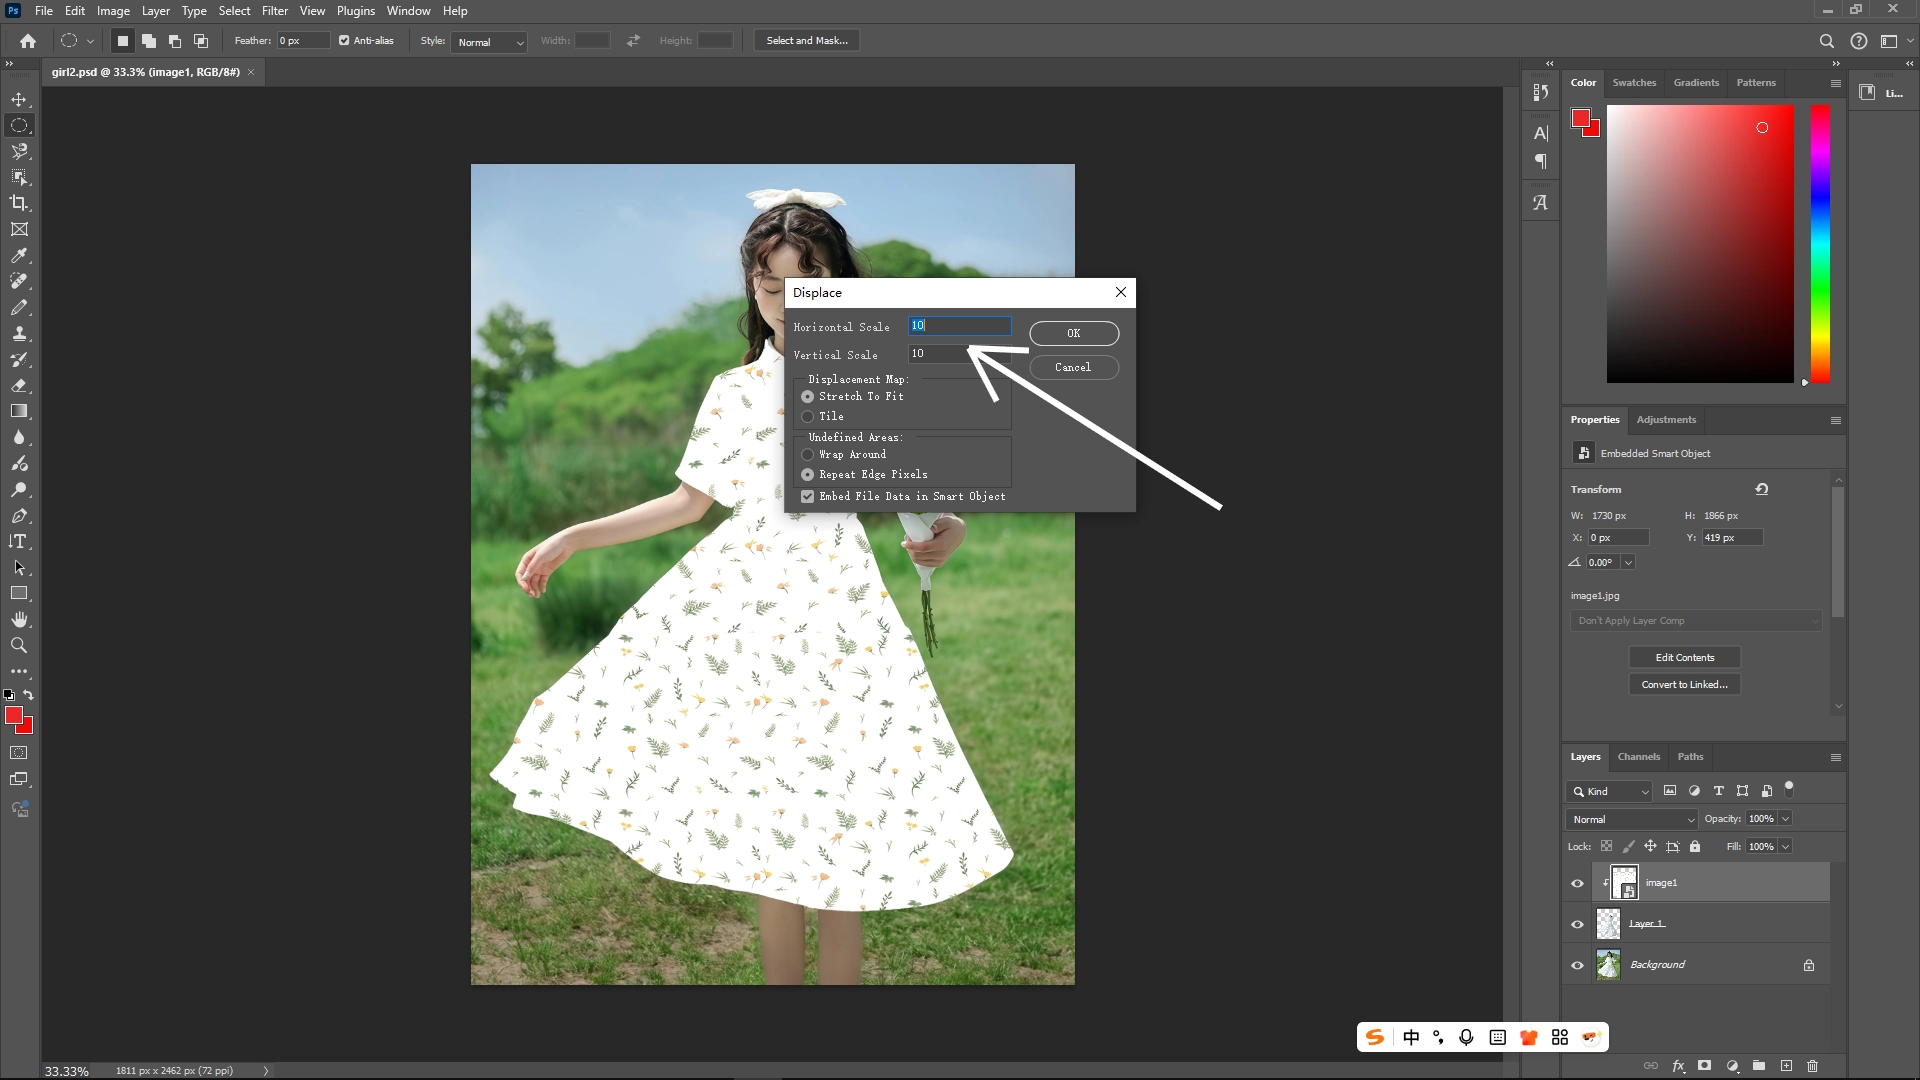
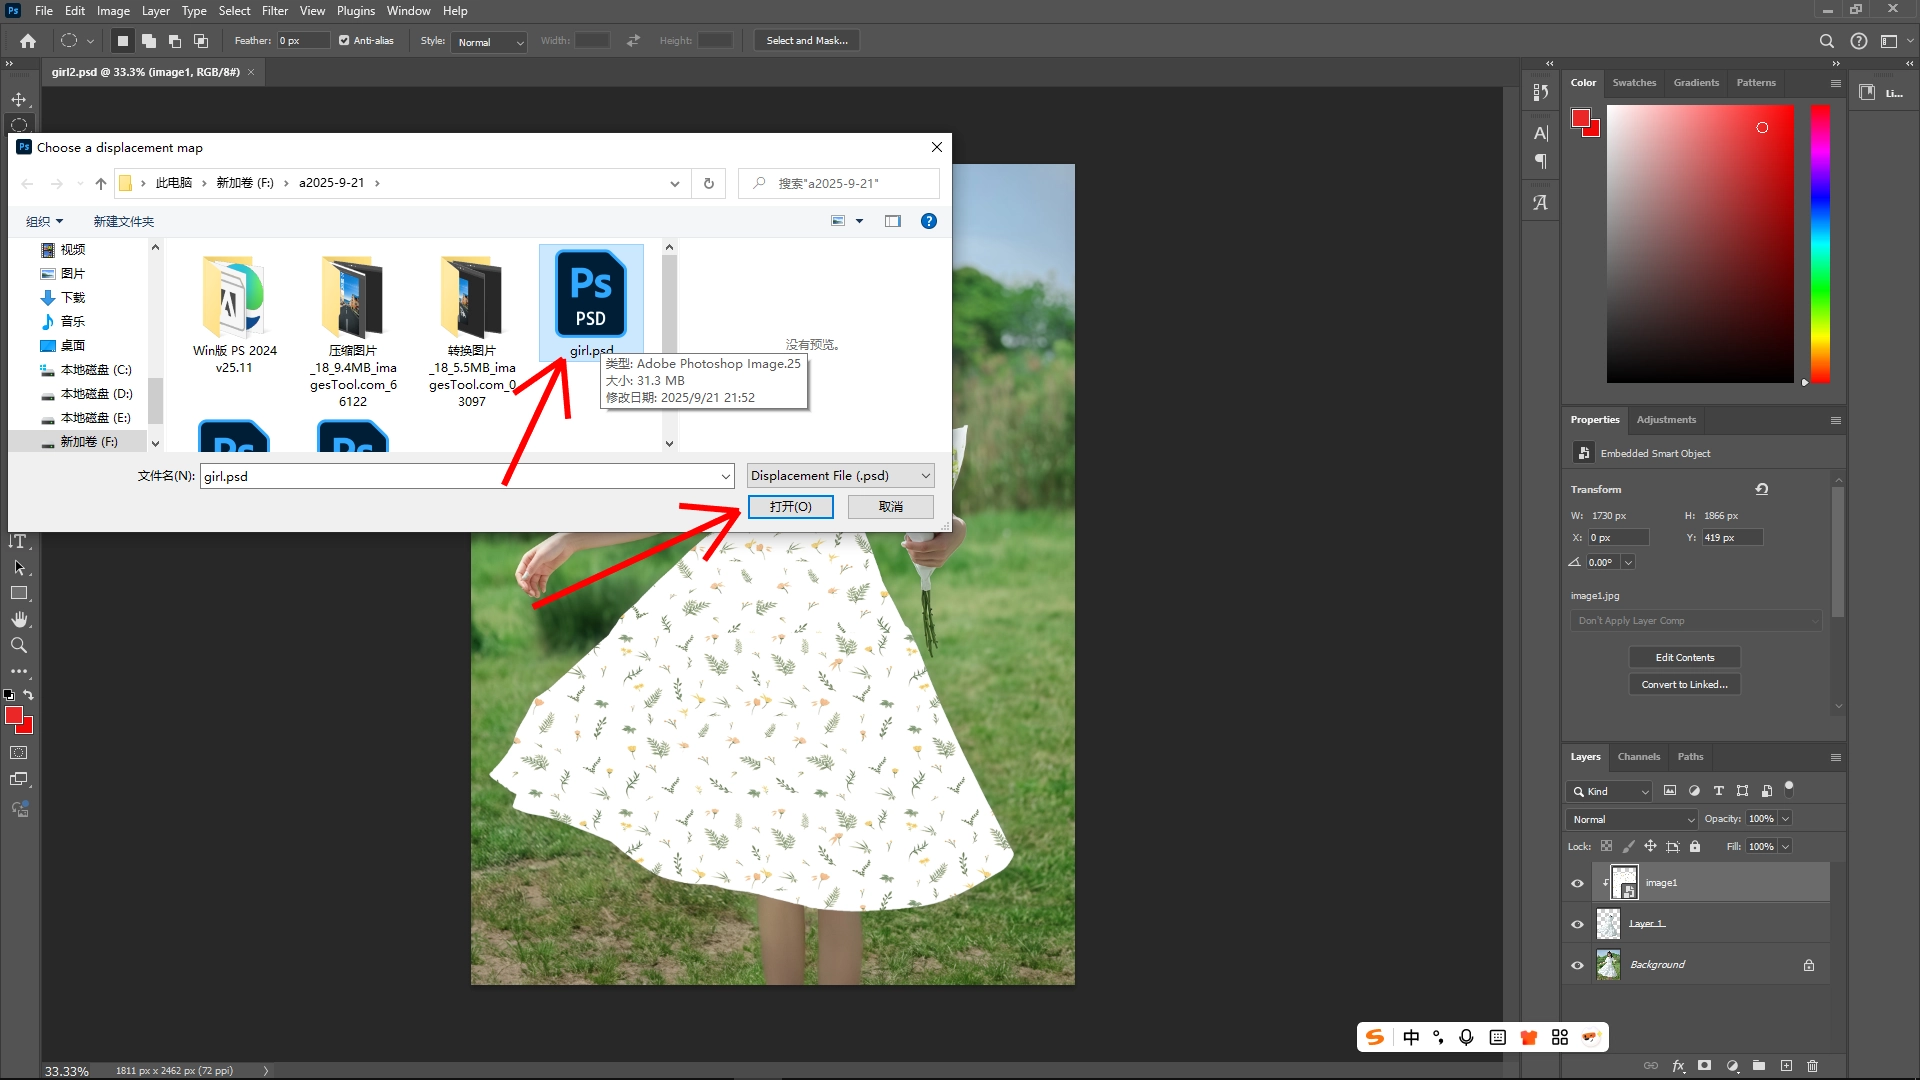
Select the PSD file you saved earlier, which will serve as your displacement map. This manipulates the texture to conform more naturally to the fabric folds and wrinkles.
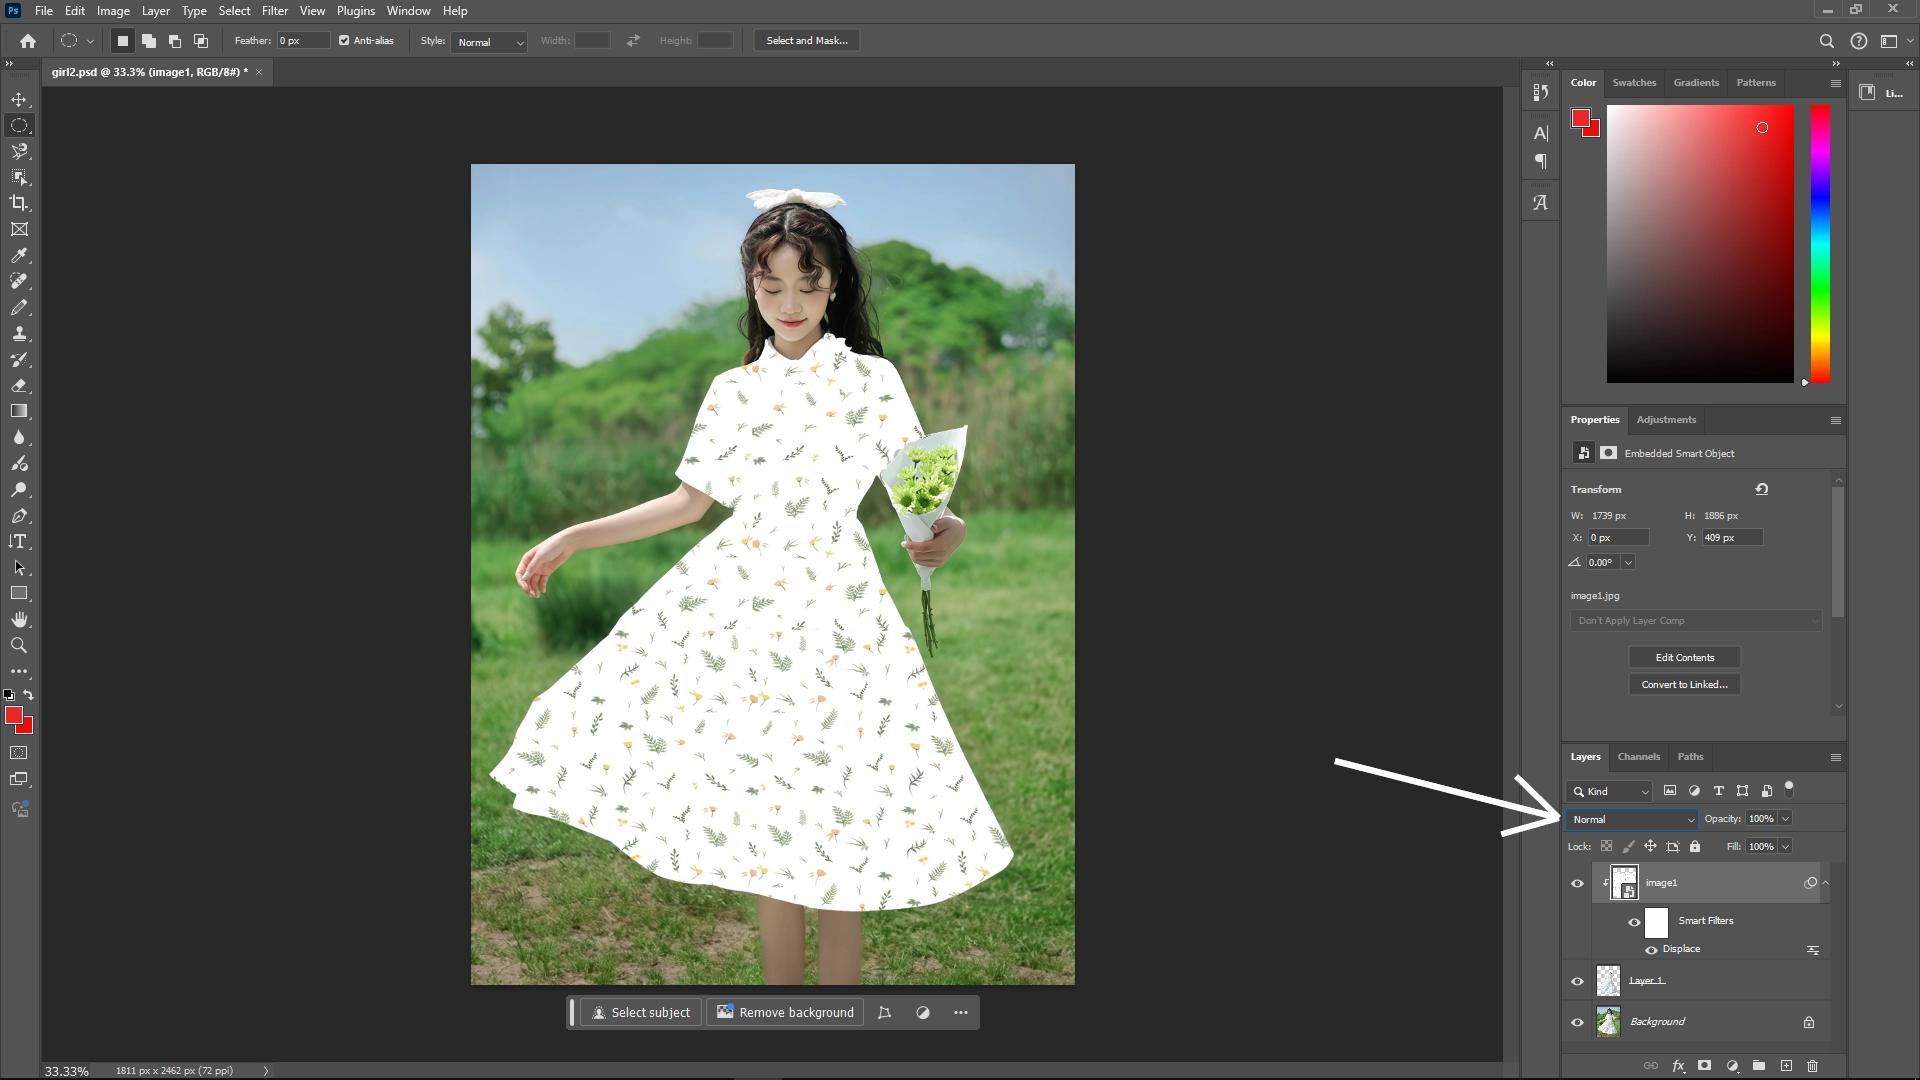
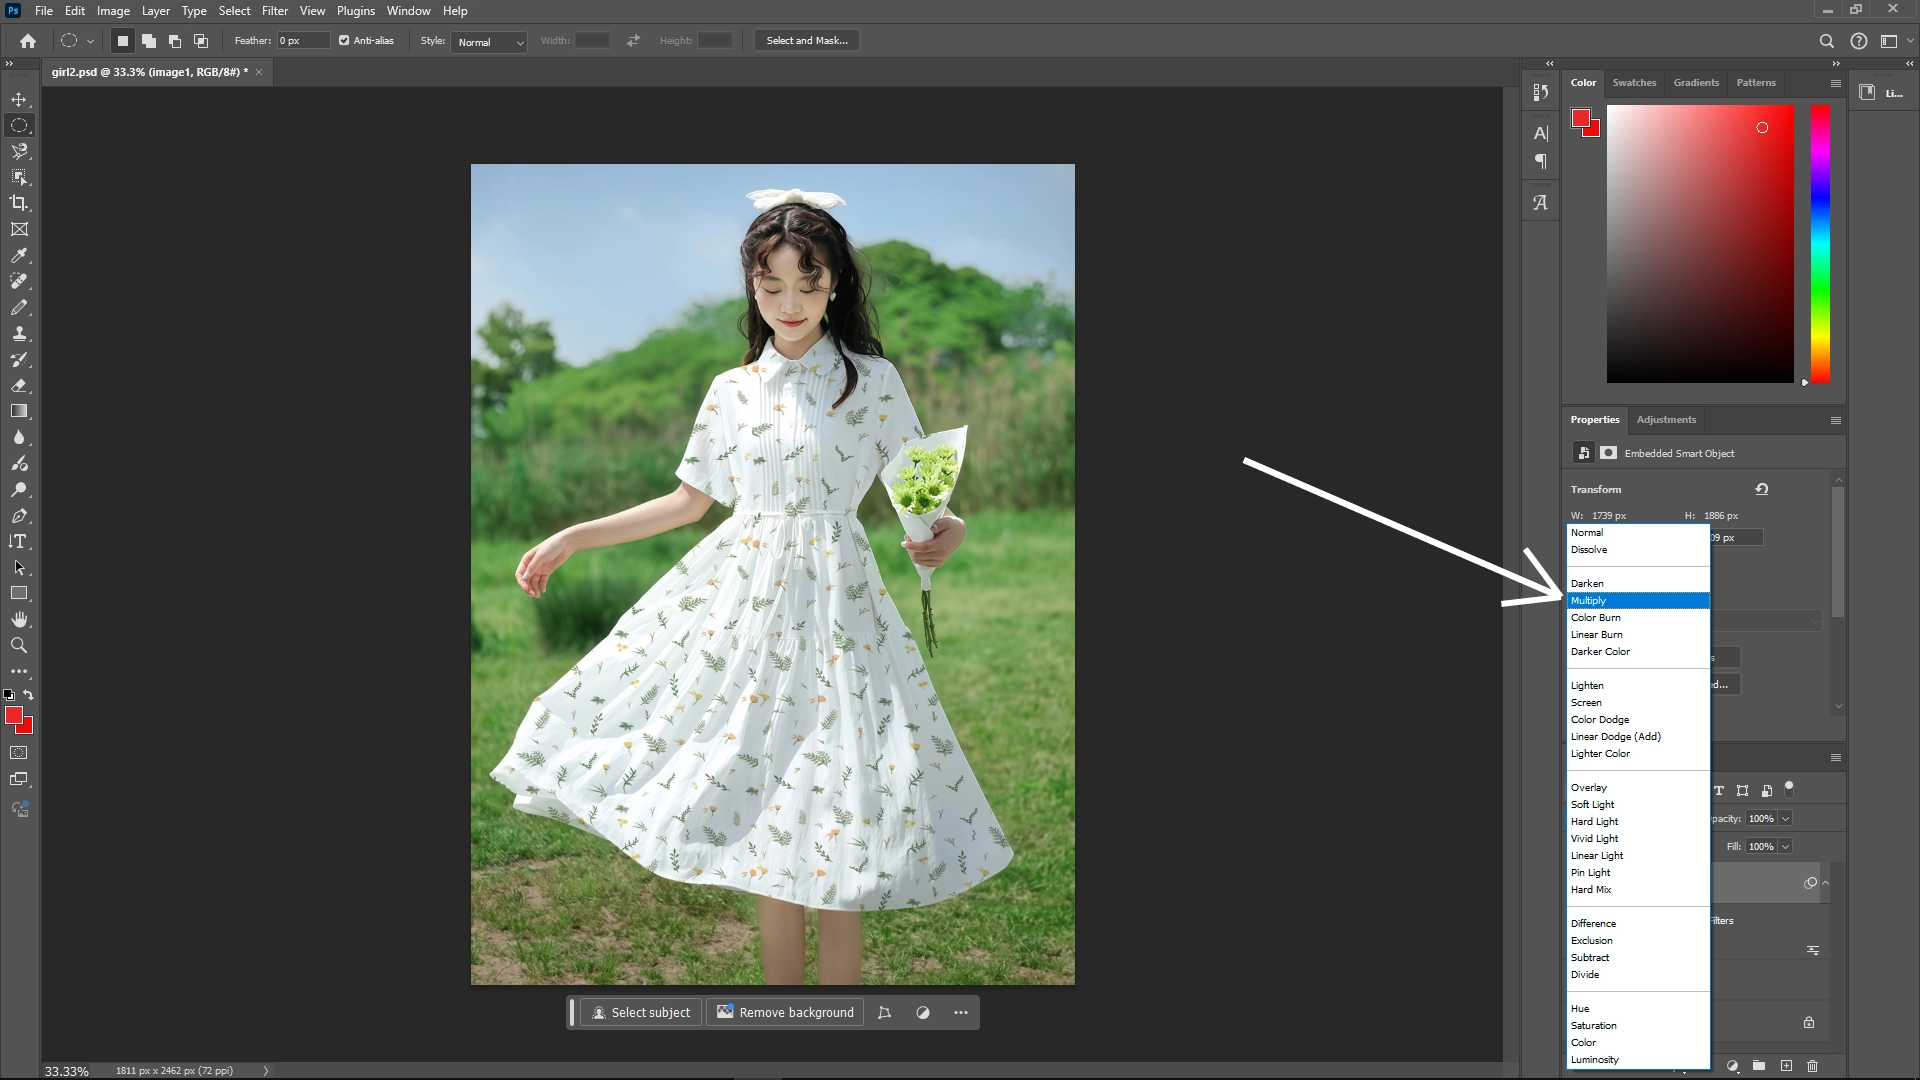
Step 10: Change Blending Mode
Action: Set the texture layer's blending mode to Multiply. This allows the texture to blend organically with the underlying clothing, benefiting from the multiply setting which darkens and mixes colors.
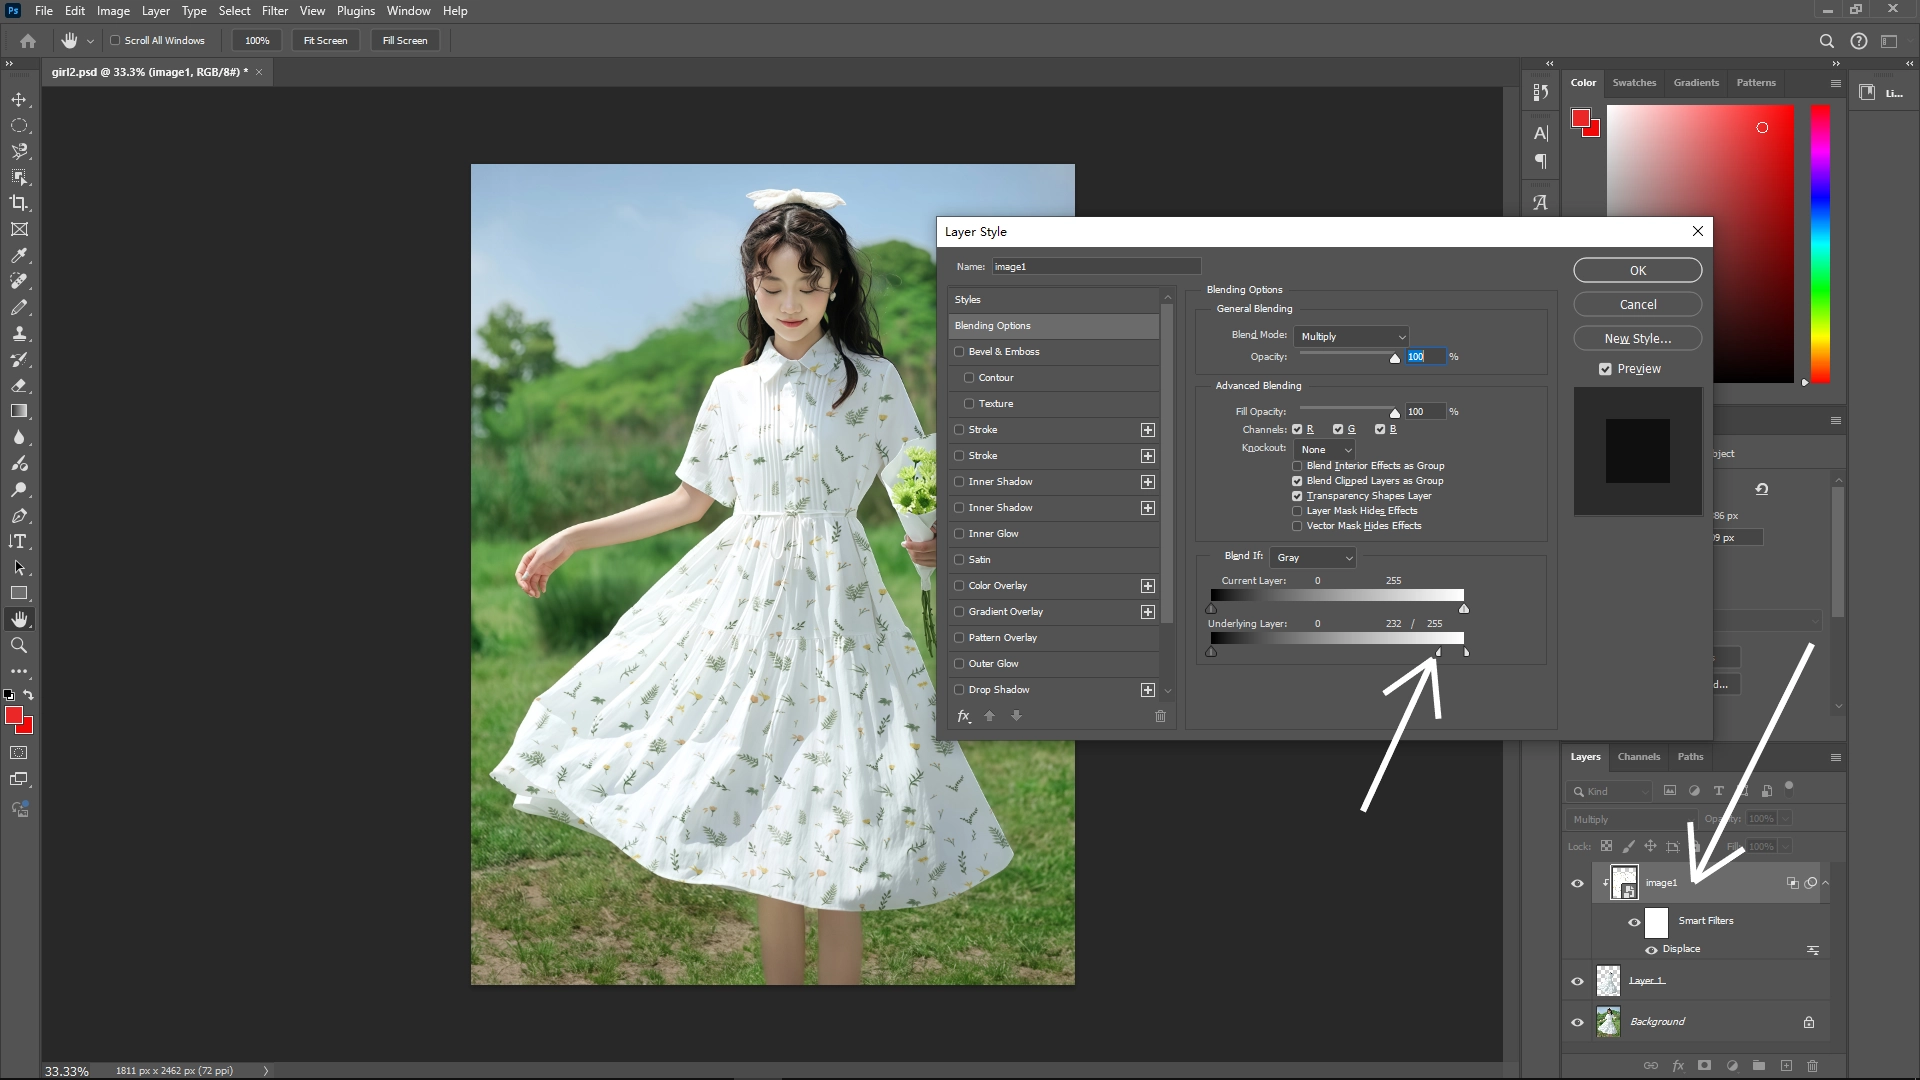
Step 11: Fine-Tune Layer Integration
Process:
Double-click the texture layer to bring up the Layer Styles menu.
Under Blending Options, find the “Blend If” section. Use the slider labeled “Underlying Layer”.
Hold Alt (Option on Mac) and drag the lower slider to split it, adjusting shadows and highlights subtly for more realistic integration.
Final Tips:
Review: After completing all steps, evaluate the result and make any necessary adjustments to improve visual fidelity, like tweaking opacity or further adjusting layer styles.
Experiment: Don't hesitate to try different displacement map settings or blending modes to achieve your desired effect.
By following these steps, you can effectively integrate textures onto clothing in your images, enhancing realism and artistic quality.
Write Reply