Remove Acne in Photoshop: Step-by-Step Skin Retouching Guide
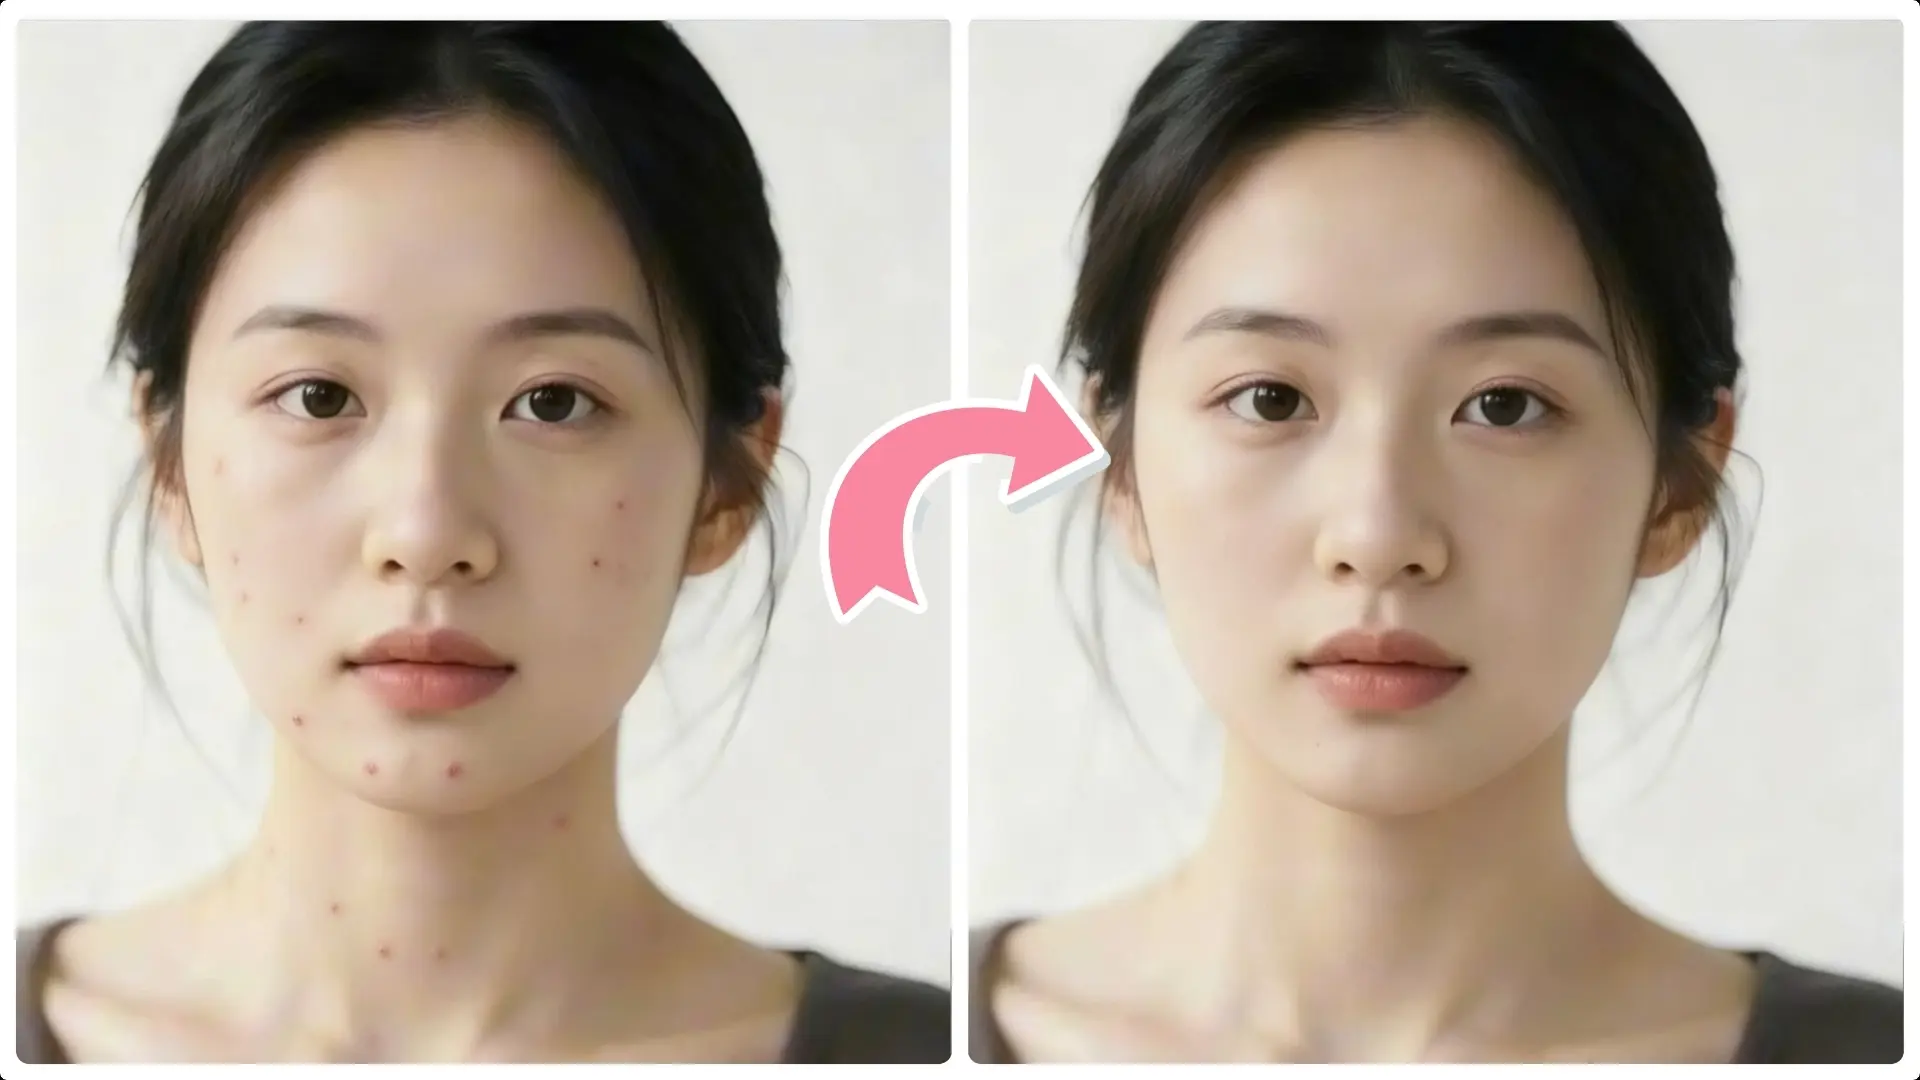
Removing acne and blemishes while preserving natural skin texture is a common challenge in photo retouching.
In this tutorial, you'll learn a professional, non-destructive Photoshop technique that uses the Dust & Scratches filter combined with the High Pass filter to smooth skin tones and maintain fine details.
By following these simple steps, you can achieve flawless, natural-looking skin without over-blurring or losing important texture — perfect for portraits and close-ups.
Step 1: Duplicate the layer twice
Select the original layer in the Layers panel, then press Ctrl + J twice to create two duplicate layers.

Tip: Always keep your original layer untouched for backup purposes.
Step 2: Hide the top layer
Click the eye icon next to the top layer to hide it, so you can focus on the bottom layer.

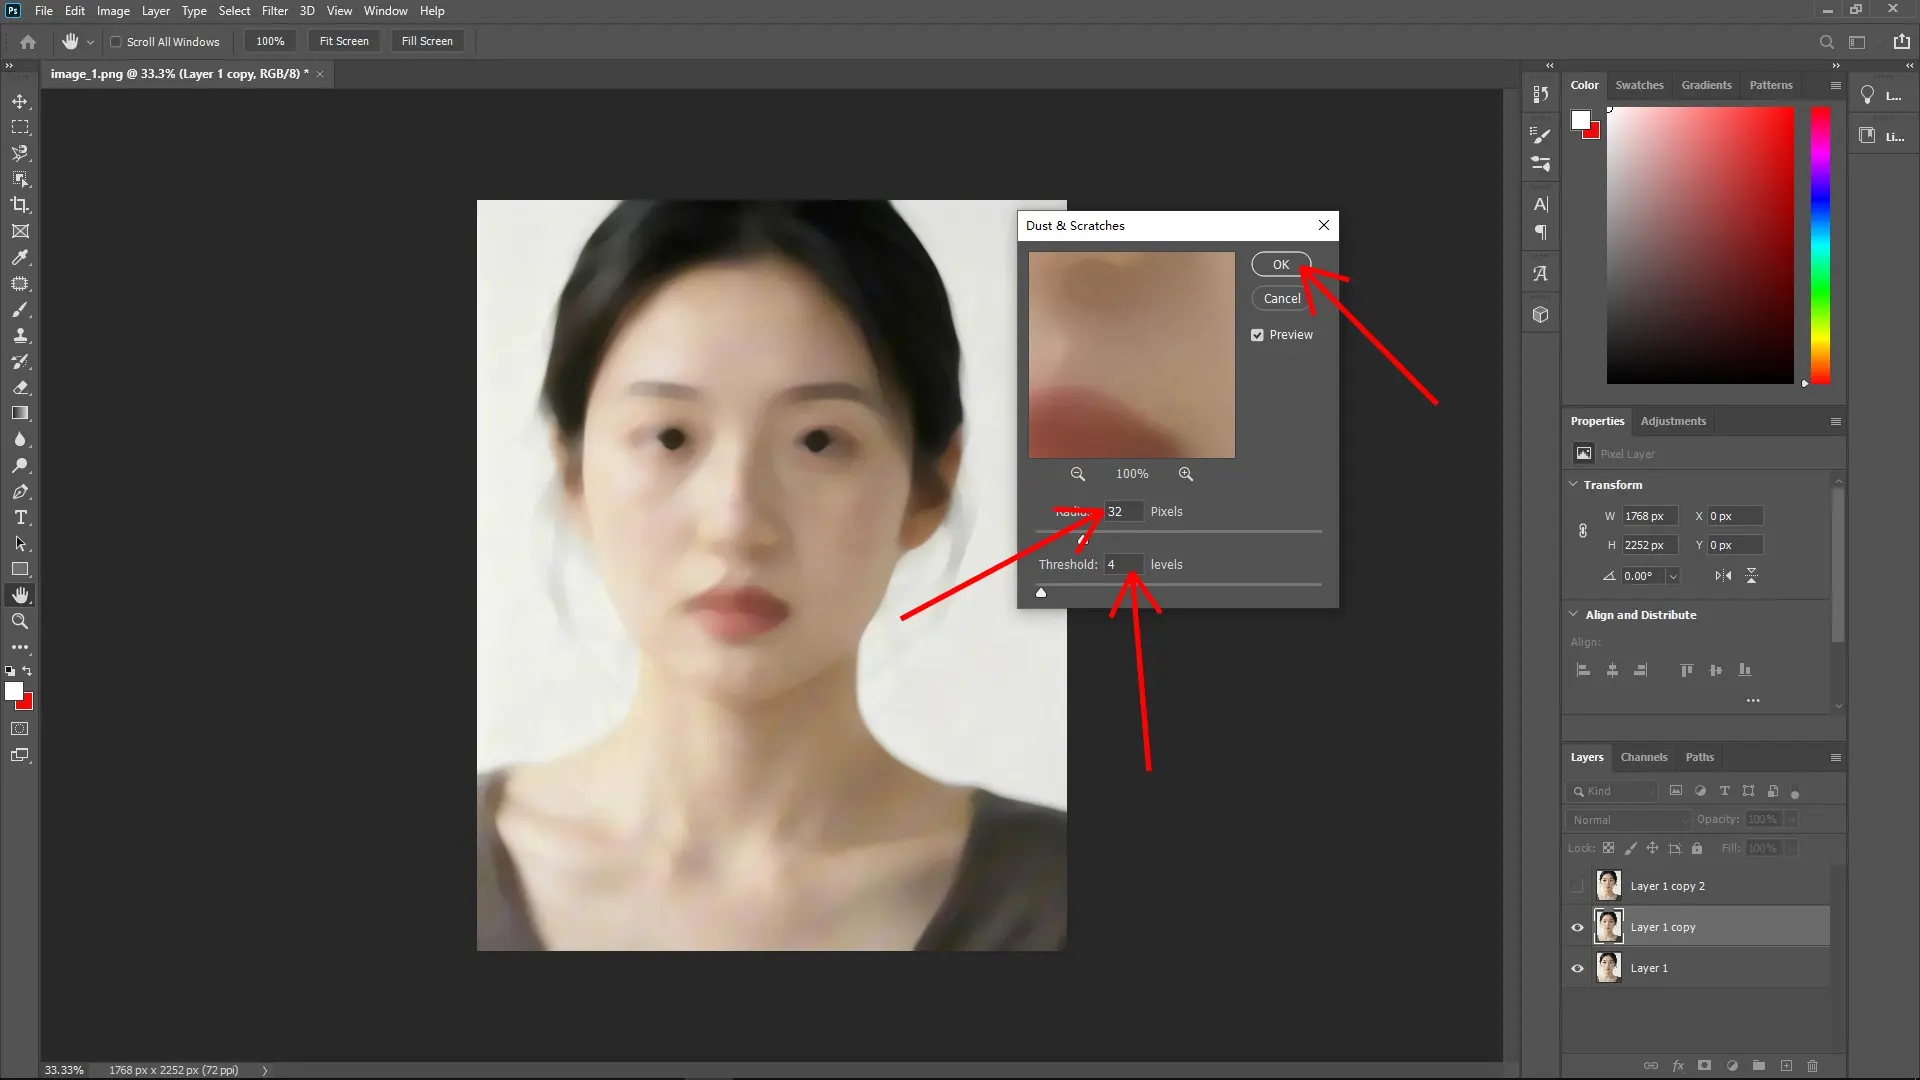
Step 3: Apply Dust & Scratches to the bottom layer
With the bottom layer selected, go to the menu bar and choose Filter > Noise > Dust & Scratches.
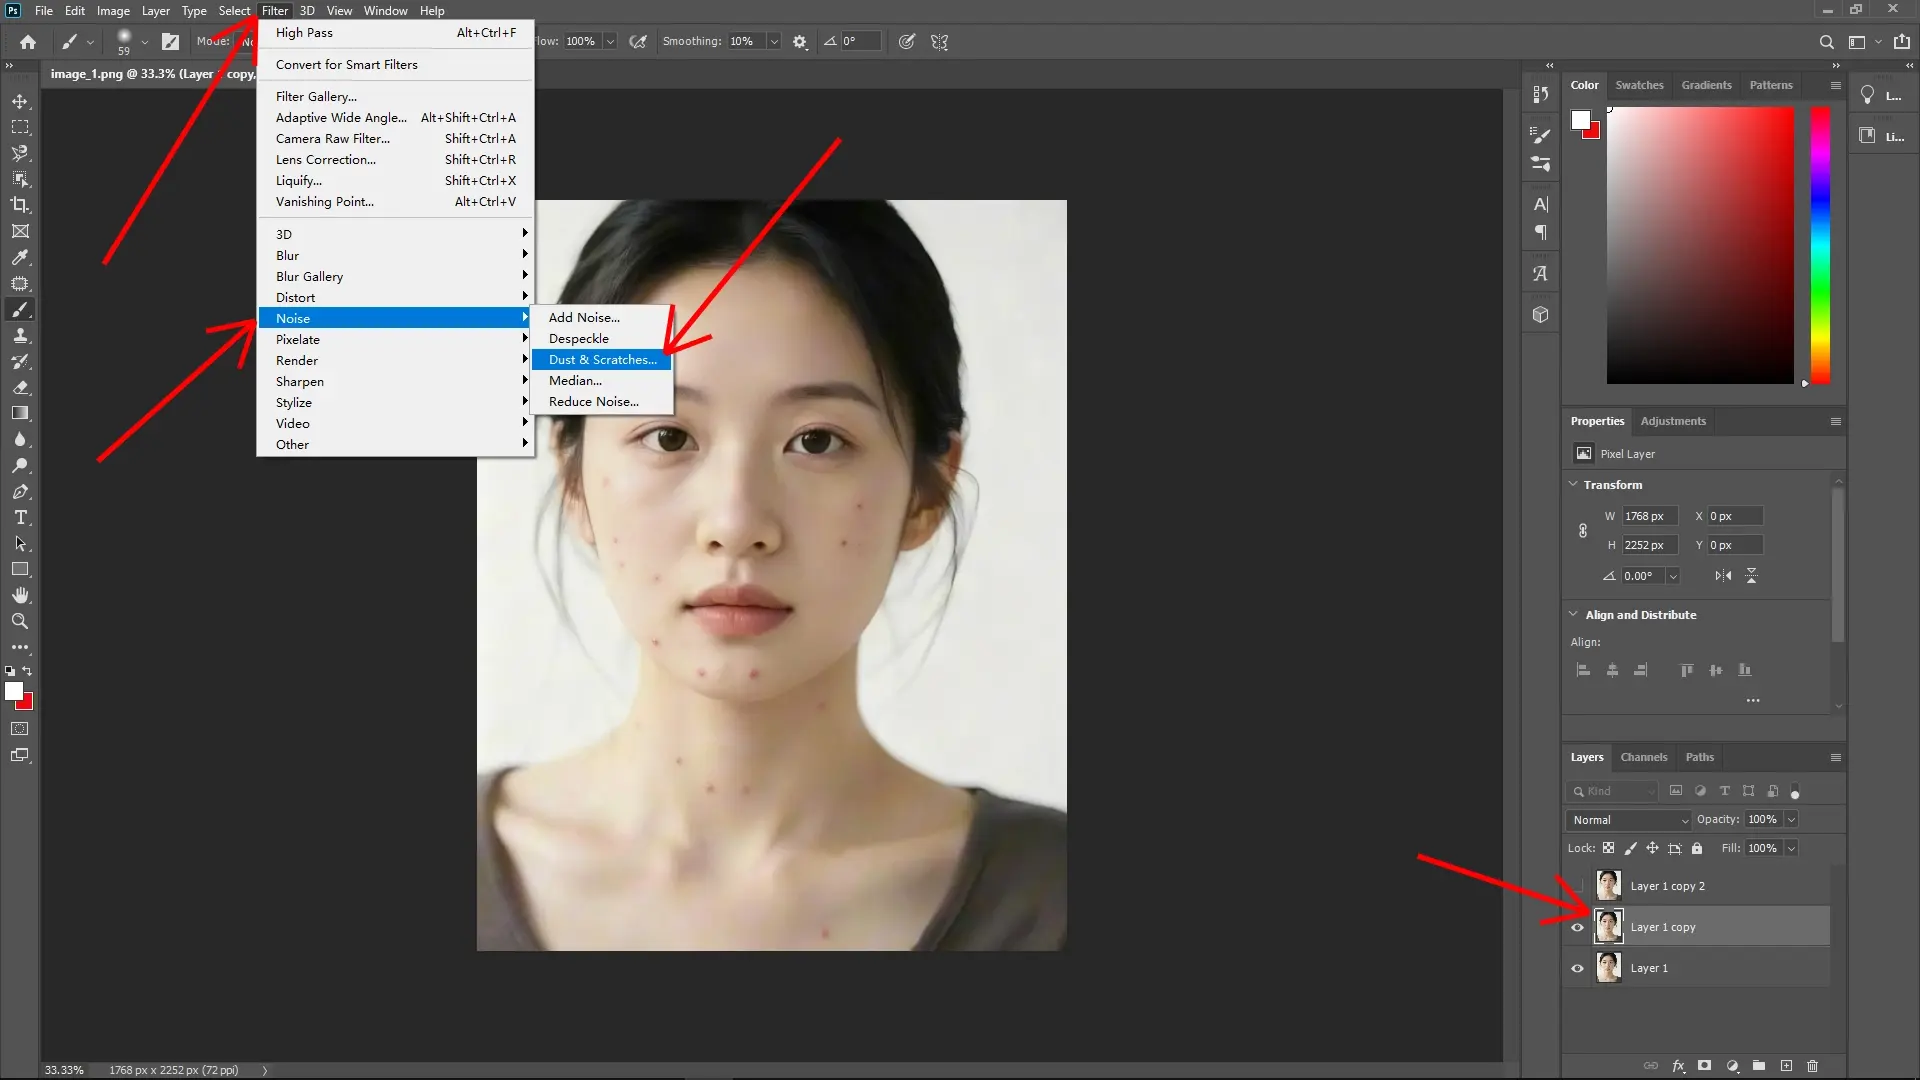
Adjust the Radius slider until the acne spots disappear, but do not go too far—maintain some detail in the surrounding skin.
Radius: This controls the size of the area being averaged or blurred. Increase it gradually until the acne spots just disappear.
Adjust the Threshold slider to refine the effect. Lower values will make the effect more sensitive, preserving more skin texture. A balance between Radius and Threshold is key.
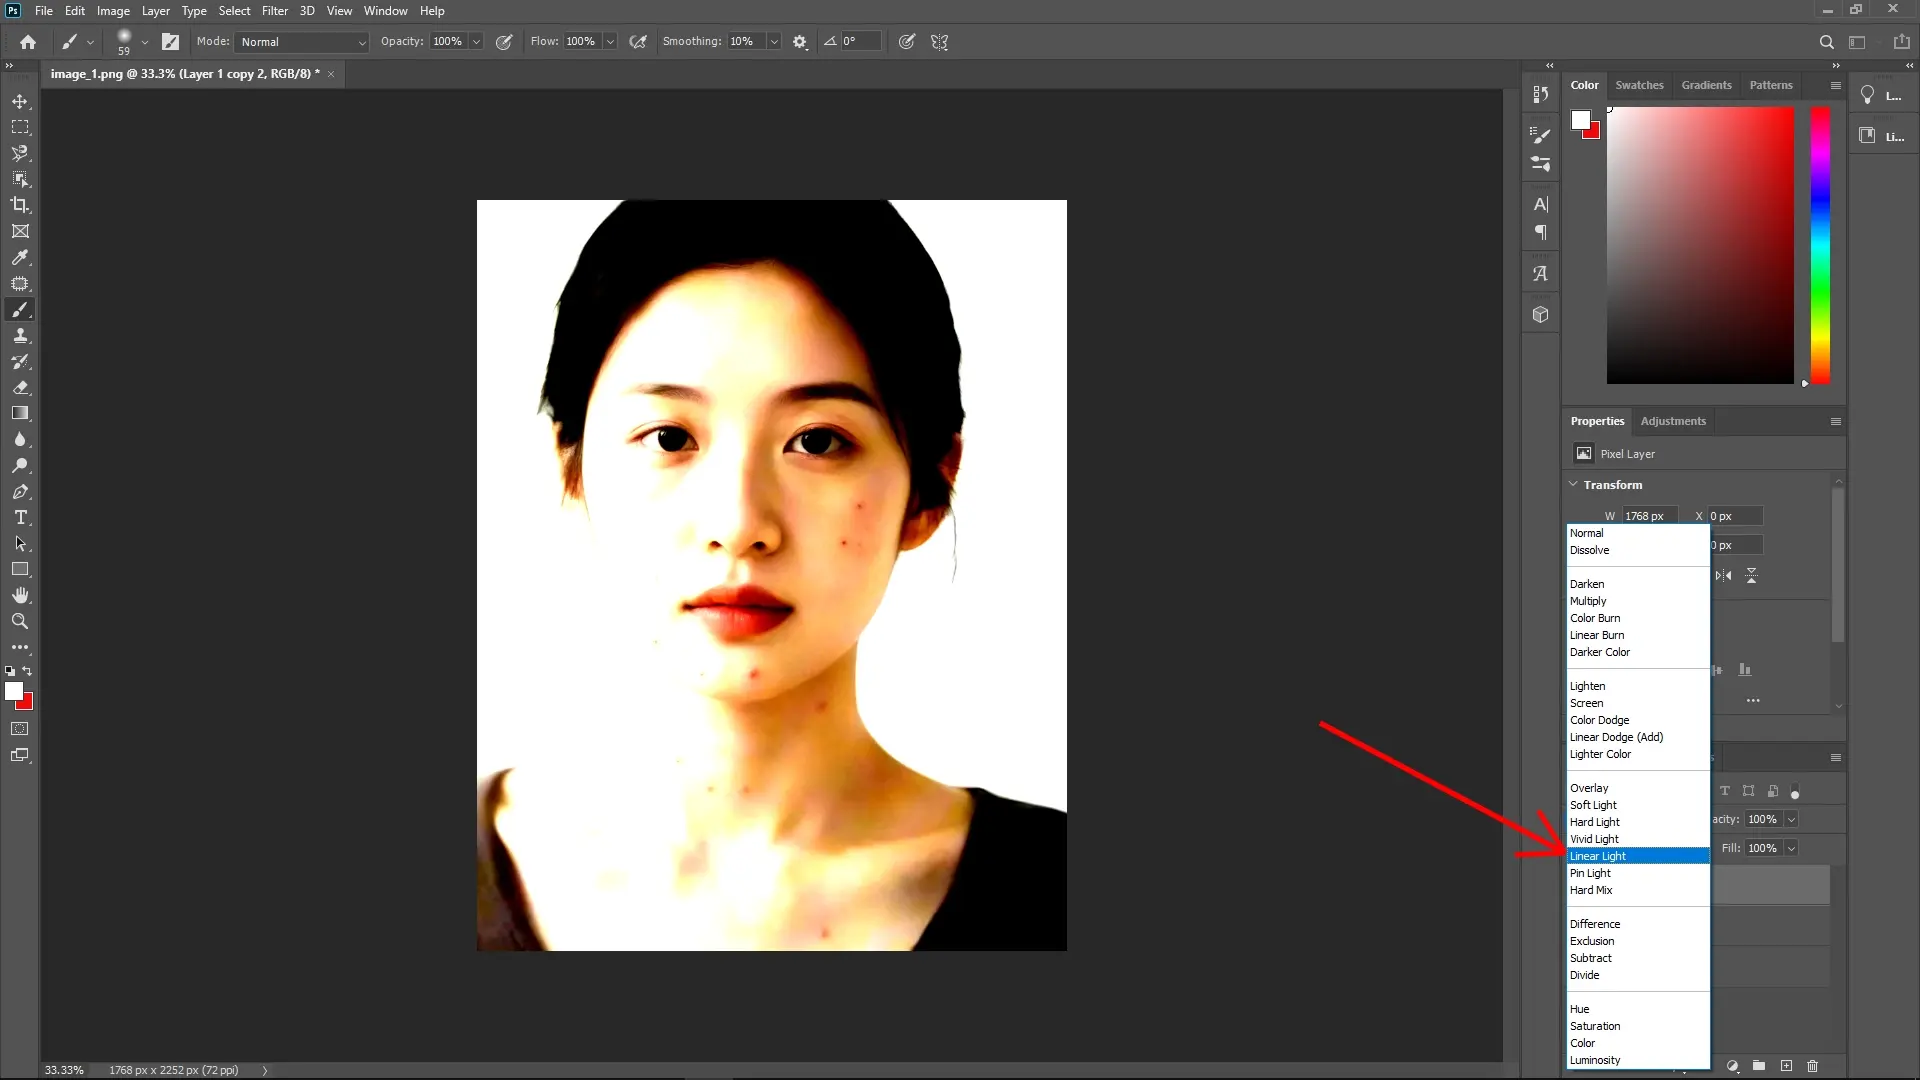
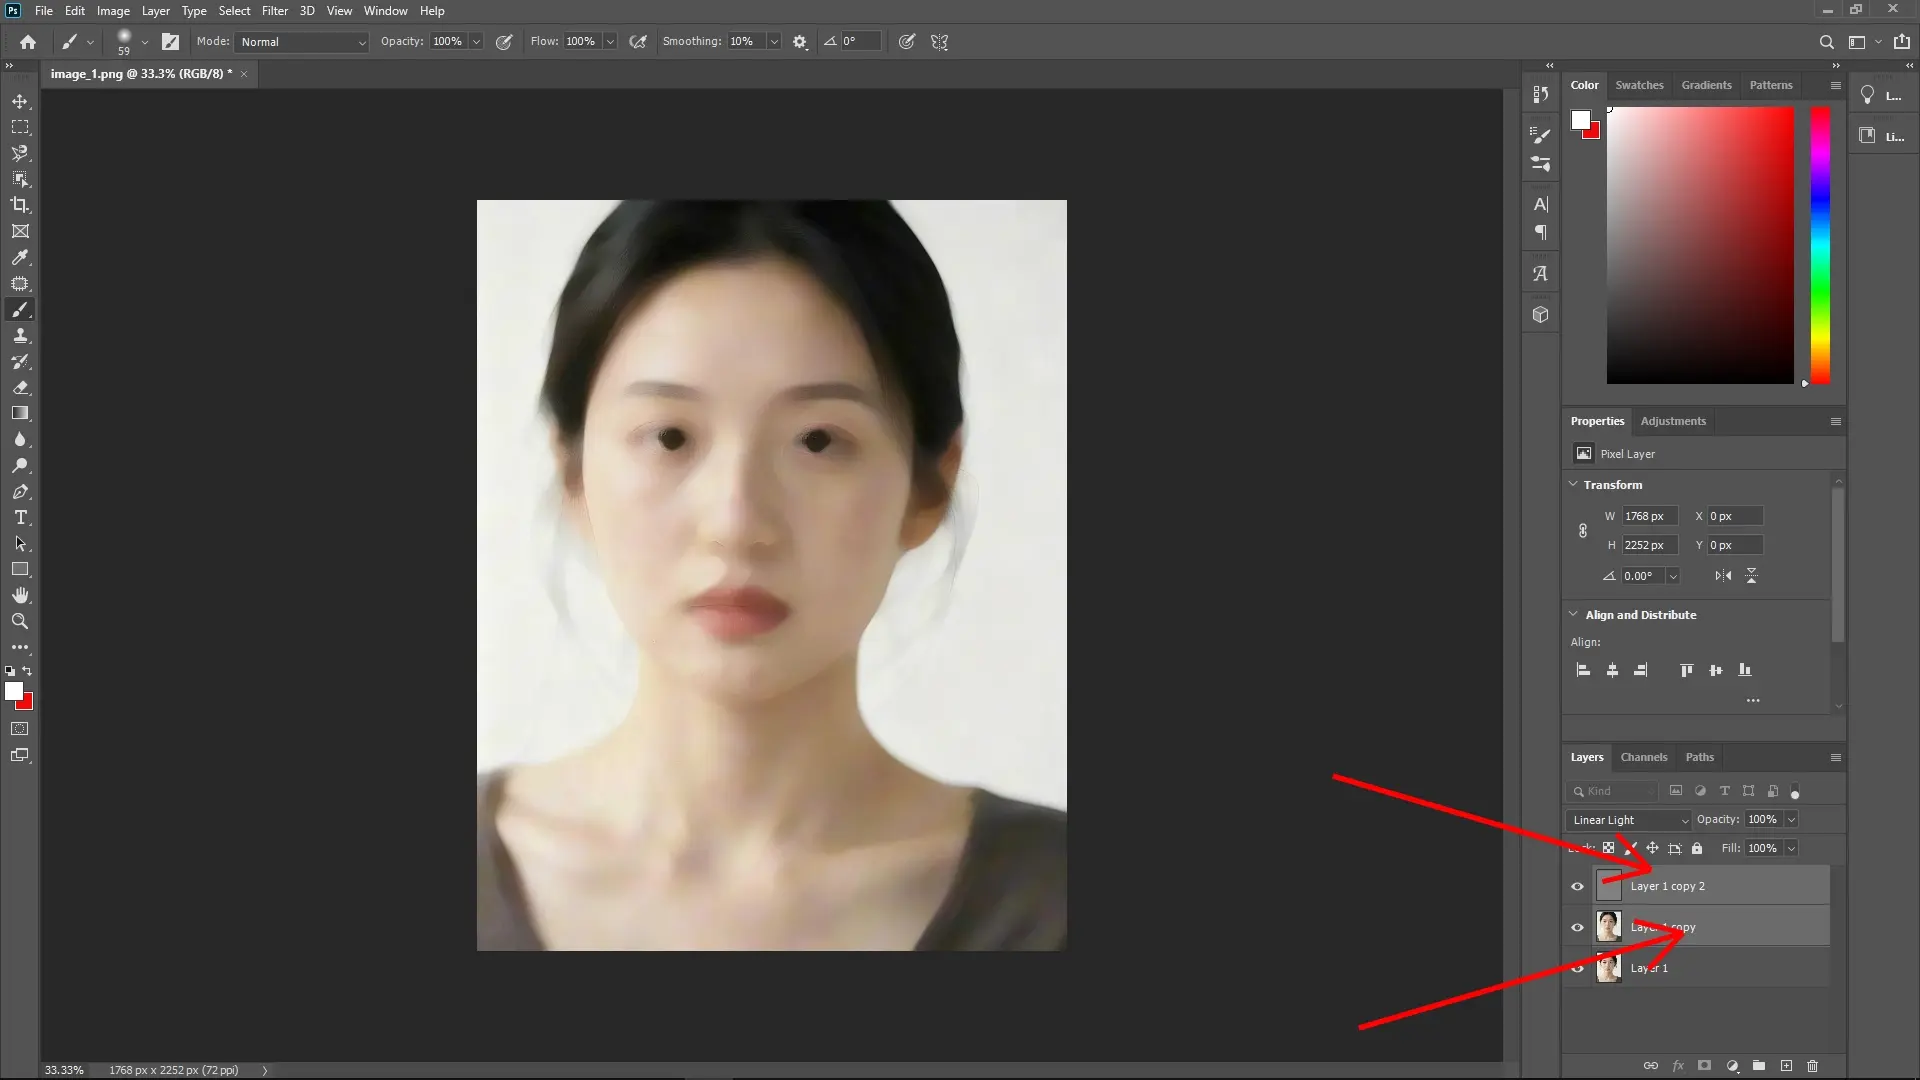
Step 4: Bring back the top layer
Unhide the top layer by clicking the eye icon again.

Select the top layer, then change its Blending Mode in the Layers panel to Linear Light. This will restore the sharpness and texture.
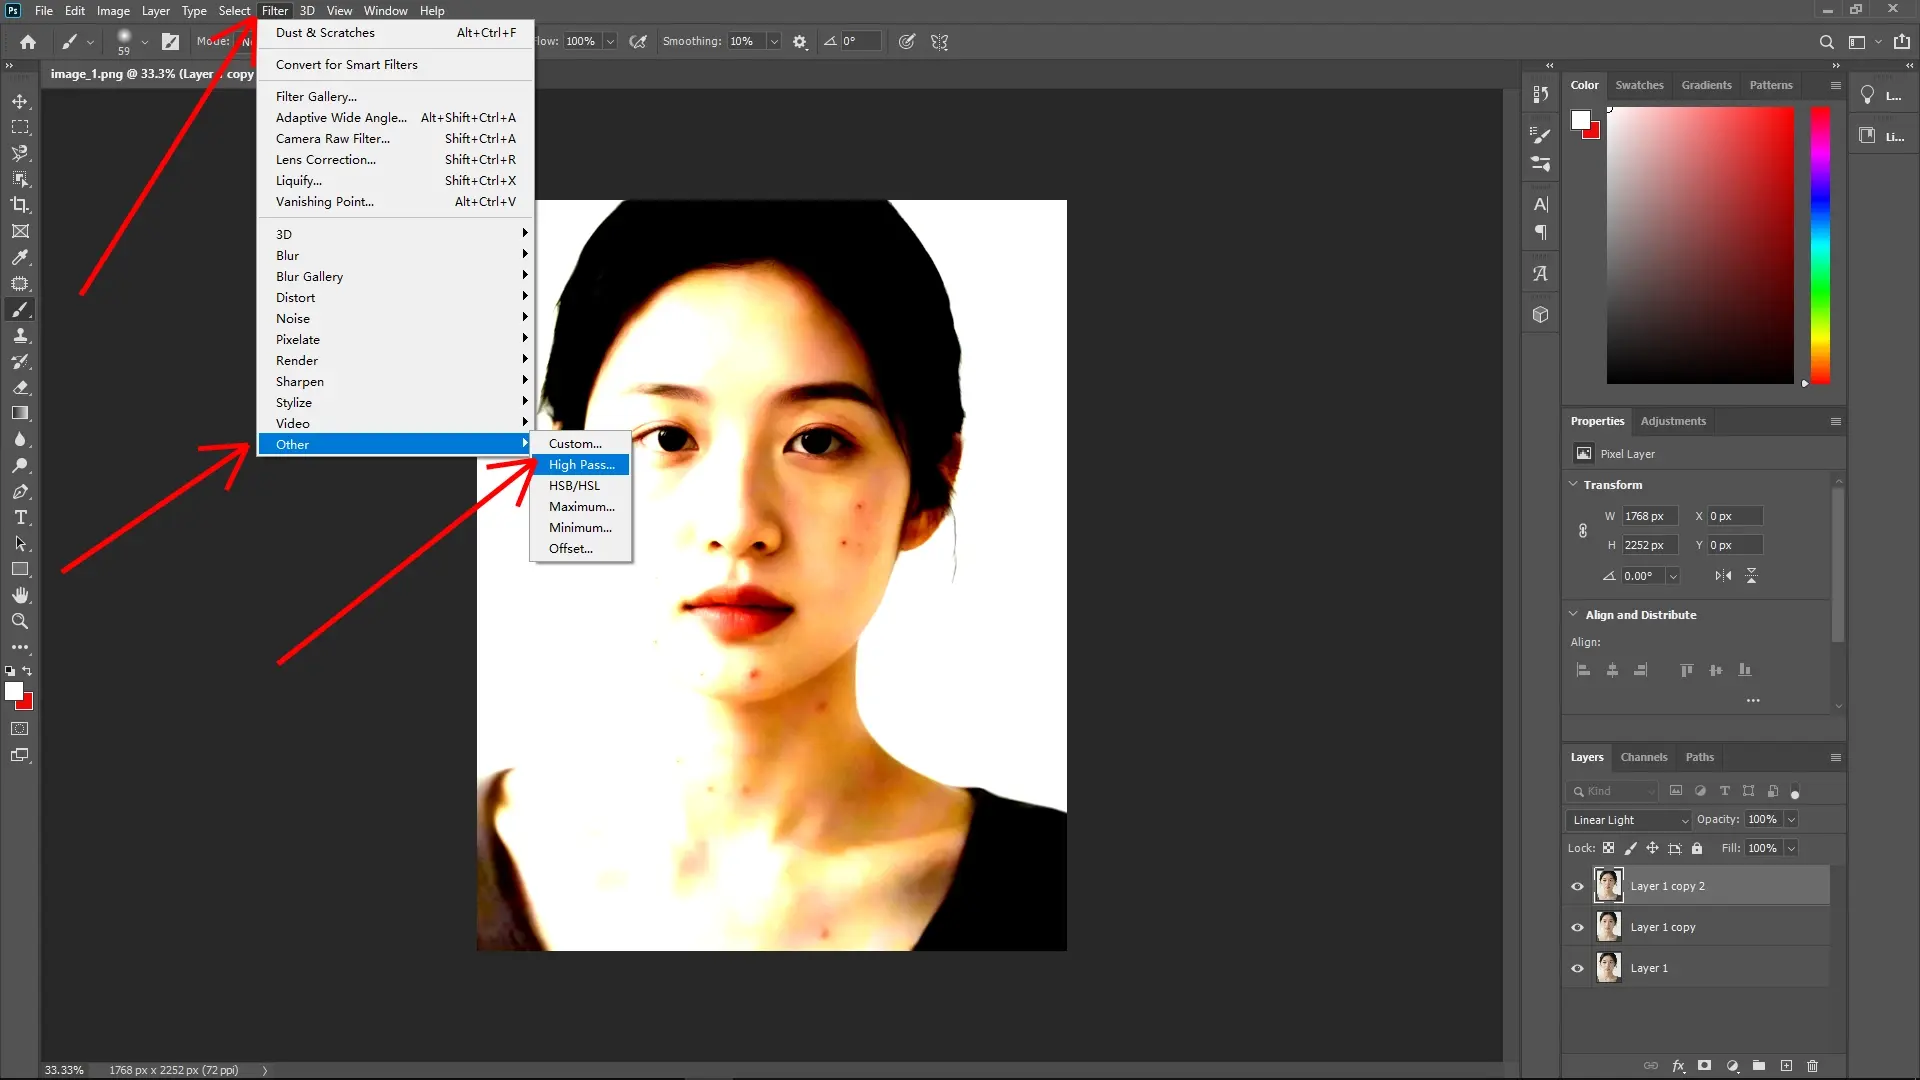
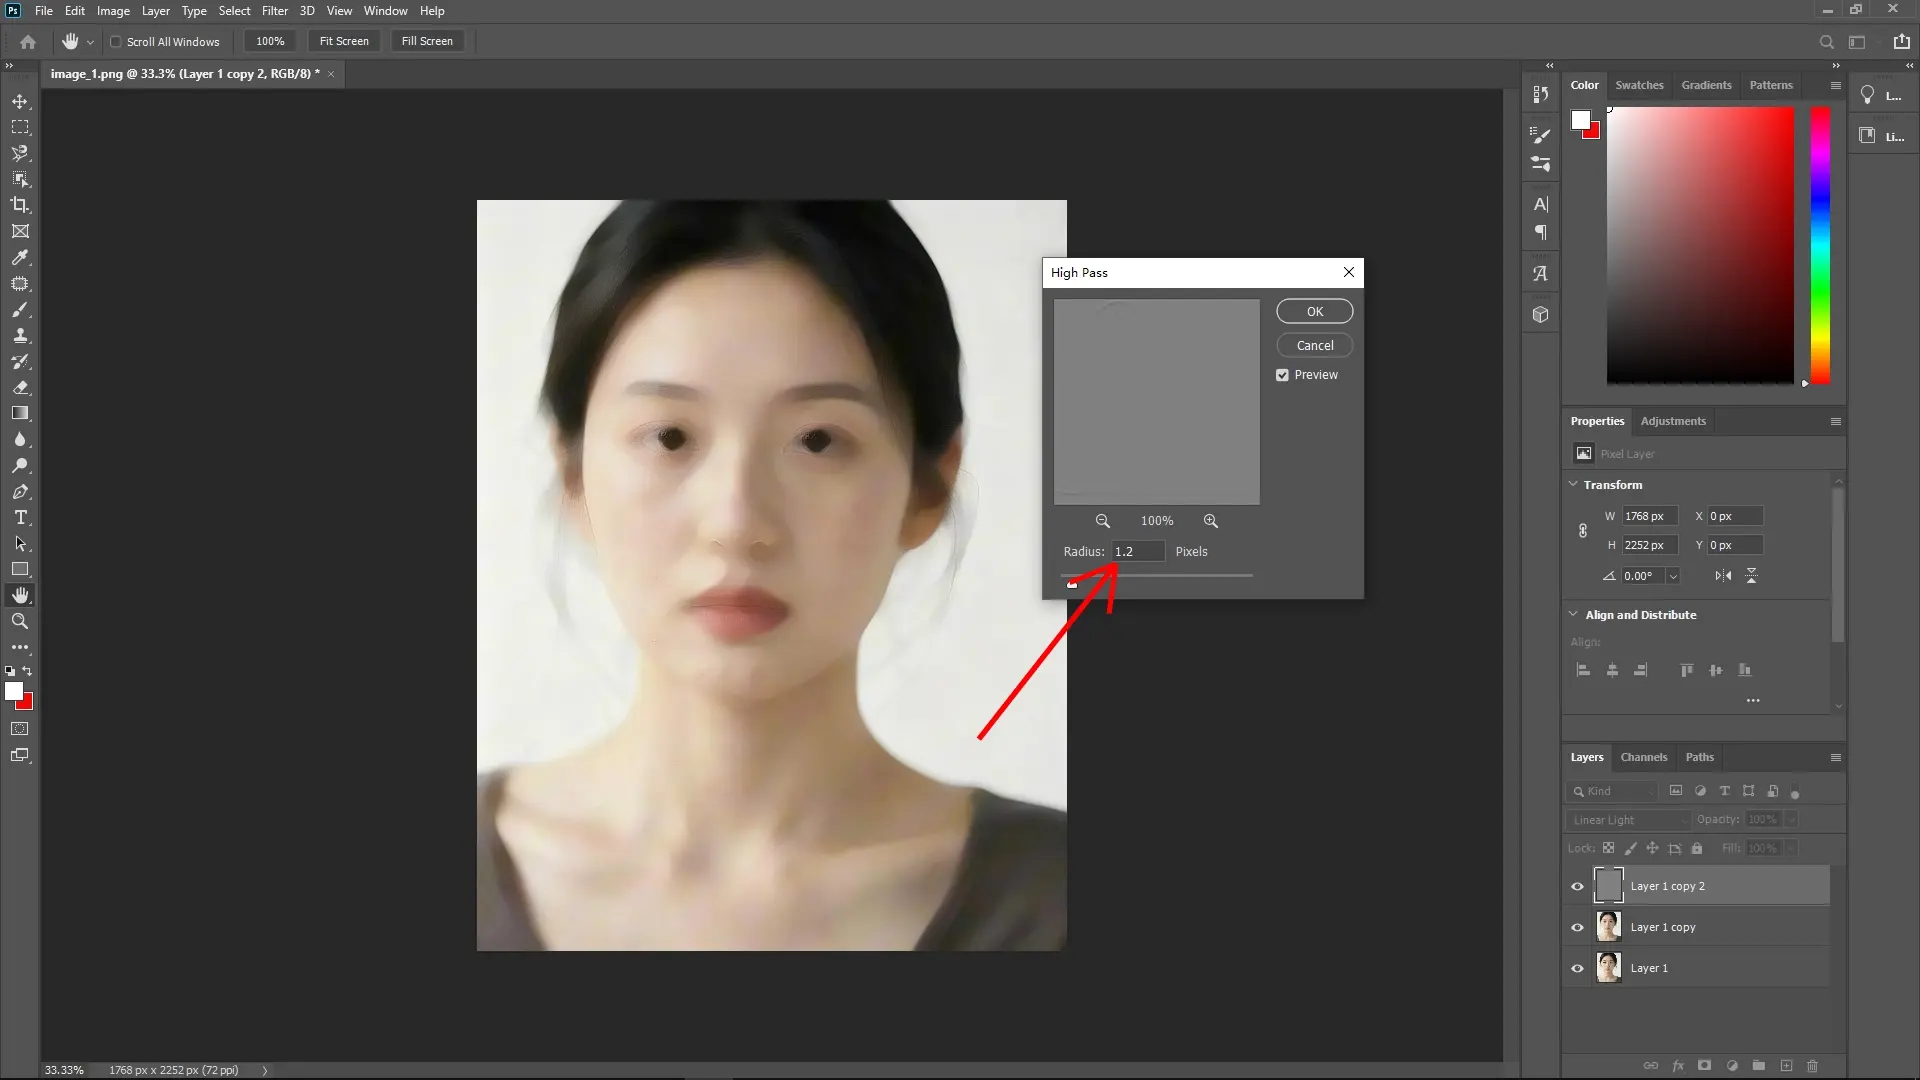
Step 5: Apply High Pass filter on the top layer
With the top layer selected, go to Filter > Other > High Pass.
Adjust the Radius to control how much detail is kept. Use a small value (e.g., 1–2 pixels) for finer texture. Larger values may over-enhance the details.
Step 6: Group the layers
Select both the top and bottom layers (click on the first layer, then hold Shift and click the second).
Press Ctrl + G to group them into a folder.

Step 7: Add a black layer mask to the group
Hold Alt (or Option on Mac) and click the Add Layer Mask icon at the bottom of the Layers panel. This will create a completely black mask, hiding the effect.

Step 8: Reveal the adjustments with a white brush
Select the Brush Tool (shortcut: B) and set your foreground color to white.
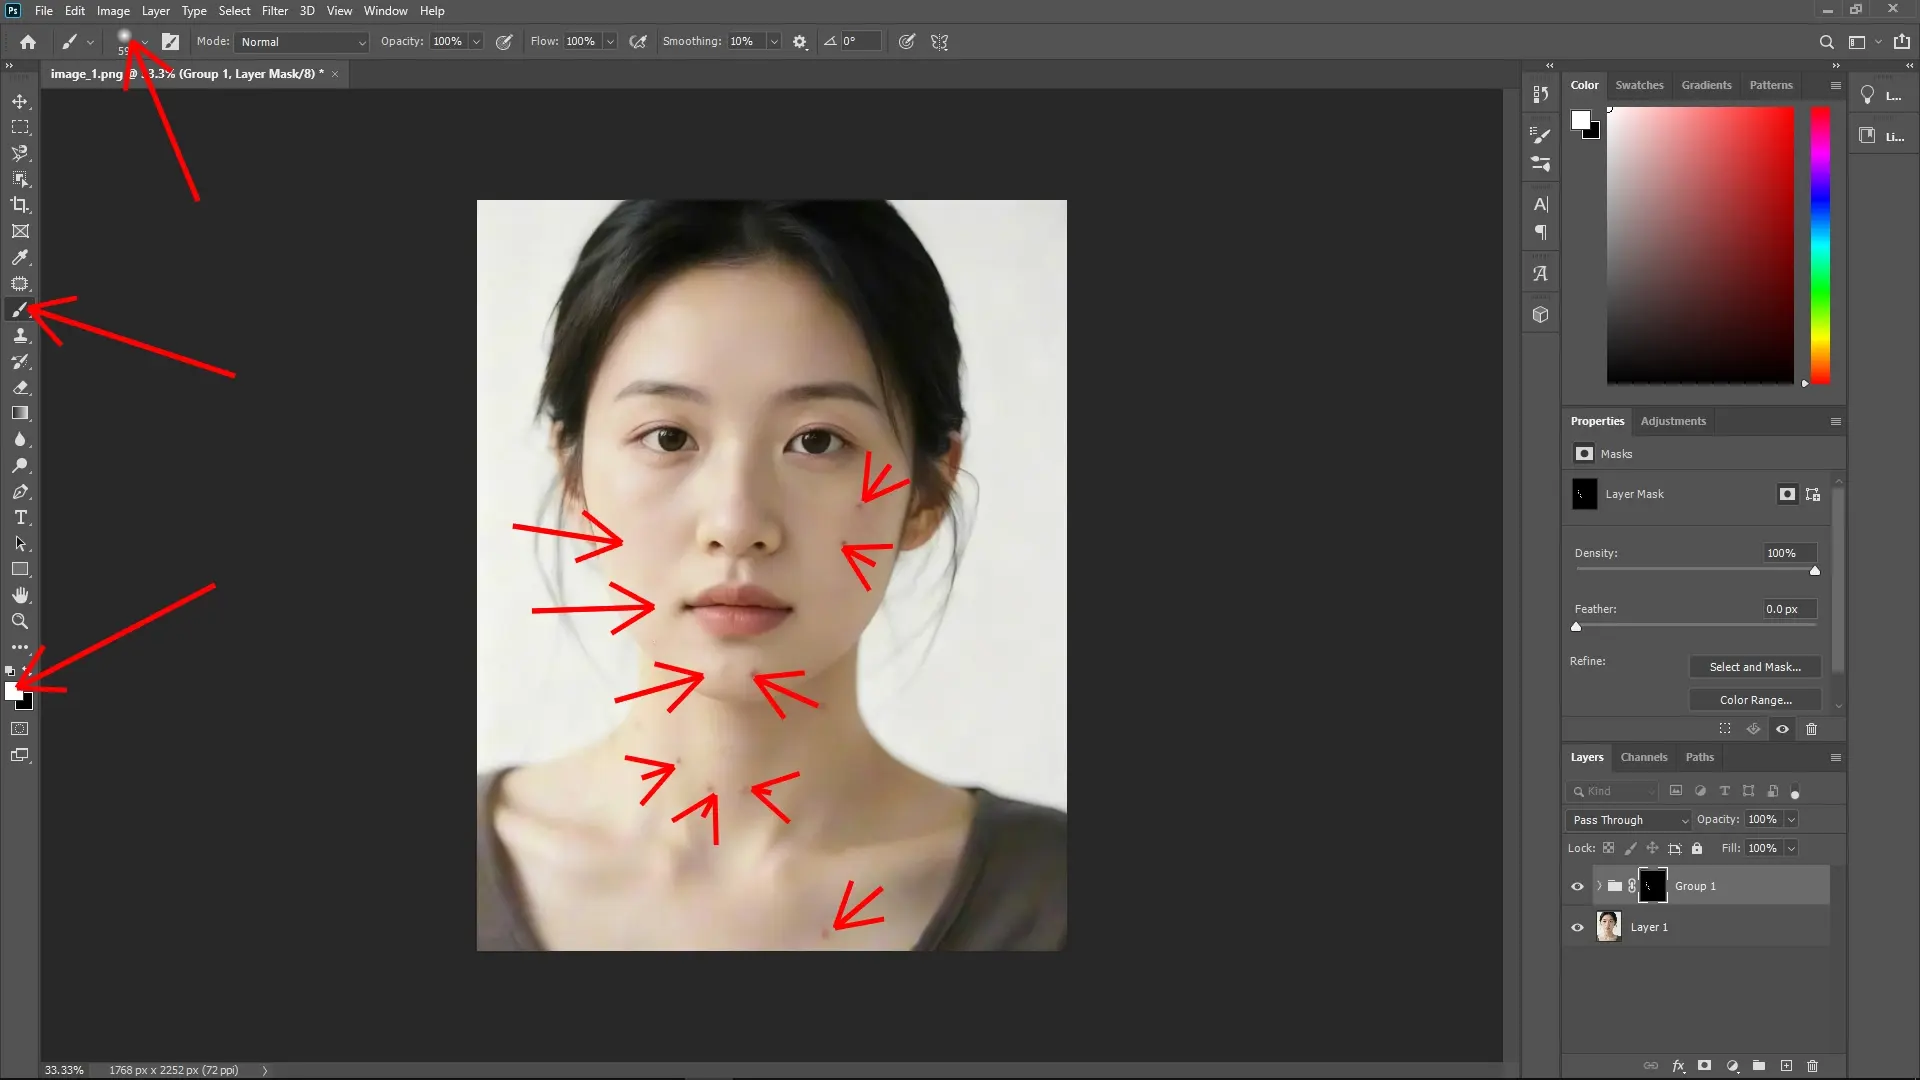
Use a soft round brush with a low opacity and gently paint over the acne spots where you want to reveal the effect. Adjust the brush size as needed to target specific areas.

Fine-tune as necessary
If the adjustments feel too strong, lower the Opacity of the group or refine the layer mask.
You can click back to the layers and tweak the Dust & Scratches or High Pass settings to better fit your image.
Why this method works
This technique separates the skin into two parts:
Blur layer: Handles the color and tones, removing imperfections like acne.
Texture layer: Preserves the skin's fine details and structure. This ensures your edits look natural and don't overly flatten or blur the image.
By using a group with a mask, you're ensuring you can apply the effect selectively and fine-tune it to match the needs of the image.
Write Reply